Thanksgiving decorating has a joyful but short window. The table is set for one afternoon, the porch gets looked at for maybe three weeks, and then everything comes down for December. That means we should go for crafts that are quick and made from things already in the yard or the grocery cart. These 30 easy Thanksgiving craft ideas are mostly that: pumpkins, leaves, pinecones, kraft paper, and candles, put together so they look like you meant it.
Some are practical, like place cards, napkin rings, and a table runner you can write on. Some are just pretty. None of them need tools you don’t already have, though a few go faster with a hot glue gun. If you want more to choose from, our older round-up of DIY Thanksgiving decoration ideas covers bigger projects, and the fallen leaves art post is a good place to look if the leaf crafts here get you going.
What you’ll need
Most of these use some combination of the following. Buy the craft-store items once and they cover the whole list.
- Mini pumpkins, small gourds, apples, and pears
- Fallen leaves, pinecones, and acorns, picked up on a dry day
- Kraft paper, brown cardstock, and a few sheets of fall-colored construction paper
- Jute twine, baker’s twine, and a roll of ribbon
- Tea lights, taper candles, and a few clear jars
- Mod Podge, a glue stick, and a hot glue gun
- White and gold paint pens, a black marker, and basic acrylic craft paint
Beginner tip: Start pressing leaves now. Half the leaf projects below want flat, dry leaves, and that takes about a week between the pages of a heavy book. Pick leaves that are still a little bendy; the crisp ones crack when you work with them.
Centerpieces
A centerpiece should be low enough to talk over and sturdy enough to survive someone reaching across for the gravy. Everything here passes both tests.
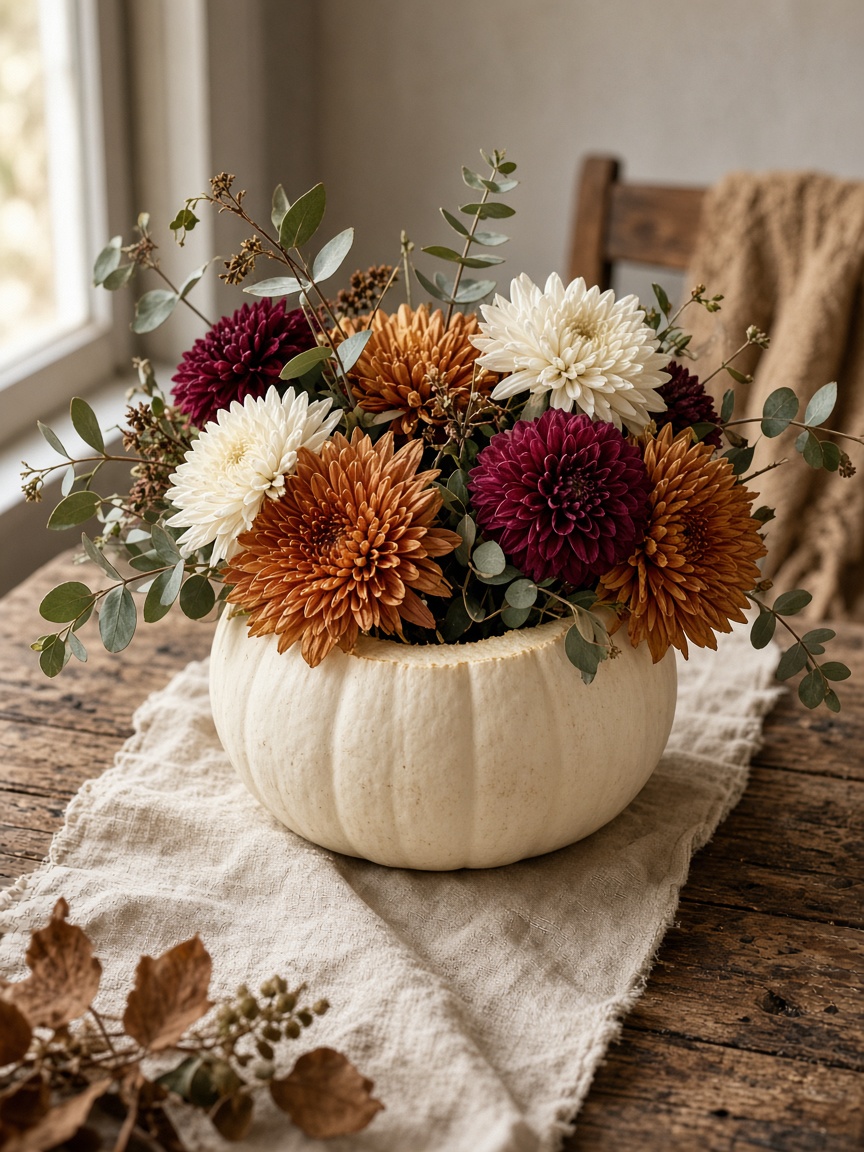
1. Pumpkin flower vase
Cut the top off a medium pumpkin, scoop it out, and set a jar or a drinking glass inside. Fill the jar with water and whatever the grocery store has that week: mums, dahlias, a few stems of eucalyptus. A white pumpkin reads more formal; orange is friendlier. It lasts about a week if the room isn’t too warm.
2. Wheat bundle in a jar
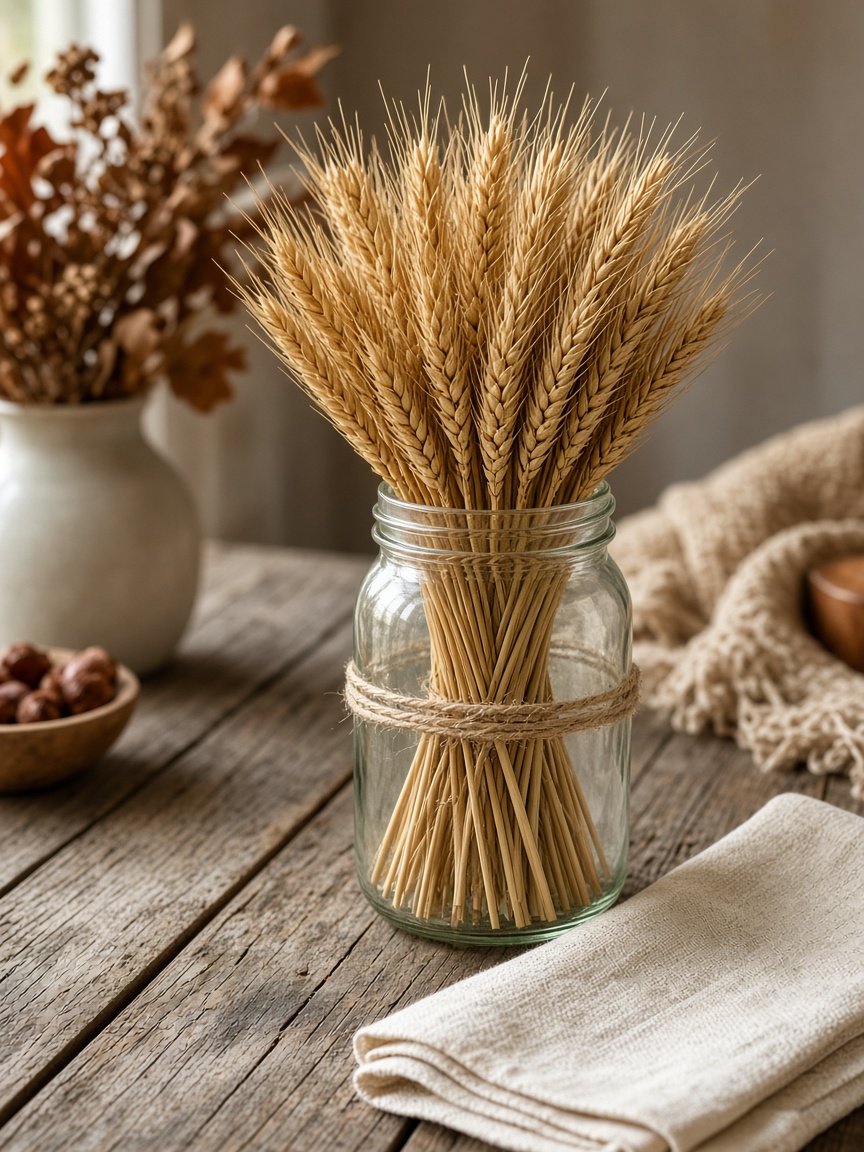
Dried wheat comes bundled from the craft store for a few dollars. Trim the stems so the heads sit a hand’s width above the rim of a wide-mouth jar, then tie the bundle with twine before you drop it in so it stands up straight. That is the whole project. It doesn’t wilt, so make it the week before and get it off your list.
3. Candle and mini pumpkin runner
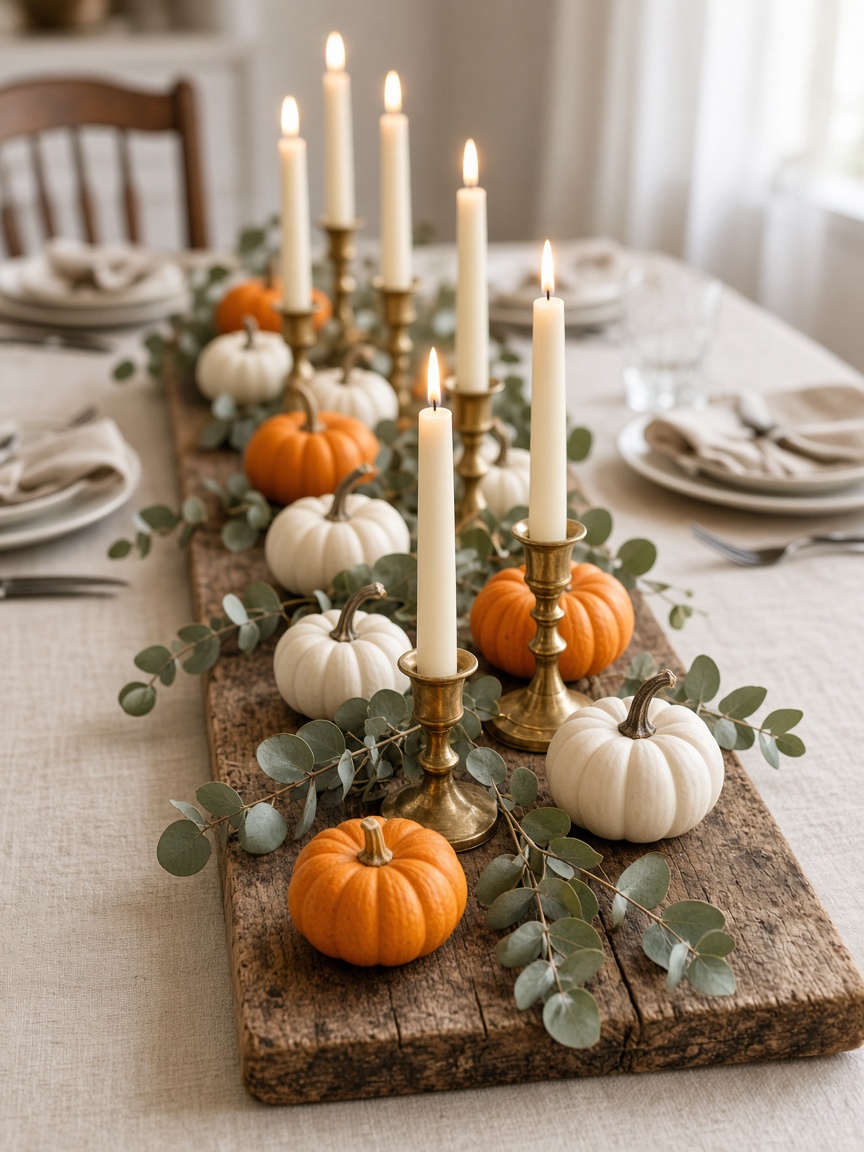
Lay a plank of scrap wood or a long cutting board down the center of the table. Alternate mini pumpkins with taper candles in brass or glass holders, and tuck sprigs of greenery into the gaps. Keep the candles short enough that people can see each other over them. Our candle centerpieces post has more arrangements if you want to vary it.
4. Dough bowl centerpiece
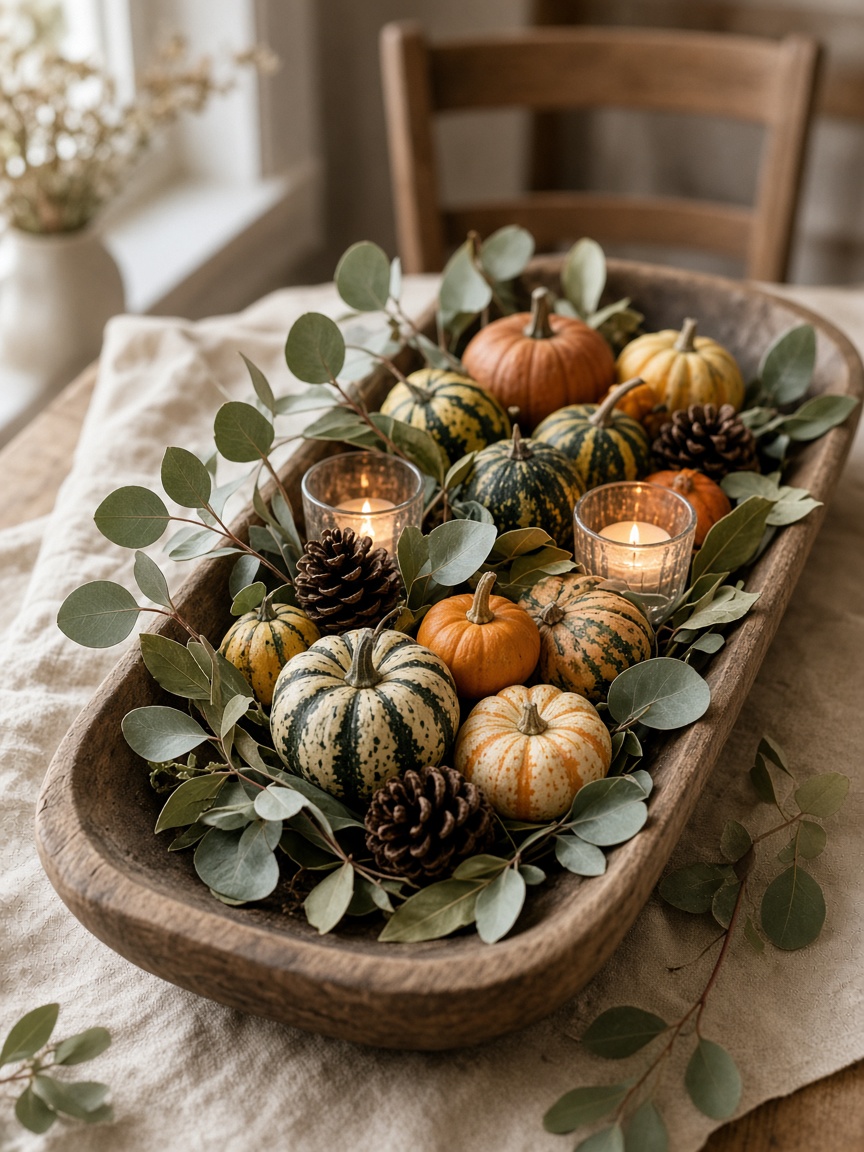
A wooden dough bowl, or any long shallow bowl, filled with small gourds, pinecones, and a handful of eucalyptus or bay leaves. Put the biggest things in first and fill around them. If it looks sparse, add two or three votives in glass. If it looks crowded, take out two gourds. It usually looks crowded.
5. Cranberry floating candle bowl
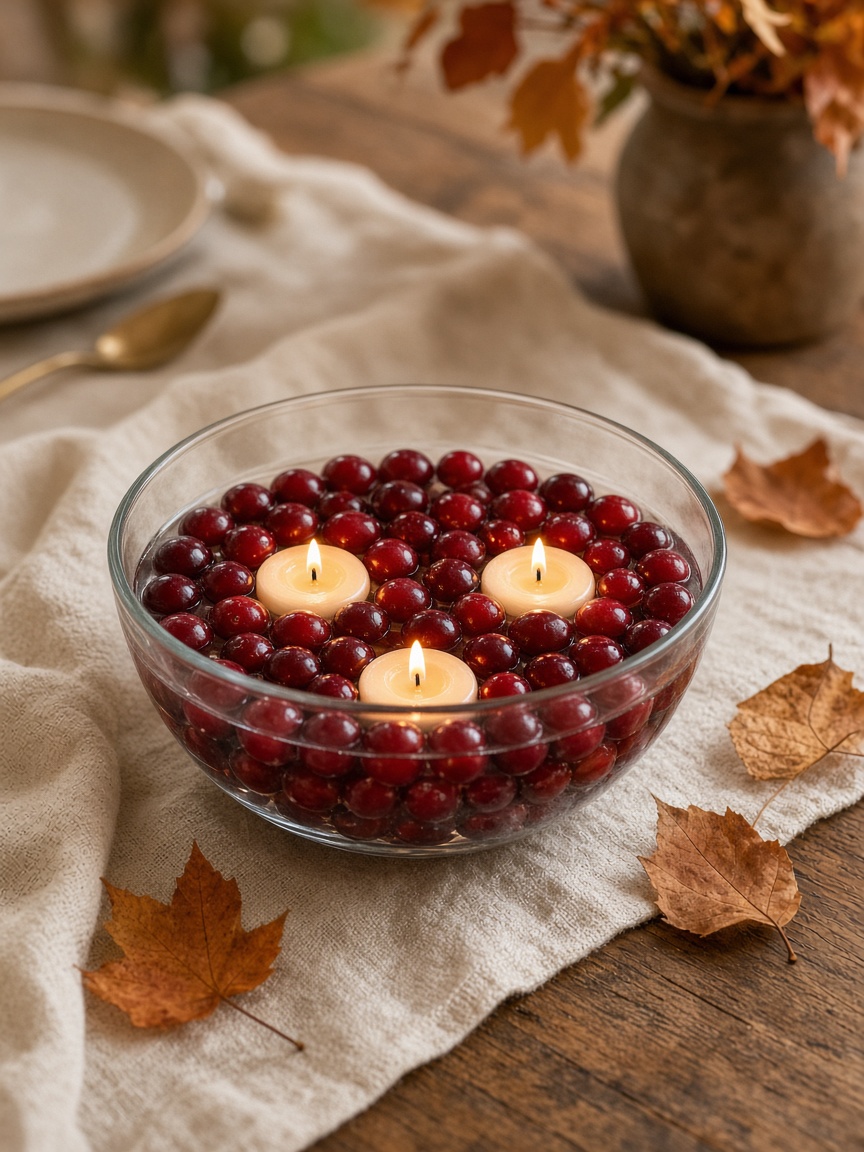
Fill a clear glass bowl two-thirds with water, pour in a bag of fresh cranberries, and float two or three tea lights on top. The cranberries float, so they fill the surface on their own. This is the fastest centerpiece on the list and it photographs well. Light the candles right before everyone sits down.
6. Apple tea light holders
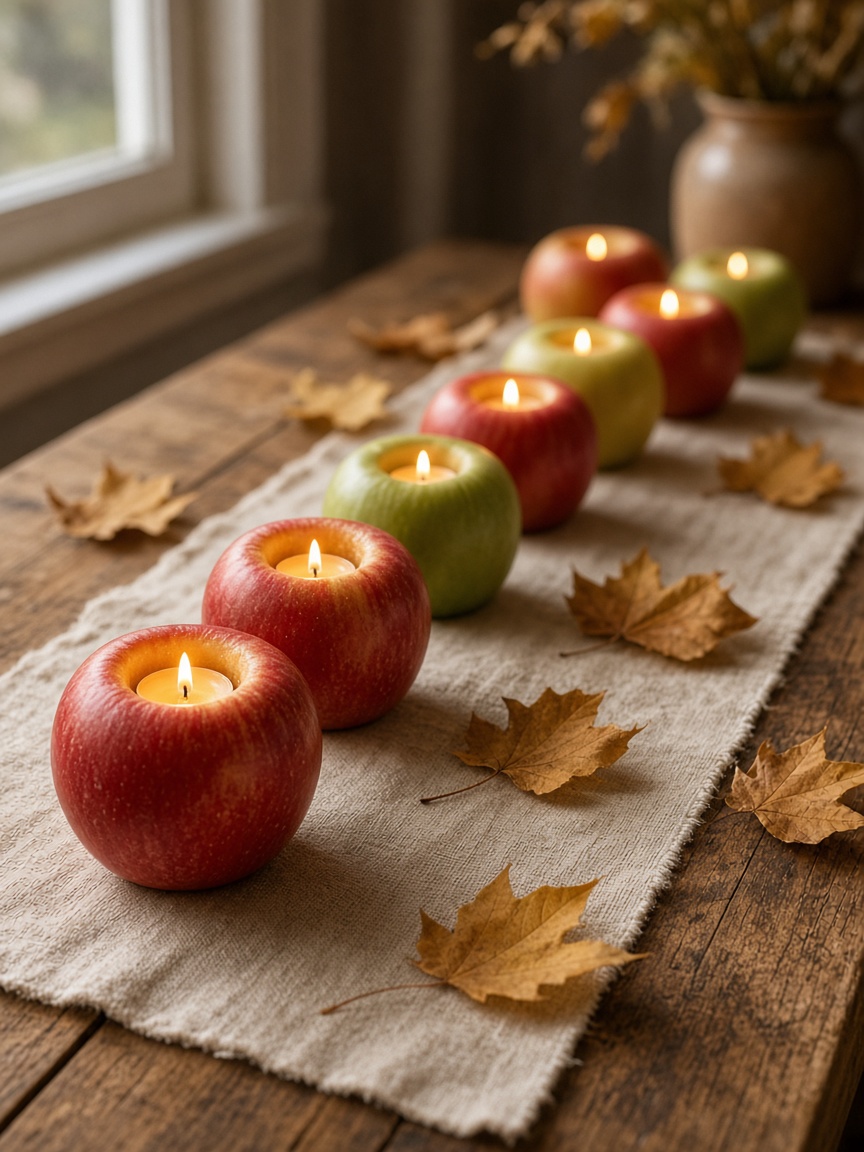
Core a firm apple about an inch deep with a paring knife or a melon baller and press a tea light into the hole. Rub the cut edge with lemon juice so it doesn’t brown before dinner. Line a few down the table or set one at each place. A mix of red and green apples looks better than all one color.
Place cards and the table
Place cards sound fussy until you’ve hosted twelve people who all hover by the kitchen door waiting to be told where to sit. These take minutes and settle the question.
7. Pressed leaf place cards
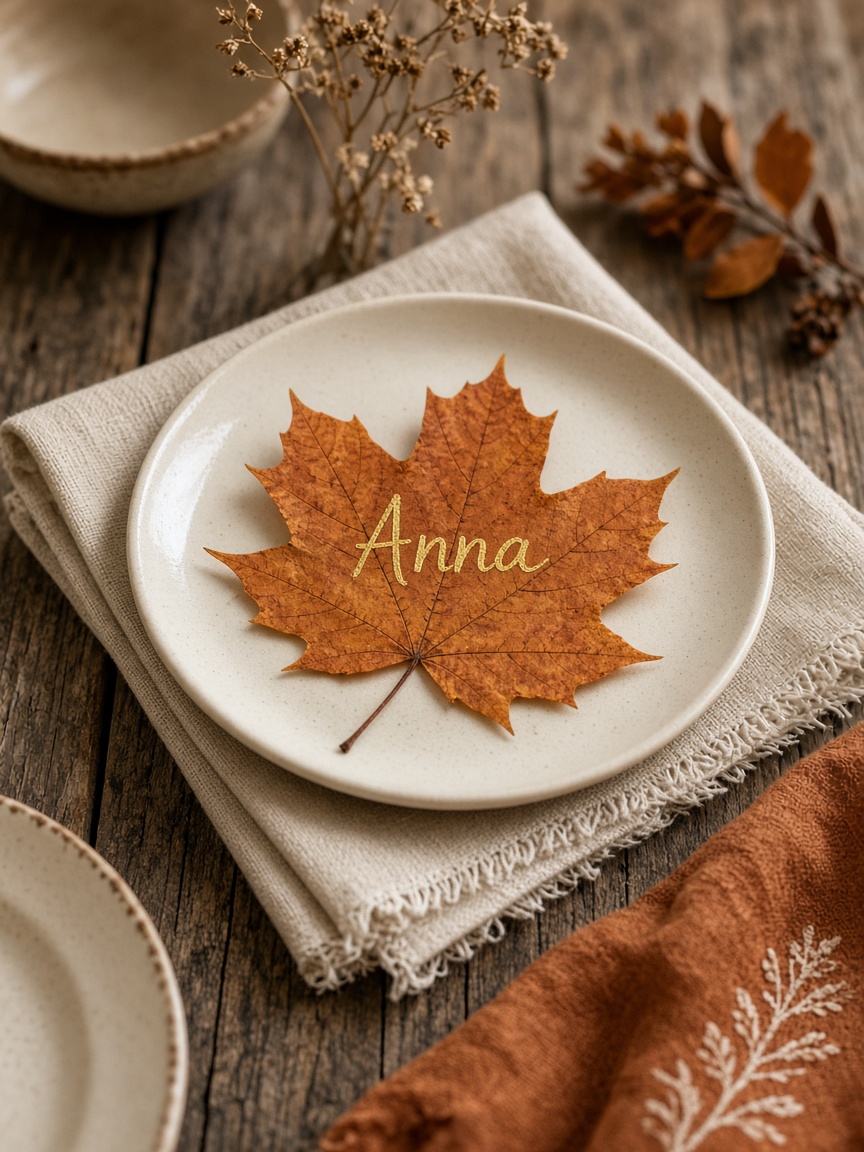
Press leaves flat for a few days, then write each guest’s name right on the leaf with a white or gold paint pen. Lay it on the plate or lean it against the glass. Maple and oak leaves have the most room to write on. Test the pen on a spare leaf first; some leaves are waxy and the ink beads up.
8. Mini pumpkin name tags
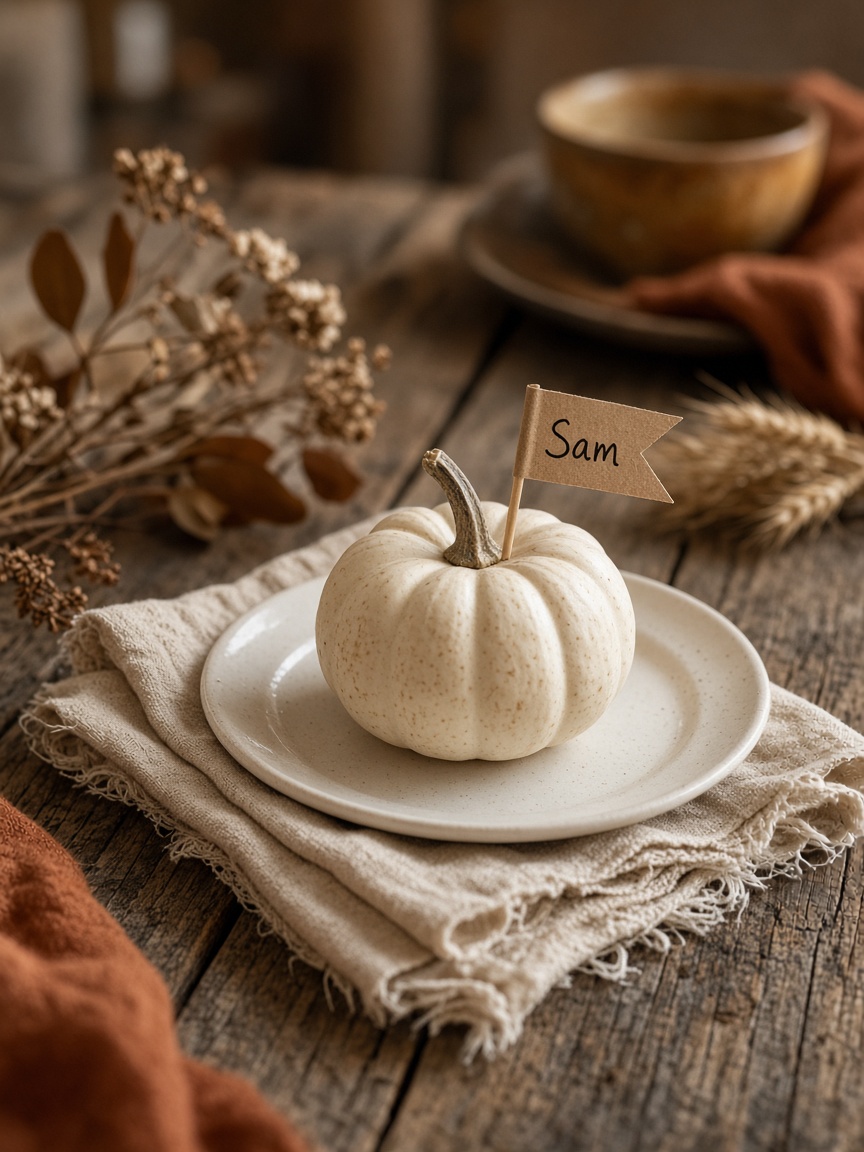
Cut small flags from cardstock, write a name on each, and tape them to a toothpick pushed in beside the pumpkin stem. A mini pumpkin at every setting doubles as something for guests to take home. White pumpkins with black ink look clean; orange pumpkins with a kraft tag look like a farm stand.
9. Pear place cards
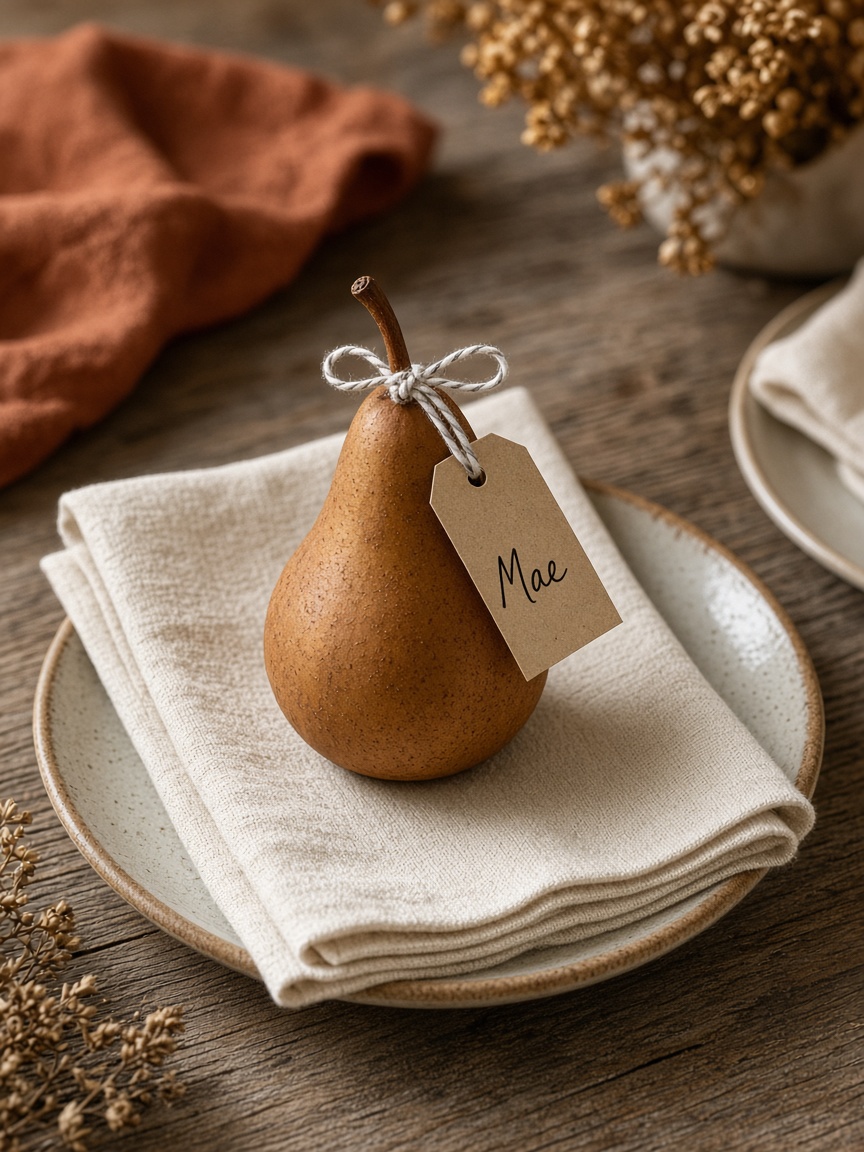
Tie a small kraft tag to the stem of a pear with baker’s twine or thin ribbon. Write the name in a pen that won’t smear and set the pear on the folded napkin. Bosc pears are the right color and sit flat without rolling. Guests can eat them, which is the point.
10. Pinecone flower place settings
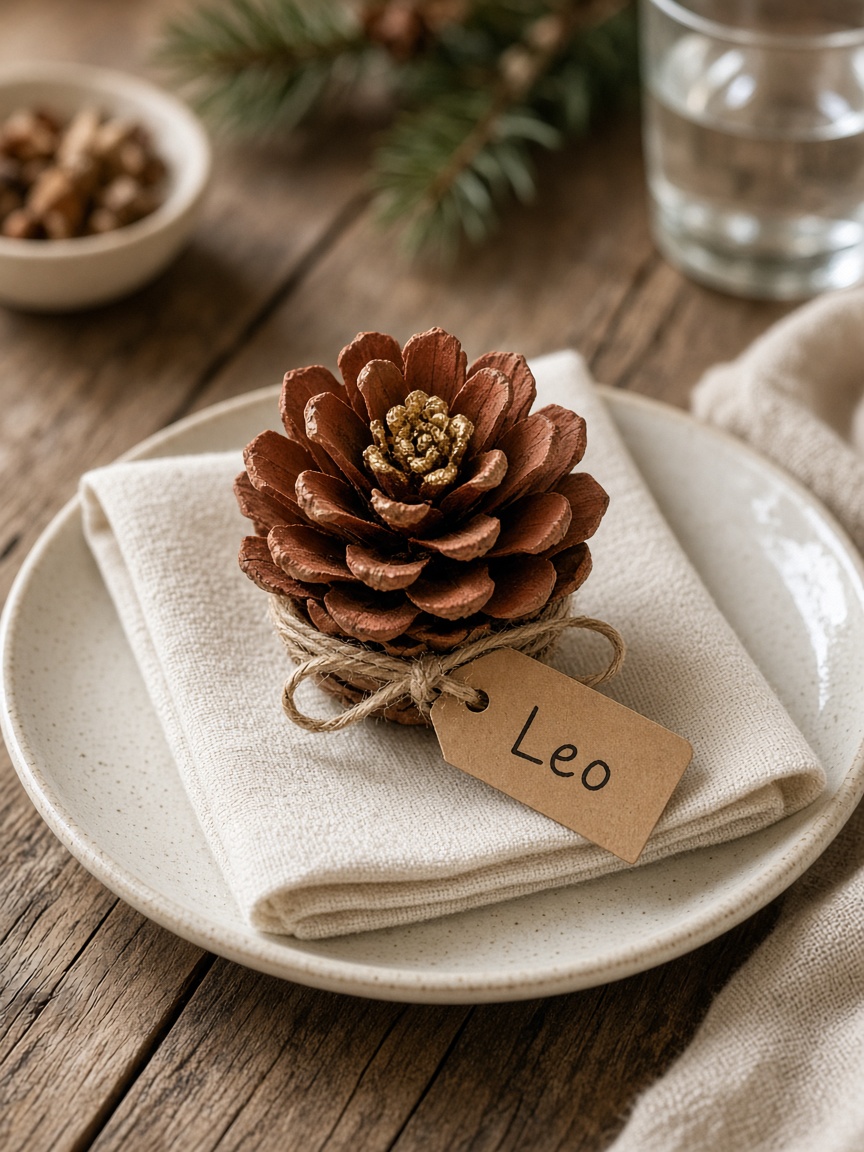
Cut a pinecone in half crosswise with pruning shears and look at the cut face. The scales fan out from the center like a zinnia. Paint the “petals” rust, cream, or dusty pink with craft paint, dab the middle gold, and let it dry sitting on its flat side. Wrap jute twine a few times around the base, tie it off, and knot a small kraft name tag into the bow so the tag hangs from the flower. Set one on each folded napkin. Long, loose pinecones cut cleanly; the tight round ones fight the shears. Leave a few unpainted so the brown shows what they started as, and drop the leftover tops into the dough bowl from idea 4.
11. Acorn napkin rings
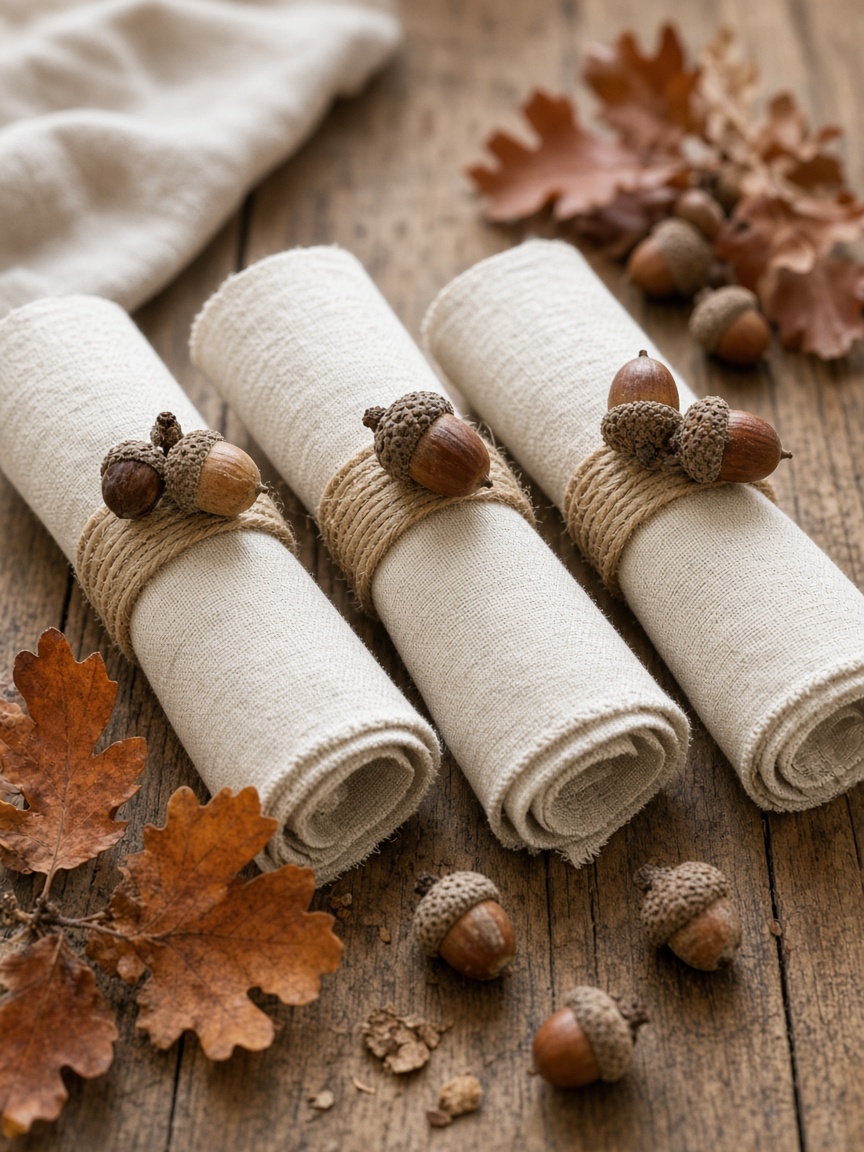
Cut a cardboard tube into inch-wide rings and wrap each tightly in jute twine, gluing the start and the end. Hot-glue one or two acorns on top. No acorns? A small pinecone or a short piece of cinnamon stick does the same job. Slide a rolled napkin through and set it on the plate. For the napkin itself, we have a whole post of napkin folding ideas.
12. Kraft paper table runner
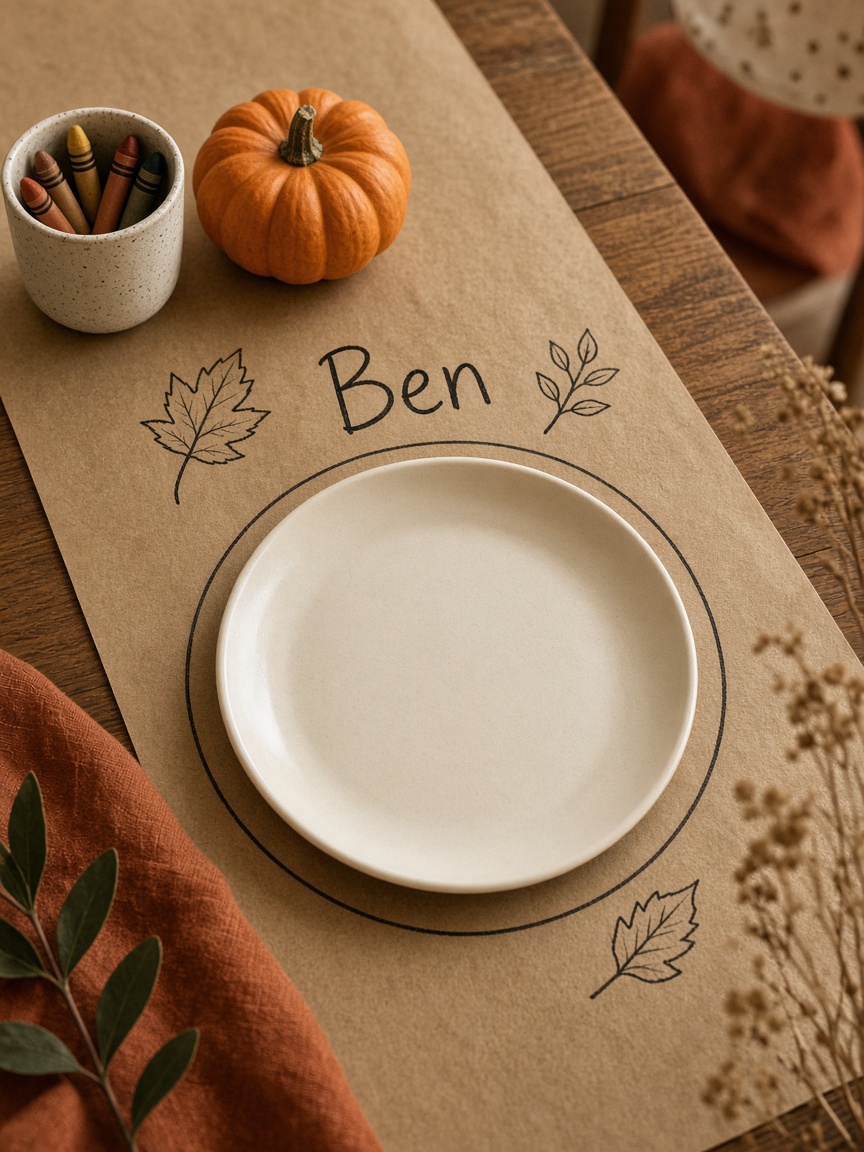
Unroll kraft paper down the length of the table and trim it an inch past each end. Write guests’ names at their places with a marker, draw a circle where the plate goes, or letter the menu down the middle. Put out a cup of crayons and let kids draw on it between courses. Afterwards the whole thing rolls up and goes in the recycling, crumbs and all.
13. Twine and rosemary cutlery bundles
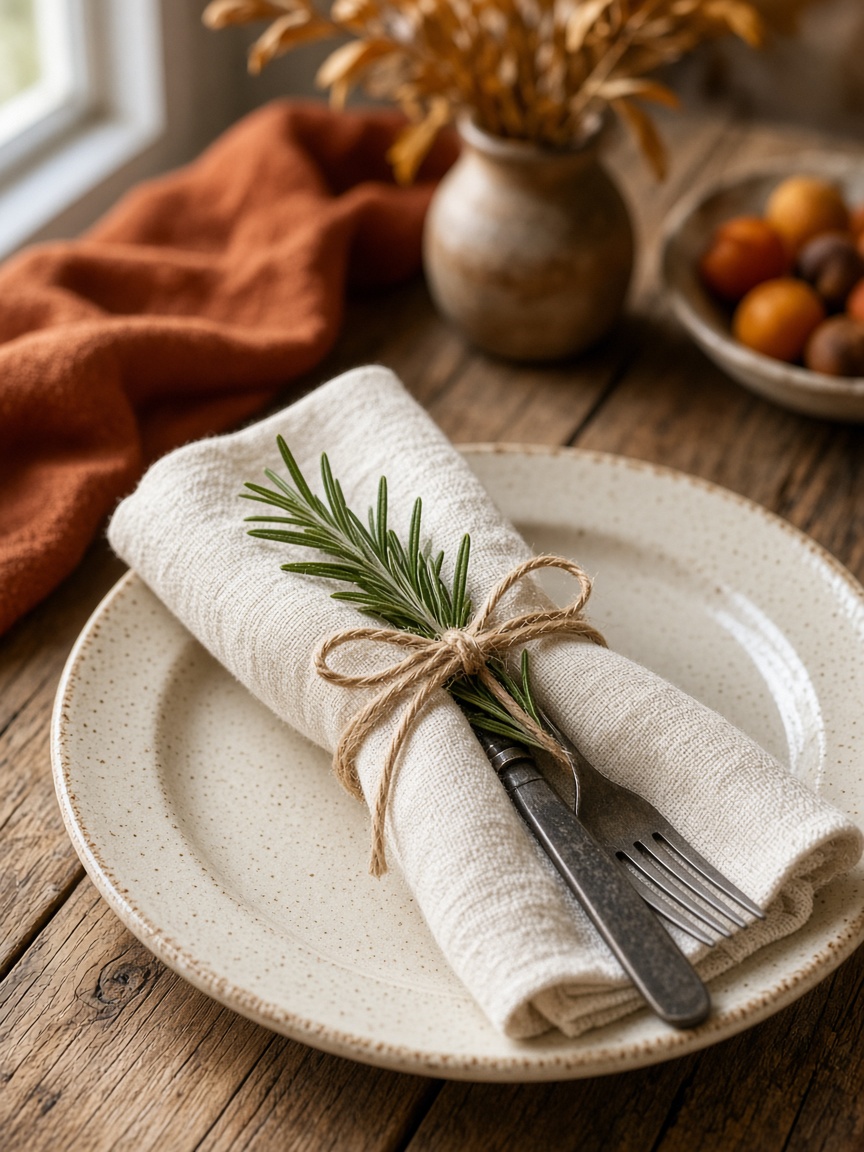
Roll a fork and knife in a cloth napkin, tie it with twine, and tuck a sprig of fresh rosemary under the knot. It smells good when people untie it. This takes about thirty seconds per place, which makes it the right job to hand to whoever is standing in the kitchen asking how they can help.
Turkeys
Every Thanksgiving needs at least one turkey that isn’t dinner. These are the ones kids can make at the counter while the real one is in the oven.
14. Handprint turkey cards
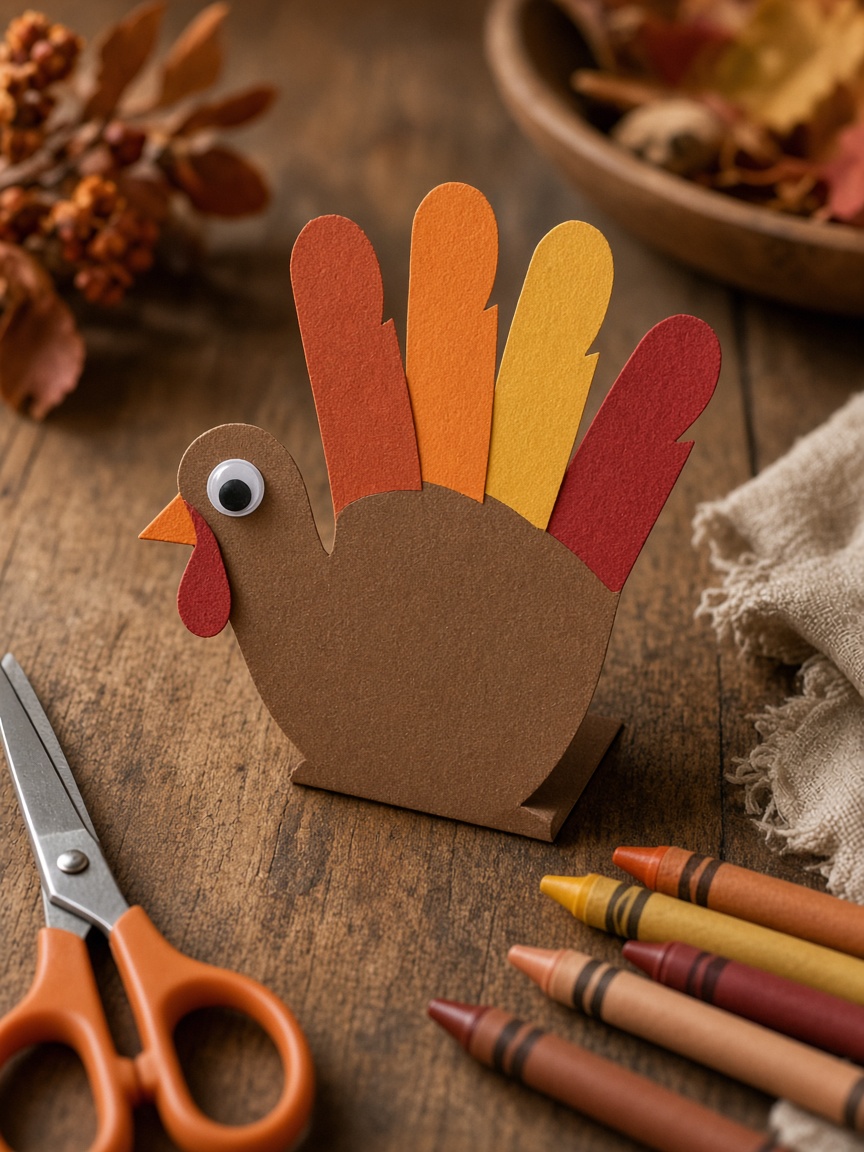
Trace a hand on brown cardstock, cut it out, and turn it so the thumb is the head and the fingers are the tail. Add an orange beak, a red wattle, and a dot for the eye. Fold a tab at the bottom and it stands up as a place card. Keep one from each kid every year; the stack turns into a record of how much they’ve grown.
15. Paper plate turkey
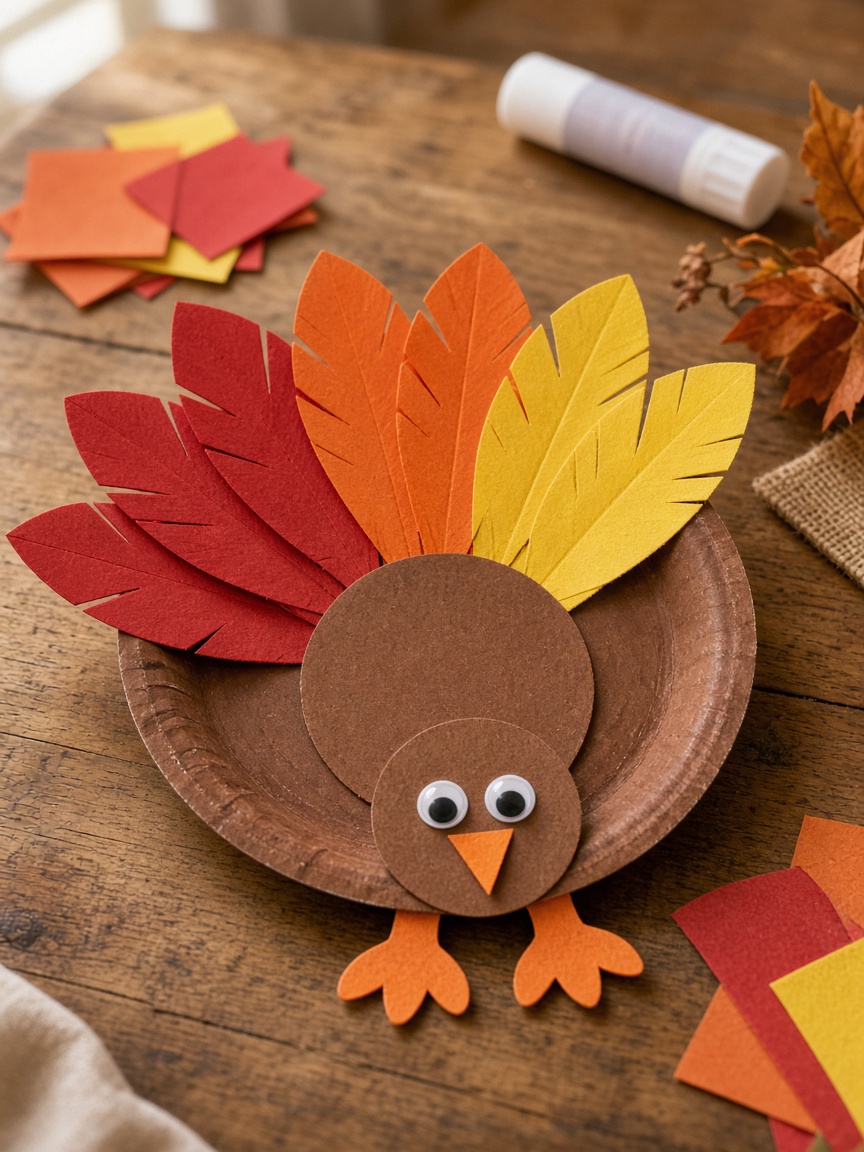
Paint or color a paper plate brown for the body. Cut feathers from red, orange, and yellow construction paper and glue them fanned out behind the top edge. Add a circle for the head, a triangle beak, and two feet. This is the classroom standard for a reason, and a row of them taped in a window looks better than you’d expect.
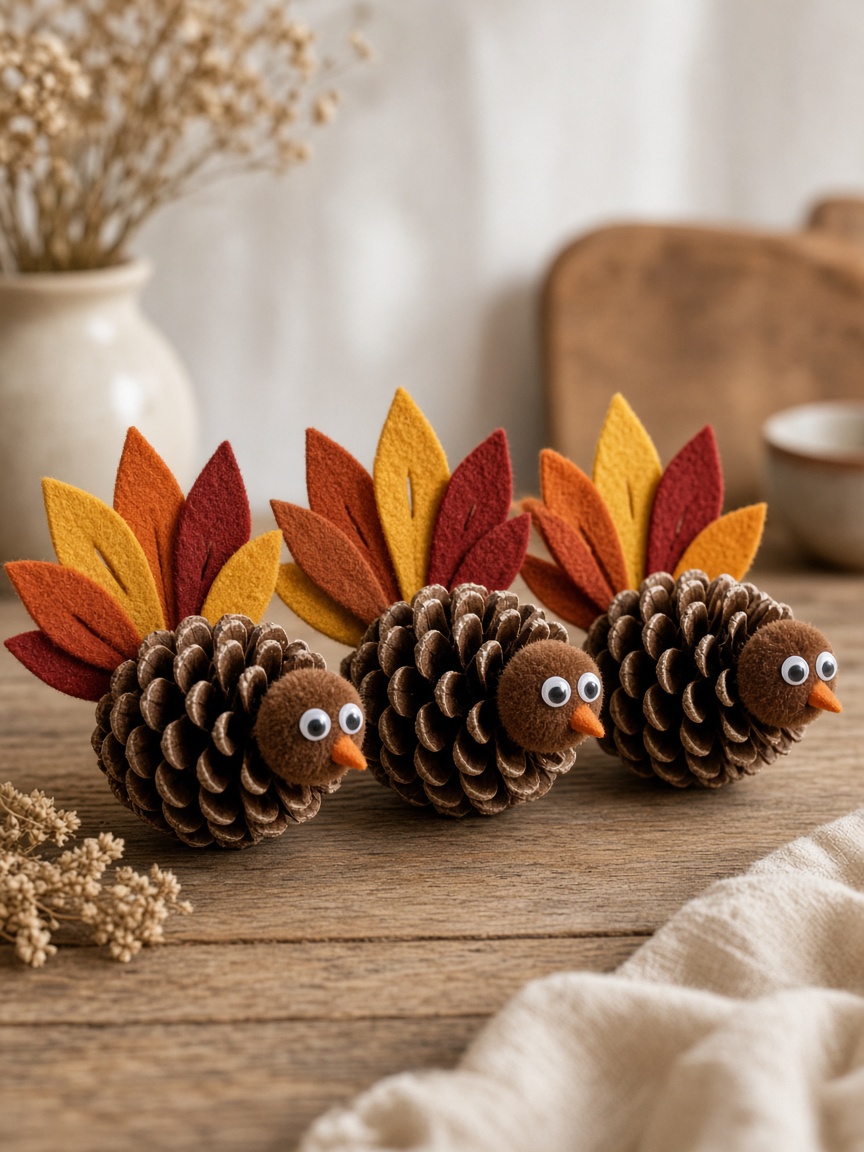
16. Pinecone turkey
Lay a pinecone on its side so the wide end is the tail. Cut feathers from felt or paper, glue them into the scales at the wide end, and glue a pom-pom or a felt circle at the narrow end for the head. Add a beak and eyes. A row of these down the middle of the table is a centerpiece in itself, and the kids who made them will point that out.
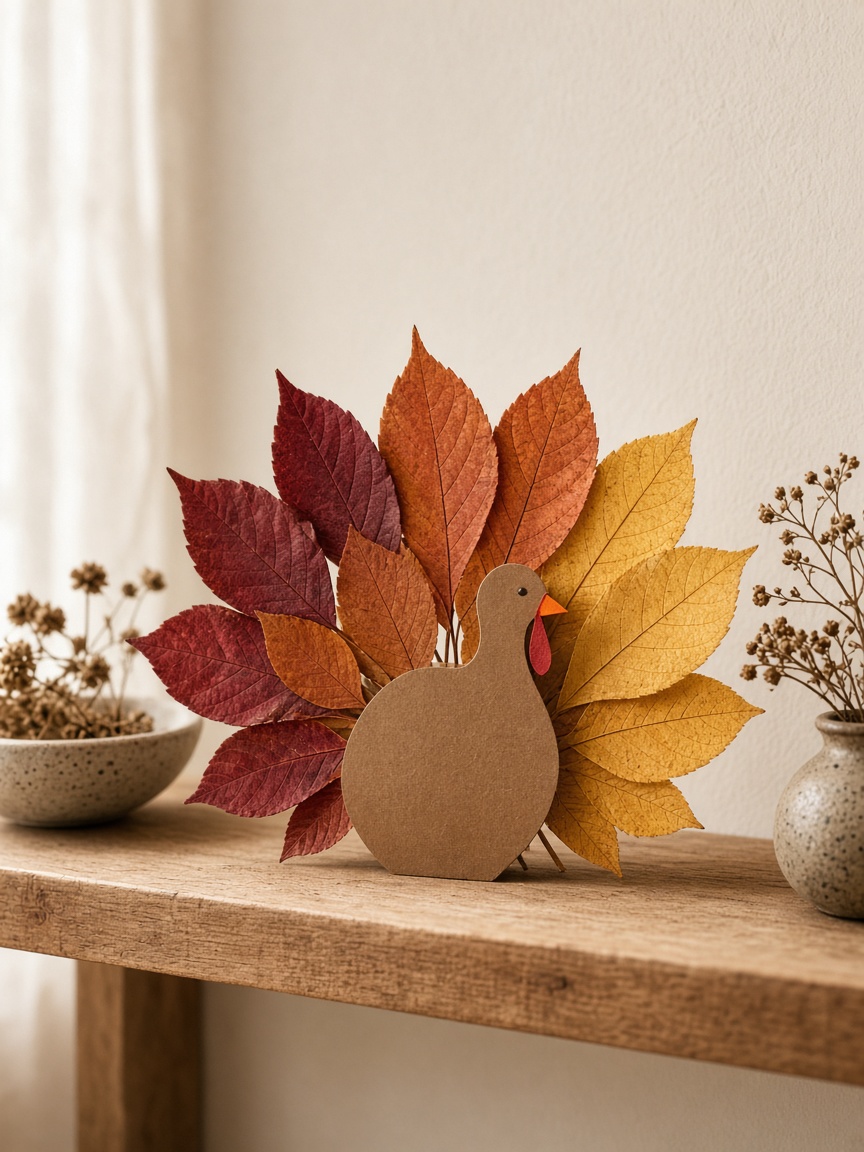
17. Leaf-feather turkey
Cut a turkey body from brown cardstock and glue real fallen leaves behind it as the tail. Use leaves of different colors and sizes, biggest in the back. Pressed leaves hold up; fresh ones curl by the next morning, which is fine if it only needs to last through dinner. Good on the front of a card or propped on a shelf.
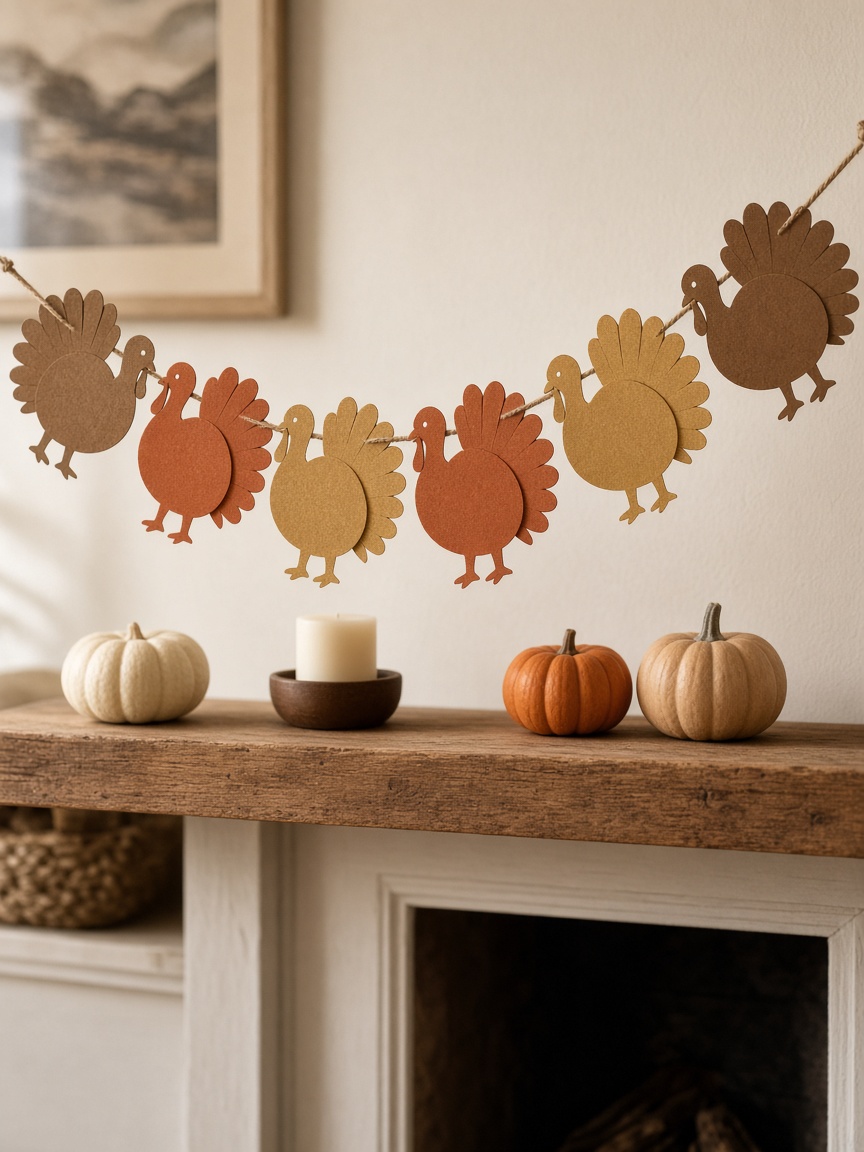
18. Turkey cutout garland
Draw one turkey silhouette, cut it out, and use it to trace a dozen more on kraft paper or fall-colored cardstock. Punch a hole in each, string them on twine, and hang the line across a mantel or a doorway. Keep the shape simple. A round body with a fanned tail reads as a turkey from across the room; a detailed one reads as a blob.
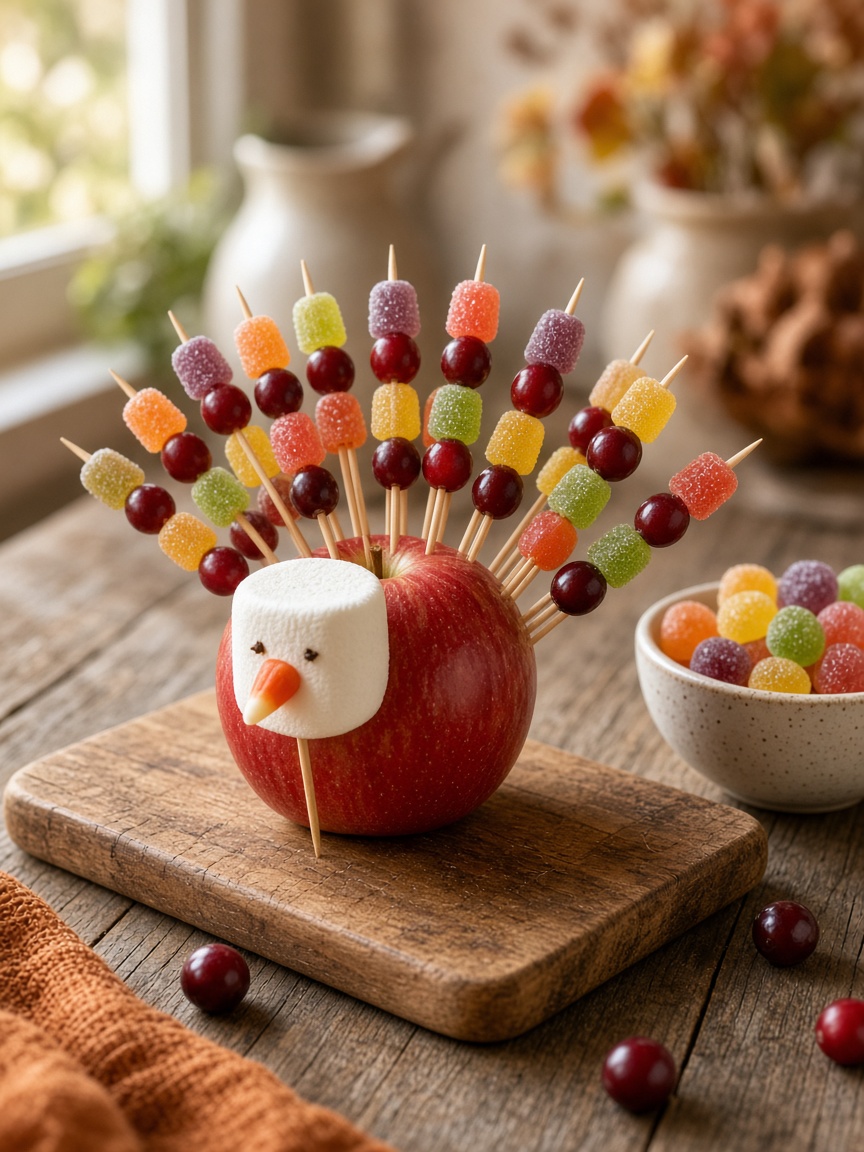
19. Apple and gumdrop turkey
Push toothpicks into the back of an apple in a fan and thread gumdrops, cranberries, or mini marshmallows onto each one for feathers. One more toothpick at the front with a large marshmallow is the head. Kids can make these at the table while the adults finish in the kitchen, and then eat them before anyone notices.
Things to do with fallen leaves
The yard is full of free material for about three weeks. Pick leaves on a dry afternoon, and if you can’t use them right away, press them so they don’t curl.
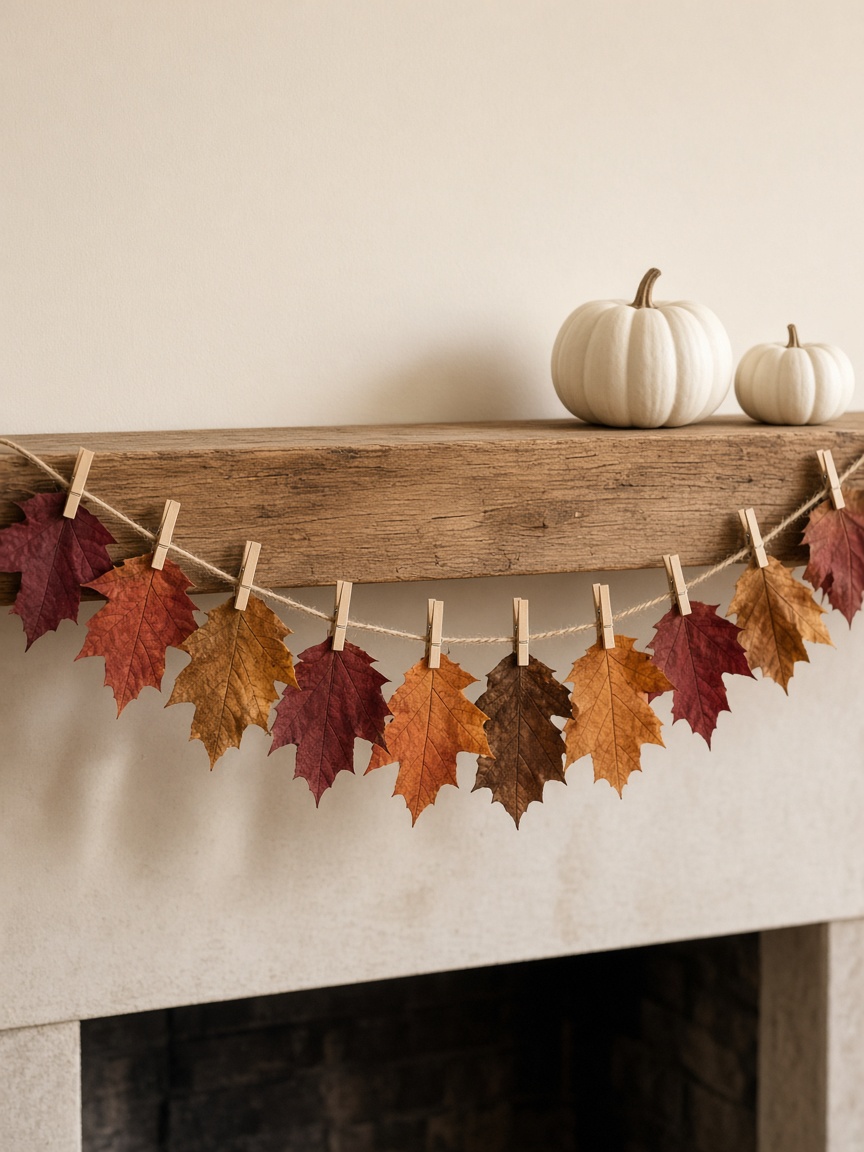
20. Pressed leaf garland
Press a couple dozen leaves flat for a few days. Run twine along a mantel or over a doorway and clip the leaves on with mini clothespins, or stitch through each stem with a needle and thread. Mix the colors and sizes along the line. Pressed leaves keep their color much longer than fresh ones hung straight from the yard.
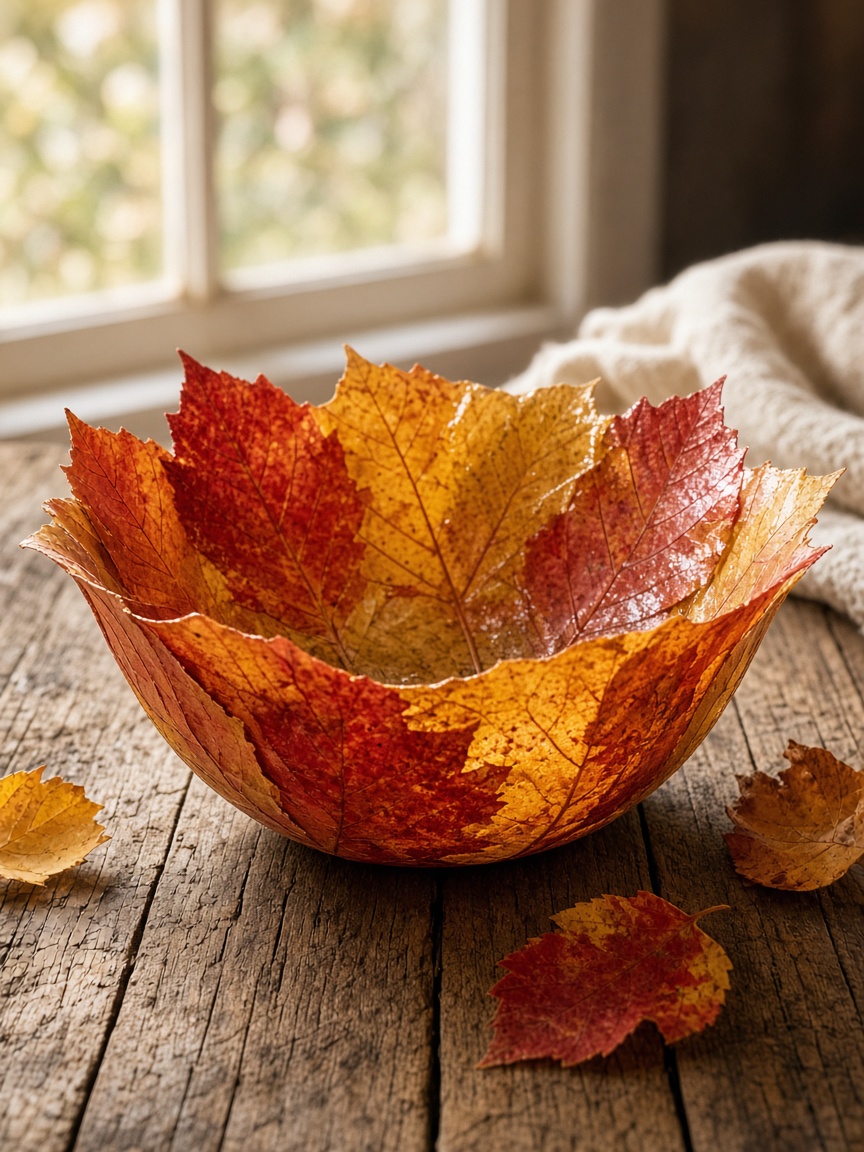
21. Mod Podge leaf bowl
Blow up a balloon, rest it in a bowl so it stays put, and brush Mod Podge over the top half. Press pressed leaves onto the glue, overlapping them, and brush more Mod Podge over the top. Add a second layer once the first is dry, let it cure overnight, then pop the balloon. It’s a decorative bowl, not a snack bowl, and it takes a full day. Start it the weekend before.
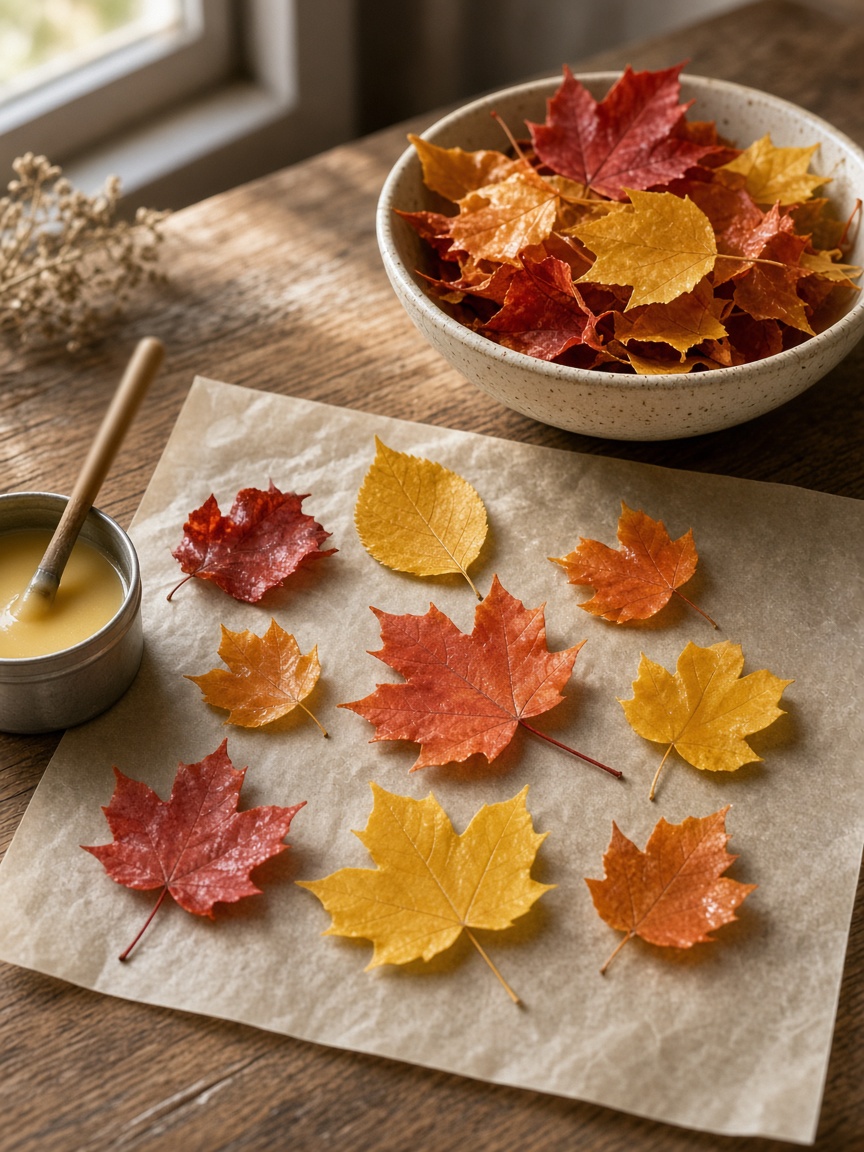
22. Waxed leaves
Melt beeswax or old candle stubs in a tin can set in a pan of simmering water. Hold each leaf by the stem, dip it, let the excess drip off, and lay it on parchment to set. The wax locks in the color and stops the leaf from curling. Scatter them down the table or pile them in a bowl, and they’ll still look good at Christmas.
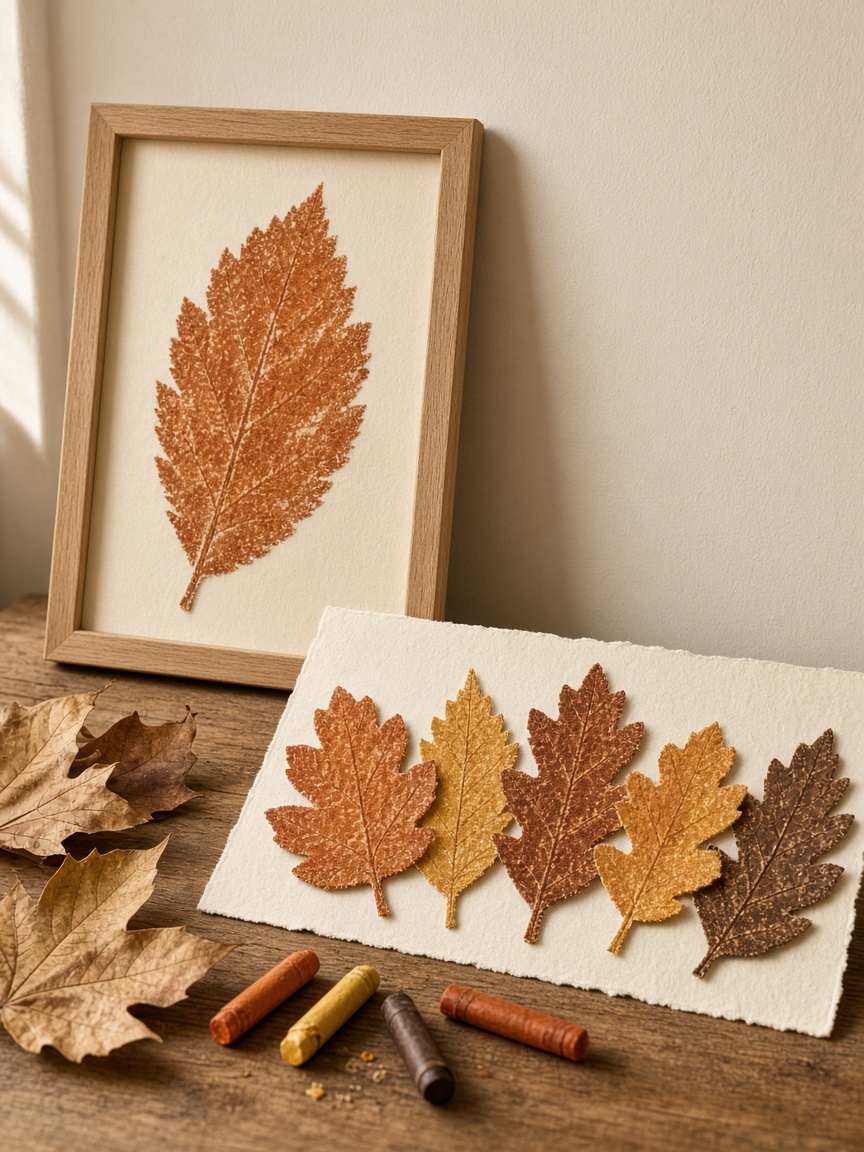
23. Leaf rubbing art
Put a leaf vein-side up under a sheet of plain paper and rub the side of a peeled crayon over it. The veins and the edge come through in a few strokes. Make several in different fall colors, cut them out, and frame a set or tape them in a row along a wall. Ten minutes, and you end up with something worth keeping. If you want to go further with leaves as a medium, see our leaf painting and leaf cutting art posts.
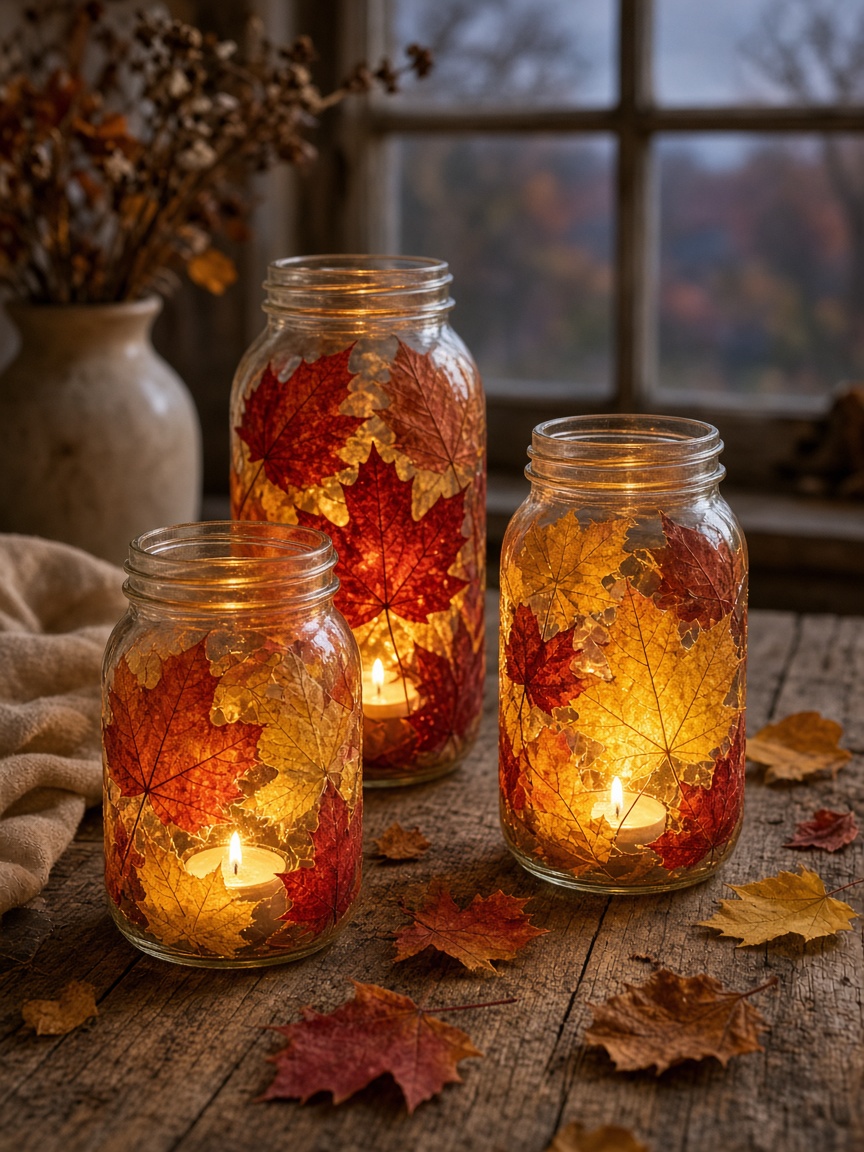
24. Leaf-wrapped candle jars
Brush Mod Podge onto the outside of a clean jar and press pressed leaves onto it, smoothing the edges flat. Seal with another coat and let it dry. Drop a tea light inside and the leaves glow from behind. Real leaves give a soft, uneven light; leaf shapes cut from tissue paper work if the yard is bare. More jar ideas are in our mason jar decoration post.
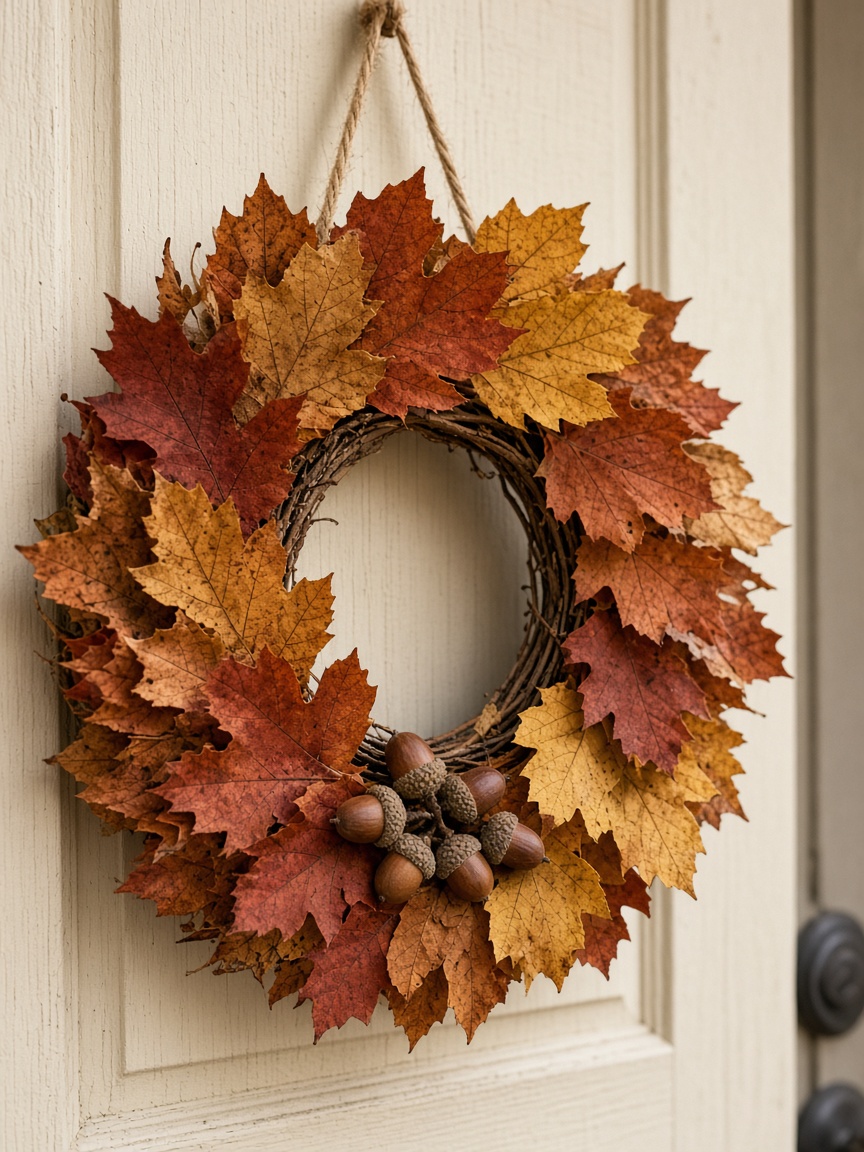
25. Fallen leaf wreath
Hot-glue leaves onto a grapevine or cardboard wreath form, overlapping them in one direction like roof shingles. Pressed or waxed leaves last; fresh ones curl within a week but still look fine on a door through the long weekend. Finish with a twine loop and a few acorns glued at the bottom. Our wreath tutorials post covers the forms and the hanging.
Mantel and front door
These are the pieces that stay up the whole month. Make them first, since they are the ones guests see before they get to the table.
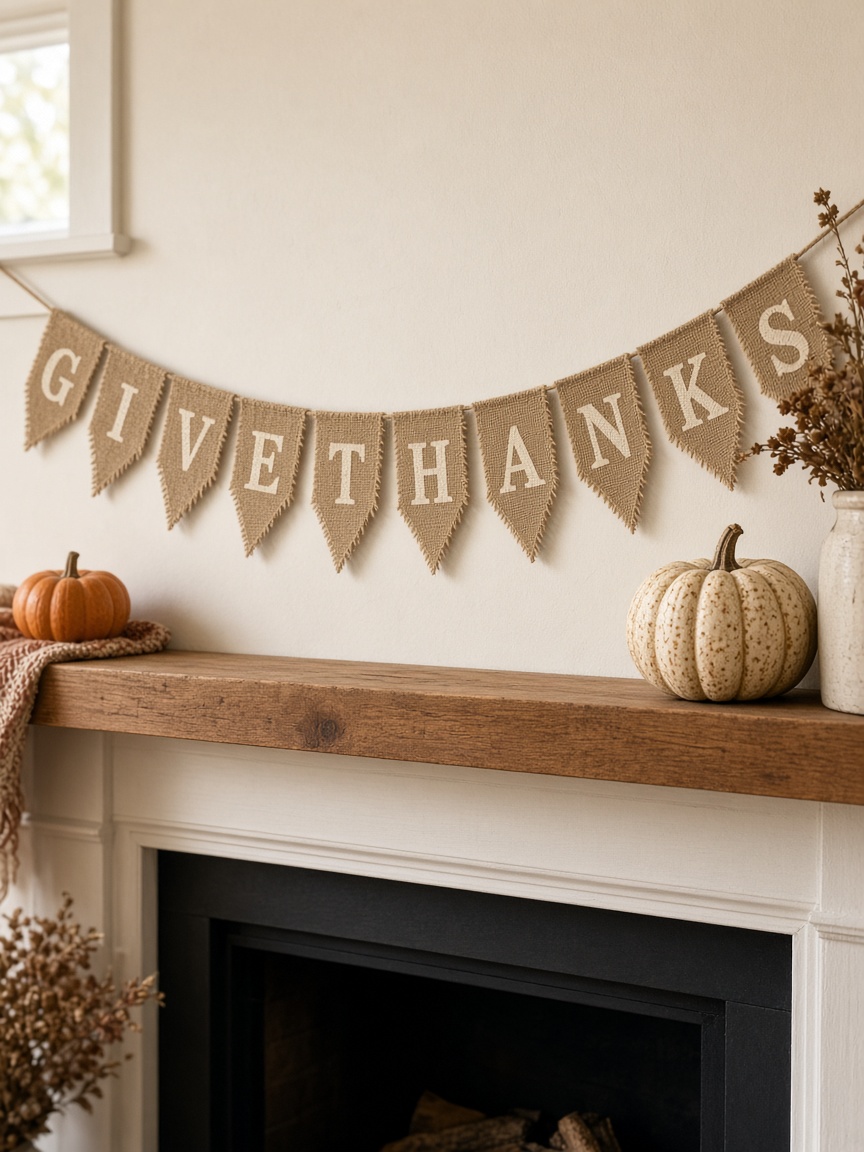
26. Burlap “Give Thanks” banner
Cut burlap into triangles, stencil one letter per flag with acrylic paint, and let it dry. Fold the top edge over a length of twine and glue or stitch it down. Hang it over the mantel or across the doorway into the dining room. Burlap frays, which is part of the look, but a thin line of glue along the cut edges keeps it from unraveling entirely. Our printable stencil patterns include letters if you’d rather not freehand them.
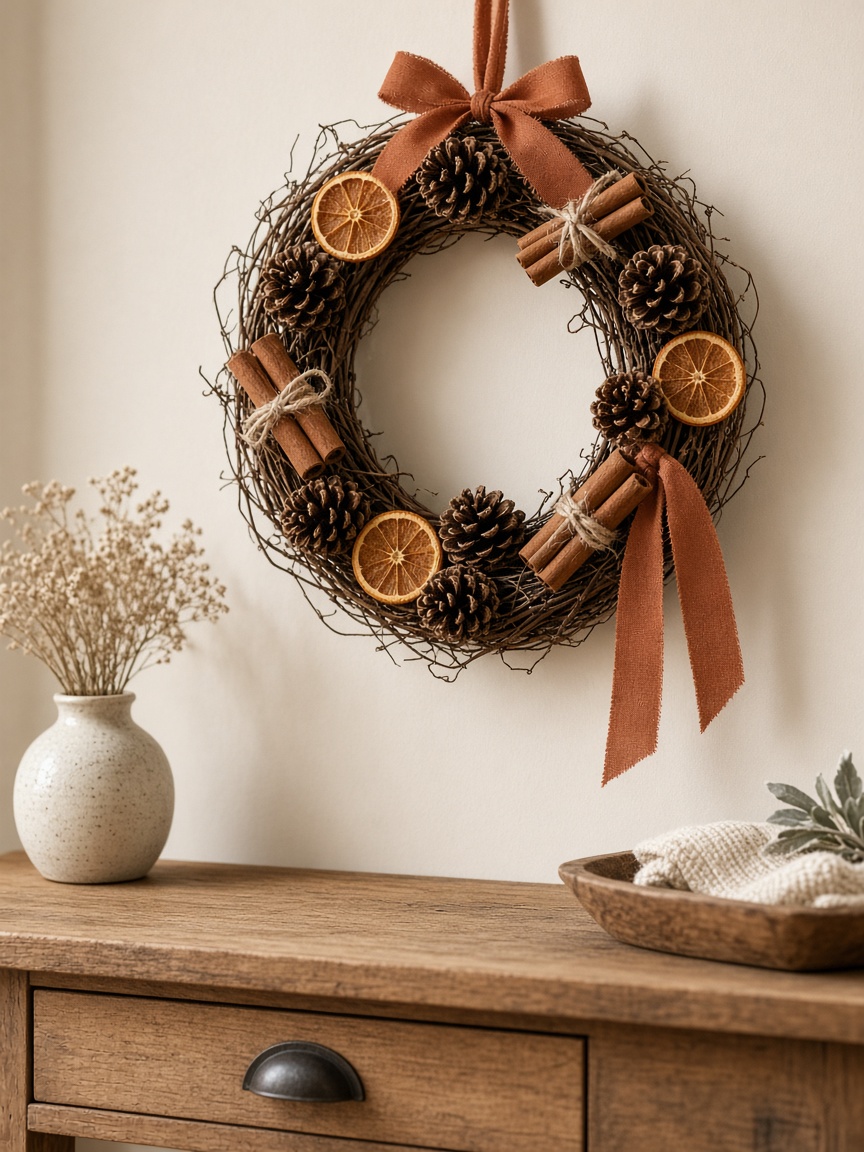
27. Cinnamon stick and pinecone wreath
Hot-glue cinnamon sticks around a grapevine wreath in bundles of three, then fill the gaps with pinecones and a few dried orange slices if you have them. The whole hallway smells like it when the door opens. Hang it inside with a ribbon loop; rain dulls the cinnamon fast.
28. Gratitude tree
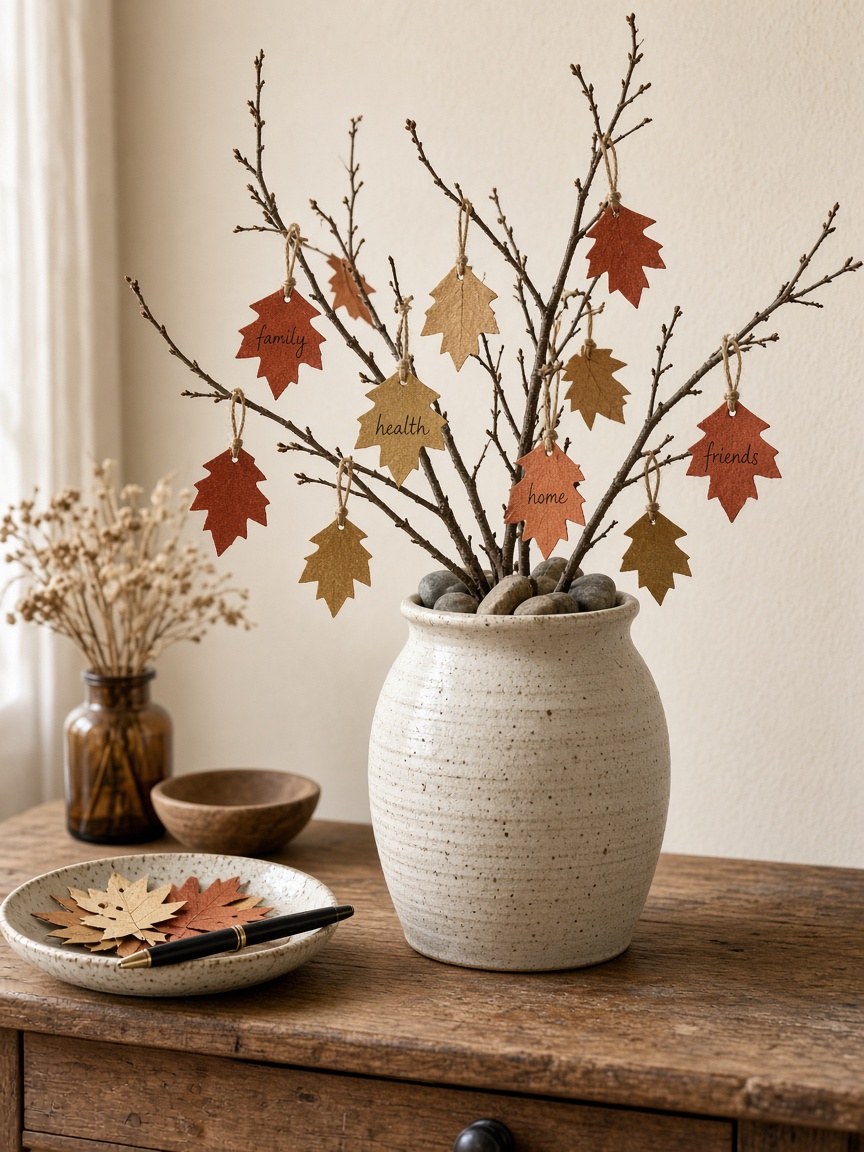
Stand a few bare branches in a heavy vase and weight the bottom with stones. Cut leaf shapes from colored paper, punch a hole in each, and loop a short piece of twine through. Leave the leaves and a pen beside the vase so guests can write something they’re thankful for and hang it on a branch as they arrive. By dessert the tree is full, and it’s the thing people remember.
29. Painted mini pumpkins
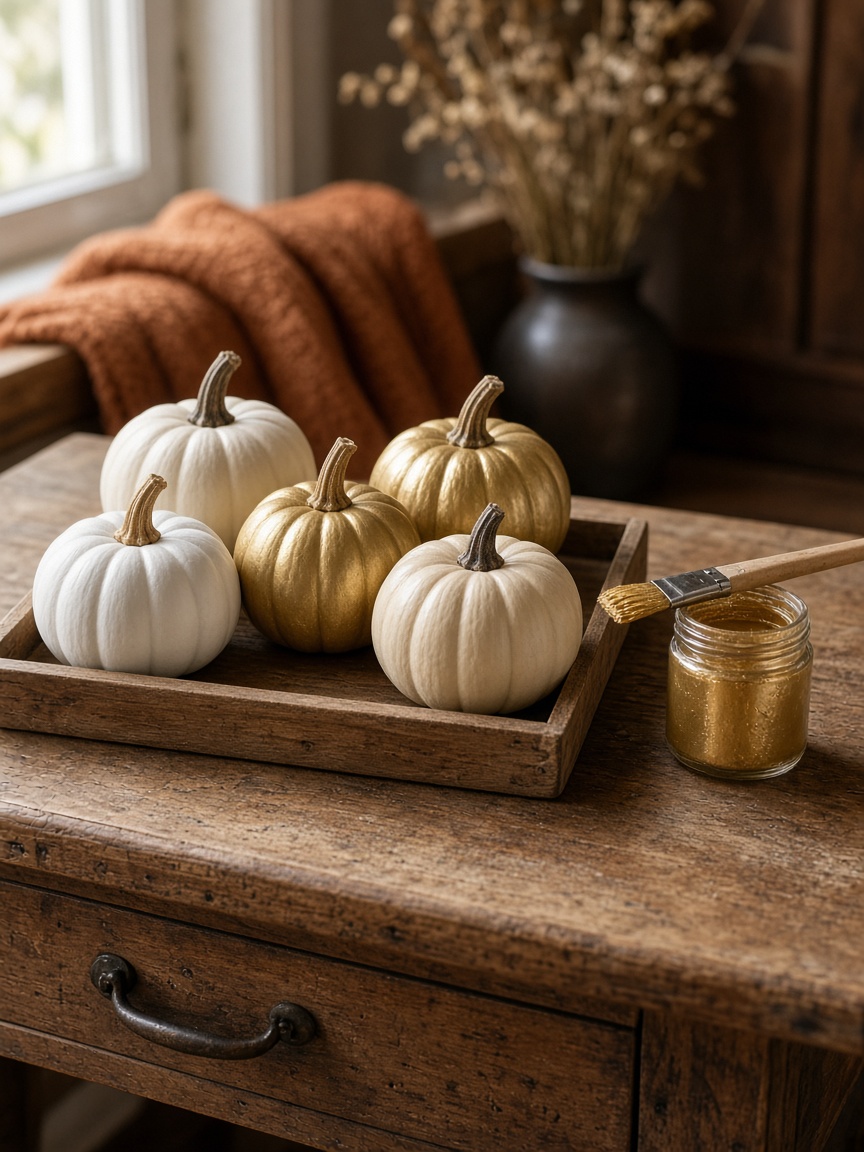
Paint small pumpkins solid white, cream, or soft gold with acrylic craft paint. Two coats cover. Leave the stems natural. Group an odd number on a tray or line them down a shelf. They go with any table color, and because nothing is carved they don’t rot, so they last through November and into the Christmas decorating.
30. Dried corn door bundle
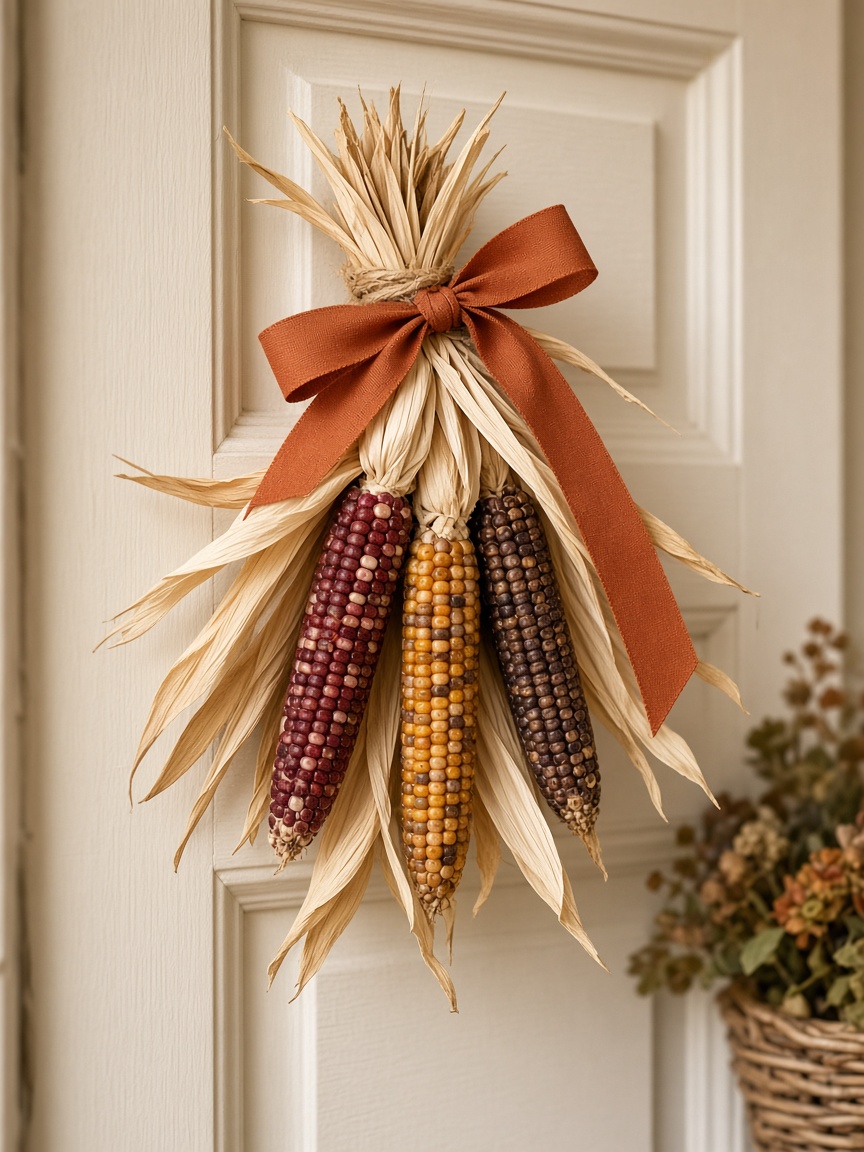
Tie three or four ears of dried ornamental corn together by the husks with twine, then cover the twine with a wide ribbon. Pull the husks back so they frame the ears. Hang it on the front door with a loop over the hook. Bring it in if there’s heavy rain in the forecast; otherwise it lasts the season and the squirrels mostly leave it alone.
A few things that make all of these look better
- Pick one palette and stay in it. Cream, rust, brown, and a little gold go with everything. Bright orange with black or purple pulls the table back toward Halloween.
- Odd numbers. Three pumpkins, five candles, one bowl. Even groupings look like a shop display.
- Keep centerpieces low. If it’s taller than a wine bottle, it’s too tall for a table people are talking across.
- Press leaves early. A stack in a heavy book the first week of November is ready by the time you need it.
- Bake pinecones first. Twenty minutes at 200°F dries the sap and deals with anything living inside.
- Buy twine in bulk. Half this list is held together with it.
After Thanksgiving
Most of this composts or recycles. Leaves, pumpkins, apples, pears, and corn go in the compost. Kraft paper and cardstock go in the recycling. Keep the wreath forms, the jars, the napkin rings, and the burlap banner; they all store flat in one box and come straight back out next year.
More fall and table ideas
- 40 DIY Thanksgiving Decoration Ideas For Everyone
- Do-It-Yourself Candle Centerpieces Made Easy
- 40 Most Creative Table Napkin Folding Ideas To Practice
- Genius Fallen Leaves Art That Pay A Worthy Tribute To Mother Nature
- 20 DIY Wreath Tutorials You Can Actually Put into Use
- 40 Magical Mason Jar Decoration Ideas
- 20 Easy Printable Halloween Coloring Pages
- 40 Christmas Table Decoration Ideas
Conclusion
None of this needs a trip to a specialty store. A bag of mini pumpkins, an afternoon of picking up leaves, and the twine and jars you already have will cover the table, the mantel, and the door. Start with the cranberry bowl and the pressed leaf place cards if you only have an hour. If you have a weekend, do the gratitude tree; it’s the one guests will ask about.
 Bored Art