DIY is not only a hobby that can keep you amused when you have time to spare but also help you save money if you can do some projects by yourself. while there are some DIY projects like cute friendship card designs that come under DIY, which are not good enough to make money out of but there are others which are more complex and have a commercial value. For instance, there are elegant DIY hanging planter ideas for indoors that could have more commercial value offer you the means to not only save money on this but also the potential to earn some cash when required.
This article will be taking you through the process of creating a marbling effect on fabric, which can be a good addition to the decorative touches to the home. But there are also other DIY beautiful and unique dream catcher ideas that are more of a sentimental and ethnic value.
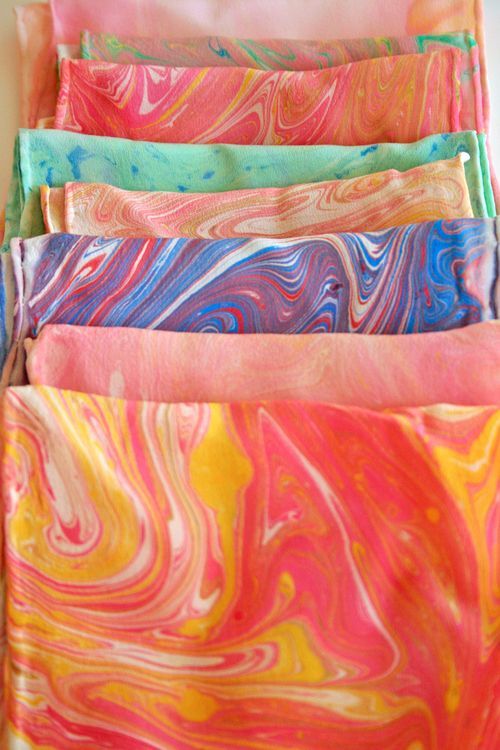
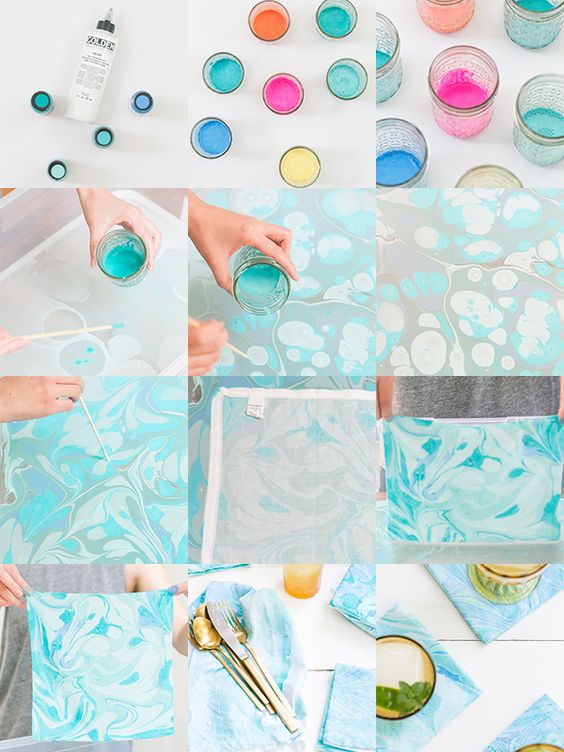
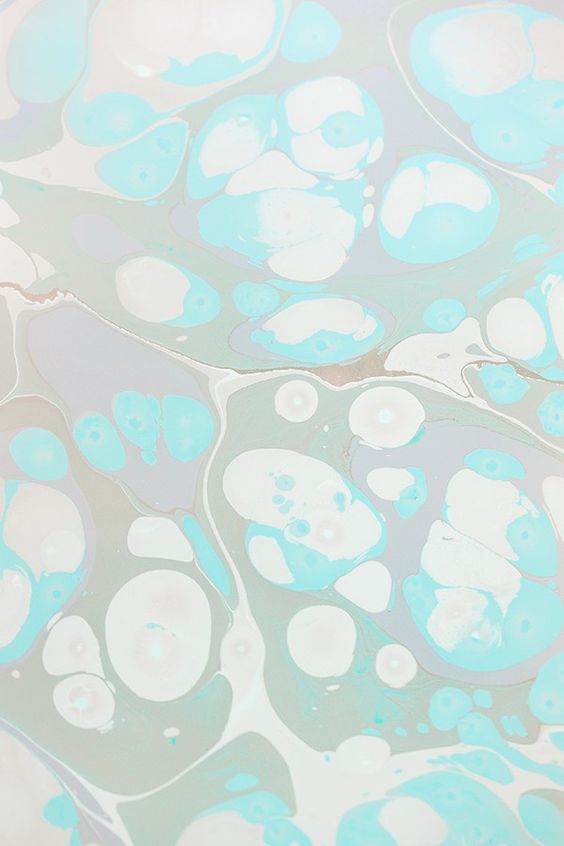
As you may be aware that marbling technique is a unique way of adding a cool design that you can have control over and which can be transferred to other surfaces if you want to reproduce the design. The idea here is to help you create a set of dinner and cocktail napkins for you to flaunt when the occasion warrants it. Once you master the technique of marbling, you will soon realize that there are many other uses for this and your wardrobe as well as your home linens will benefit from it.
Let us start with a list of supplies that you will require – you will need alum, ammonia, methocel for marbling, acrylic paints in the hues you desire, golden acrylic polymer, some white napkins (both dinner and cocktail) and a huge flat container where you can lay the napkins out when the marbling process is going on. You will also need some water for rinsing after the process is over as well as a measuring cup, some measurement cups for paint, whisk and wooden sticks.
To start with you need to remember that the paint will stick to the cloth only when you soak it prior to the marbling in alum at least a night before. To do this mix one quart of hot water with three tablespoons of alum and soak the cloth for twenty minutes. Hang it out to dry well before you start the marbling process.
In the large tray or tin create the marbling mix by mixing one tablespoon of ammonia with four tablespoons of methocel in tepid water. Mix well and leave for a couple of hours till the mix is thick and the bubbles have gone.
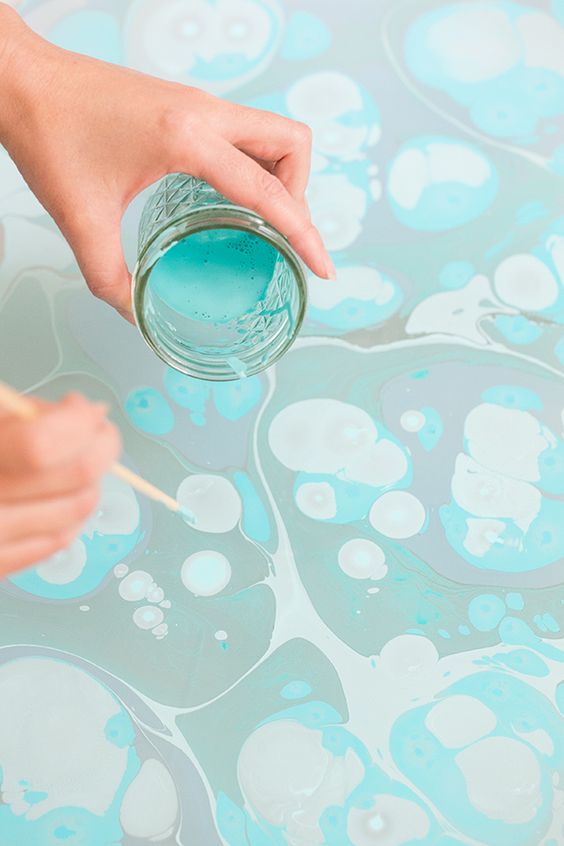
In the meanwhile, prepare jars of acrylic paints by mixing two tablespoons of paint that can be thinned using golden acrylic polymer to form a milky consistency.
Iron out your napkins to prepare them for the process. Once the mix is in the right stage, ensure that you pop all the remaining bubbles. Then drop the colors on top of the mix and spread it. You can if you wish, layer different colors one on the top of the other. Some paints spread more while some don’t and you have to provide for that.
You can then use the tip of stick to create patterns on the paint. Once you are done with it, take the napkin and put it flat on the surface. Immerse the napkins completely to ensure the pattern is completely transferred.
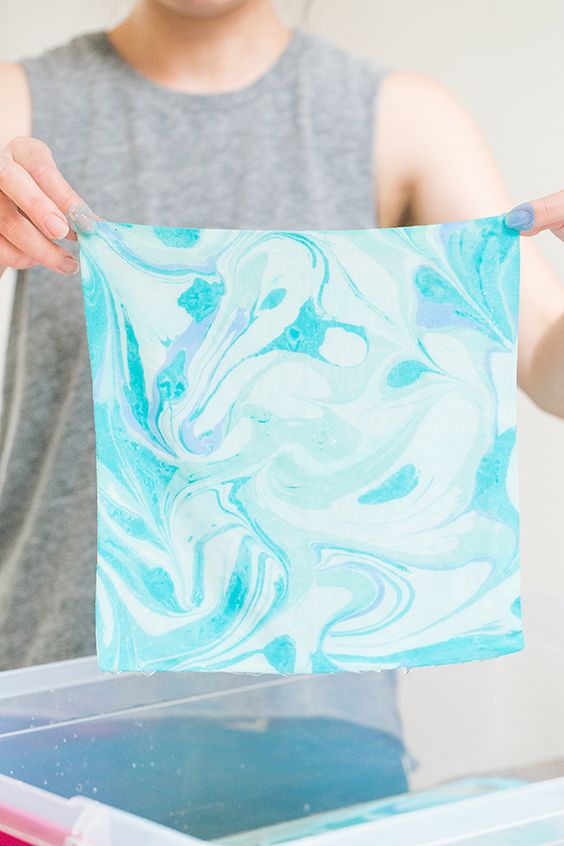
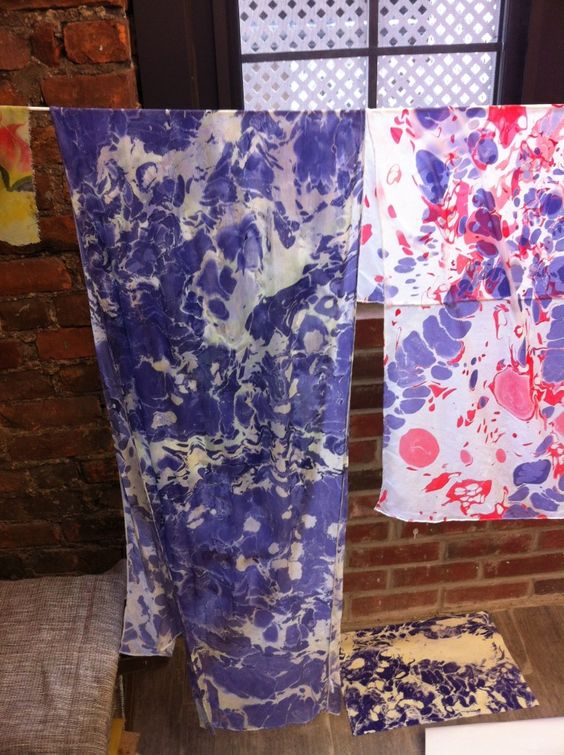
Lift the napkin carefully by pulling it up by one corner. Then place the napkin in clean water to rinse. Keep doing the same thing with all the napkins till you are done.