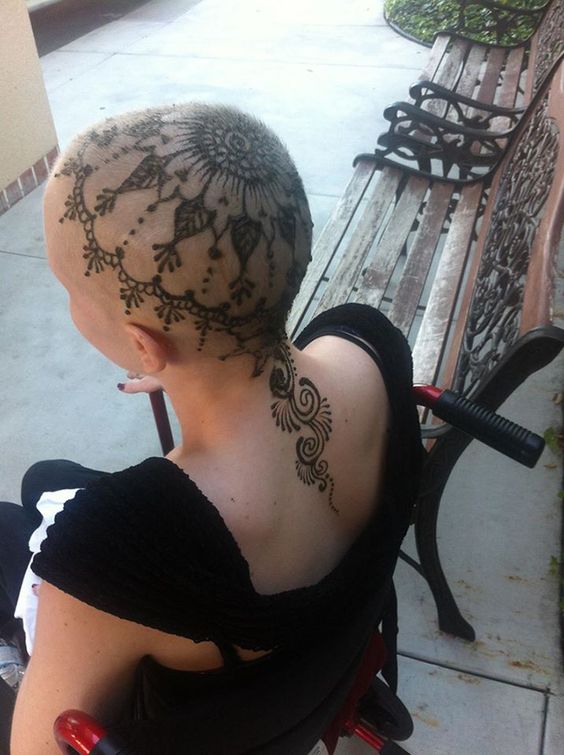
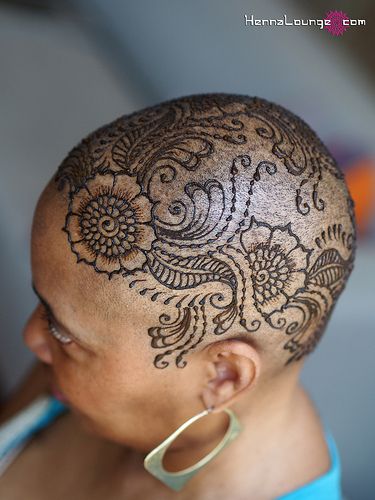
Did you know that in some cultures of the world henna is considered holy, pure and good for your health? Yes, in the Indian subcontinent, a bride is adorned with temporary tattoos made of henna that not only added to her beauty but were also supposed to cool her systems in preparation and make her more ready for her marital duties. It was also believed that the deeper the color of the henna on the bride’s hands, the deeper her groom’s love for her. The application of henna to the hair is supposed to color and condition the hair and make it grow stronger and longer. While there is a lot of science to the reasons behind the application of henna on the head, the hands and feet, the actual designs drawn belong firmly to the area of art. In this article, we will be looking at the kind of henna that is applied on the head but not for the hair but for the design, which means that you need the area to be cleared of hair to do this. You can figure out designs by looking at various types of henna designs including very attractive white henna designs.
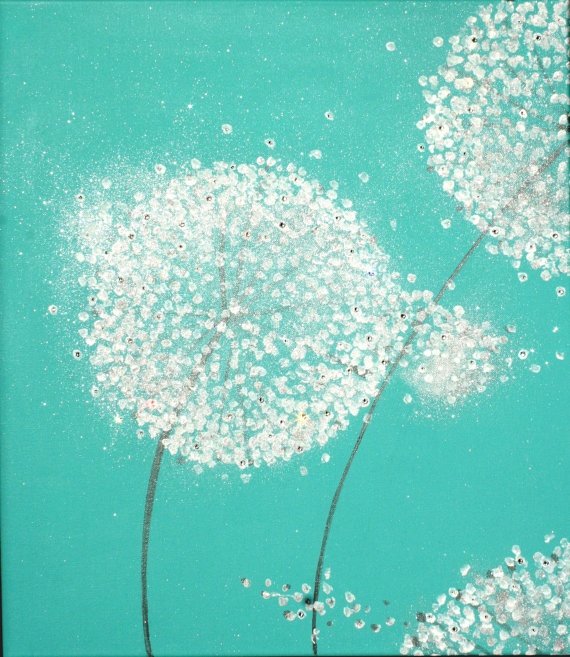
We know that white henna is not actually henna, the leaf, but the henna designs can be recreated using the white henna base and vice versa. And if you want to be a purist, then you can always look at beautiful henna tattoo designs from different cultures. And if you still want more design ideas, we suggest that you also look at beautiful rangoli designs like never seen before to duplicate on the crown of your head.
For you to be able to make heady henna designs on the crown, you will need to get the cone of henna paste ready. Here is what you will need:
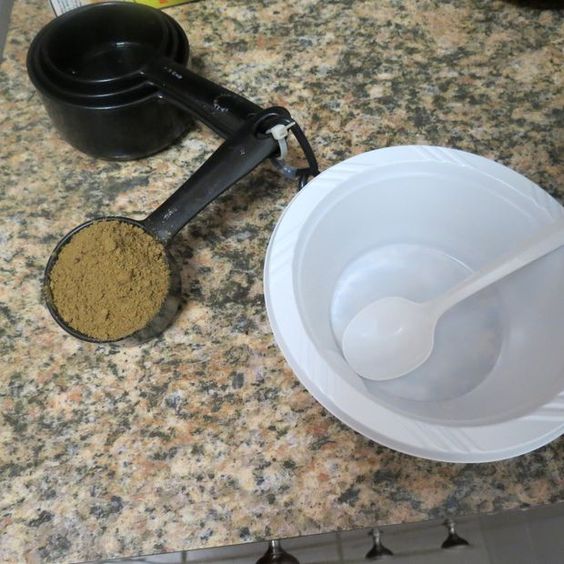
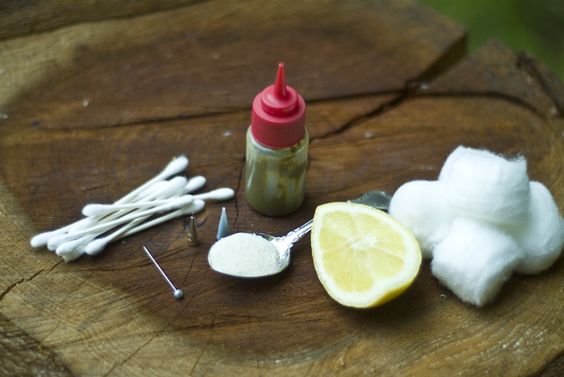
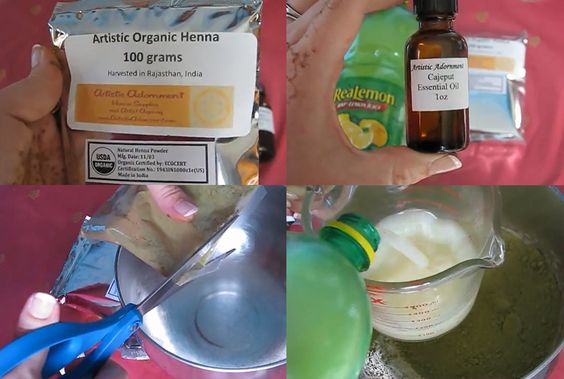
Good quality henna powder: Check for henna powder that is green and smells fresh. Henna powder is made from henna leaves that are plucked and dried.
Juice of a lemon
A few drops of eucalyptus oil
A cotton cloth for sieving the powder
Some reasonably thick sheets of plastic
Scissors
Sticking tape
Some sugar and water made into a solution
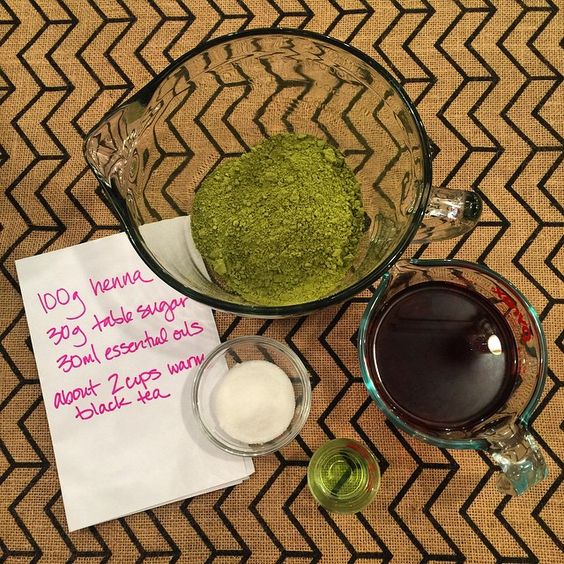
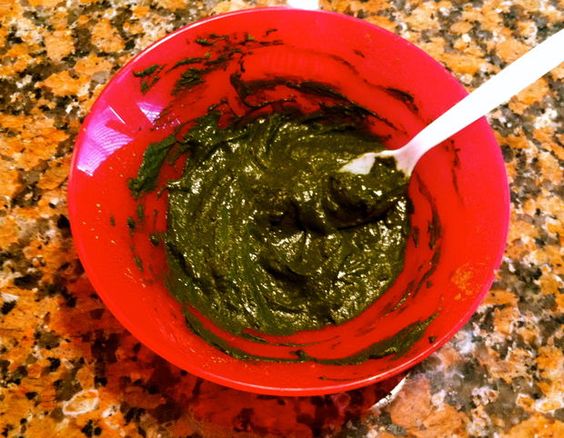
The first step would be to sieve the powder using the cloth to ensure that it is fine and free of lumps. Use the lemon juice, the eucalyptus oil and some water to make a thick paste using a spoon or spatula. Ensure that the paste is neither too runny nor too thick. Cut the plastic sheet into a square and then roll into a cone that is closed and narrow at one end and open on the other. Stick the cone closed on the inside and outside to secure the cone. Once you are sure that it is secure, then fill the cone with the henna paste. Ensure that the paste does not have air pockets in it by shaking the cone to fill the paste properly. Then close the cone on top by folding it and taping it shut. Once the surface for making the designs, which is the crown of your head is ready, use the scissors to cut a very small opening at the narrow end of the cone.
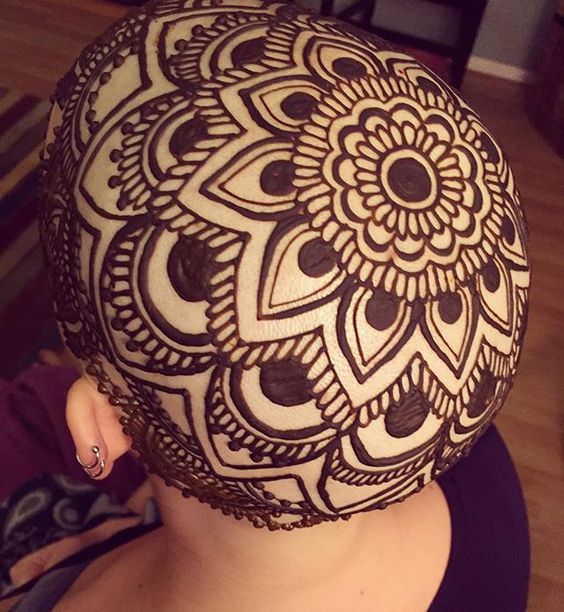
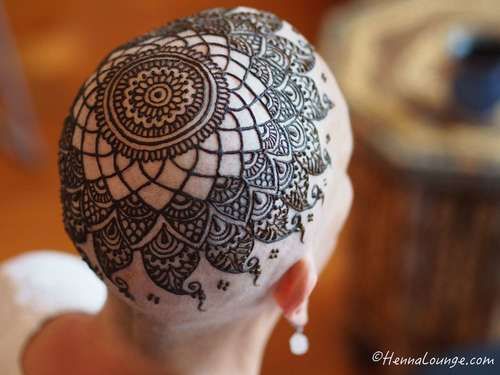
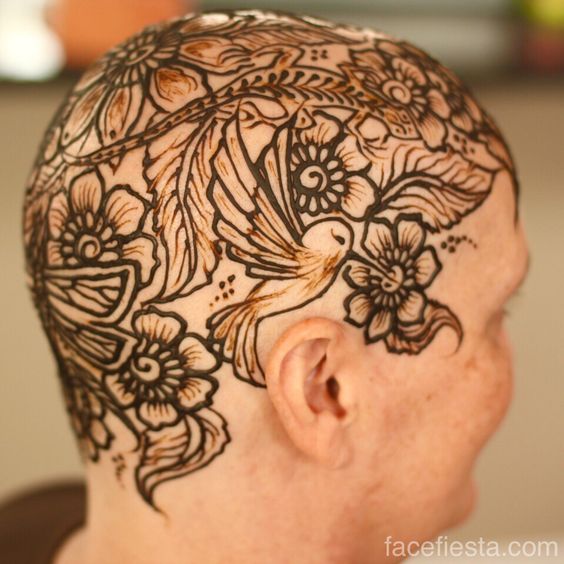
This will ensure that when you press down on the top of the cone, the henna will flow out of the small opening that you have cut in the point of the cone. The designs using henna especially for the crown will have to form a circle. Most designs in the traditional sense are composed of dots, curls, curves, circles, lines and similar motifs. You can refer to the images we have given here to get an idea. We suggest that you start from the center and move on to the corners to ensure that the design does not get affected by the hand movements of yours while drawing out the design.

Once you are done with the design, let the henna dry out and keep applying the solution of sugar and water lightly on the henna to ensure that it keeps darkening. Let it stay on for a few hours before removing the now dry flakes of henna. Exposure to water can make the henna design fade; it is best to avoid exposure to water for some time after removing the dried flakes of henna.