Sculpture is such an amazing art form, one that requires a great deal of strength, skill and creativity. The thing is that each of us sometimes that we had the wherewithal to convert something inert like stone, metal or wood into something that seems to have a life of its own. But with most us, this may not be possible but do not lose hope, you can use polymer clay to do some work on these lines. It may not be like sculpting on metal with fascinating aesthetic and practical uses but it has a certain charm all its own. And it may not be as temporary as most realistic snow art sculptures, which are winter creations.
When you start sculpting with polymer clay, do not expect the first efforts to be like astonishingly life-like figurative sculptures but you will probably get there with a lot of practice.
Here is what you will need to sculpt:
A small quantity of polymer clay, needle tool, craft knife, wire loop, small spatulas, small brushes for blending, a bit of stick, foil and paper tape.
You have to know that sculpting a face is one of the most difficult things to do and to do this well, you have to spend some time studying faces and facial features so that you have an idea about what you are doing.

Start the process with firm clay rather than very mushy clay so that you have better control on what you are doing. Take the skewer or stick and stick a small ball of aluminum foil on top. Ensure that it is crushed tight to form a rounded back, flat sides and a tapered front. This is going to be the base for the face. Fix the foil with tape and cover it too.
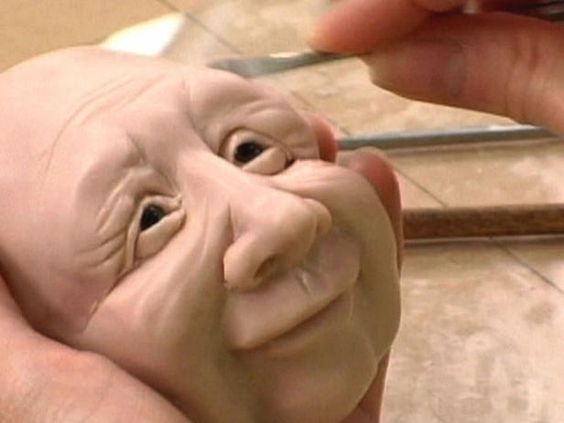
Not only will this ensure that the foil does not move but will also give the clay a surface to stick on. Make a dent on the face between the top and bottom using the tool firmly but gently. Now that you have a skull shape add some kind of skin for the face. Use the knife to divide up the face to form eyes and then the forehead and the chin. The vertical line will indicate the nose. Leaving some space below, make the lines for the mouth.
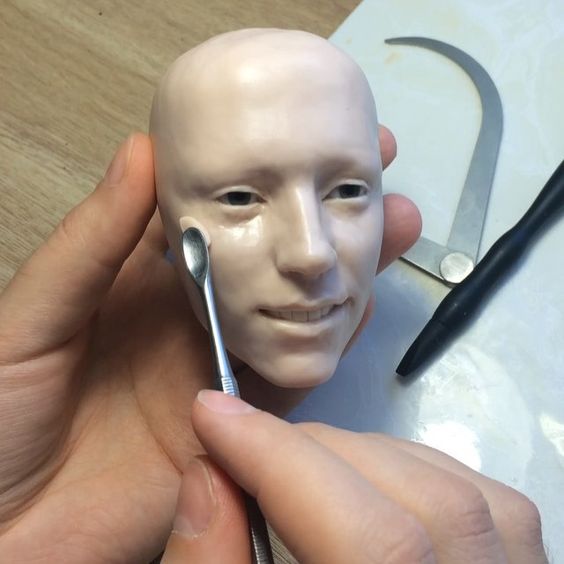
Add some extra clay to form the chin and on both sides of the nose for the cheeks. You will need to keep blending in the clay so that the facial features look smooth. If you want, you can refer to a plastic toy head to see if you are going in the right direction.
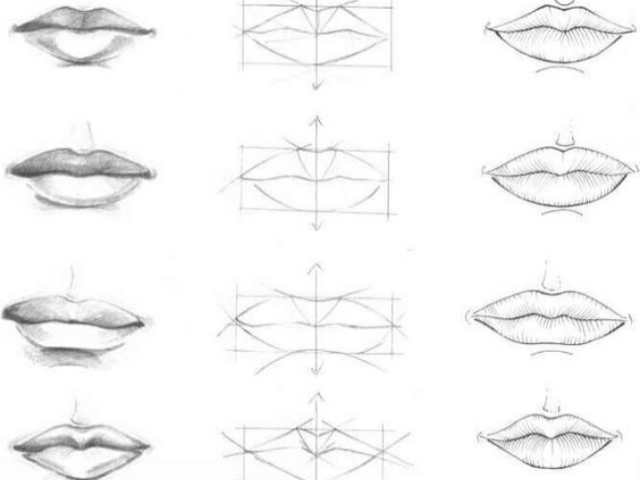
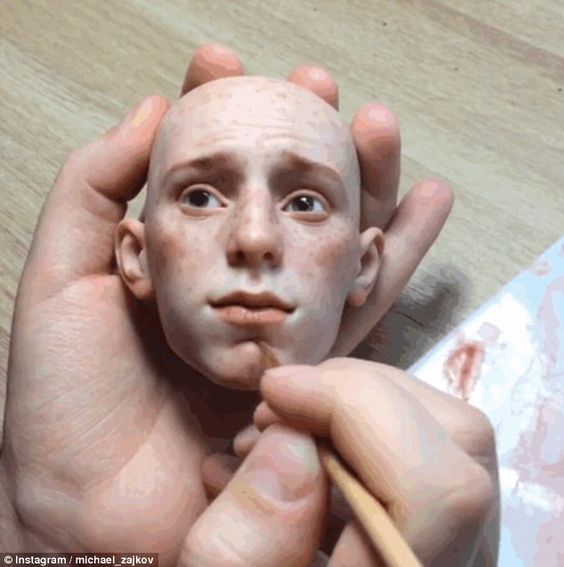
The nose will have to be added on the line you have drawn and shaped as wish it to look. Use a small rounded stick to make the depressions for the eye sockets. While shaping the lips, add a small dent at each corner to make it look more realistic.
You will need to use a sharp tool to make the four indents at the start and end of each eye. Ensure that it gently slopes instead of violently veering in. Keep checking if both the eyes have come out evenly so that they don’t look lopsided. As and when you add each feature, ensure that both sides are balanced and keep smoothing it away to ensure a better finish.
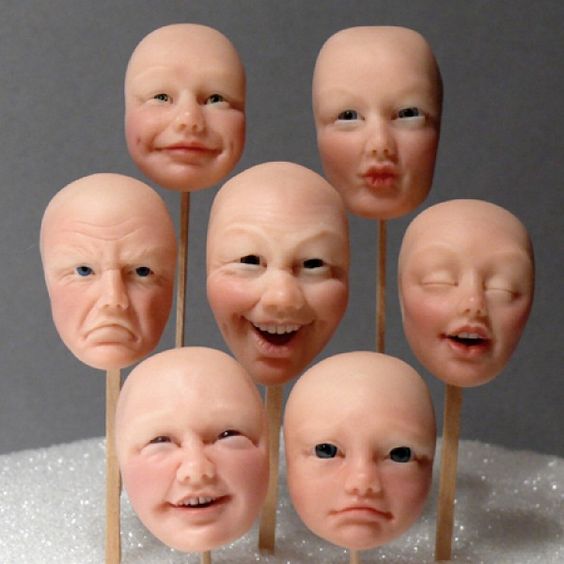
You cannot expect a perfect face and head the first time you do this and you will have to remember that only with persistent practice will you become better. Once you are done, bake the head and spend some time admiring it.

")