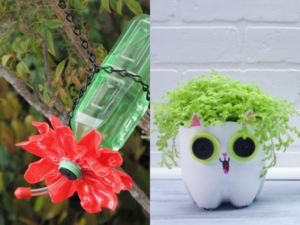
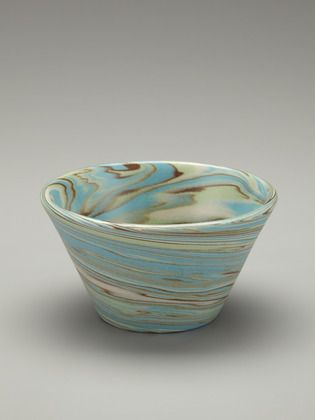
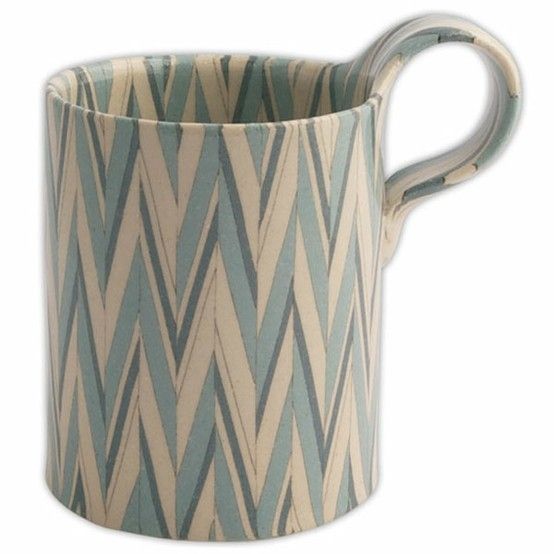
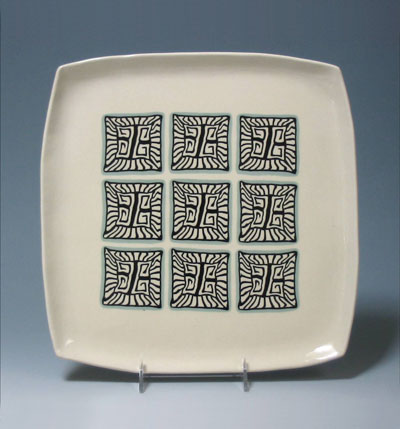
Have you ever wondered if there is more to pottery than working the clay, shaping the pot, baking it and glazing it? Of course, there is, there is pottery and then there is nerikomi pottery. What is Nerikomi pottery? This is a Japanese way of making pottery that has intricate motifs in it but not the kind that you draw on the surface but the kind that you inculcate into the very layers of the clay. It is also called Neriage and is a decorative process that piles on colored blocks of clay to form a pattern. Once the block is created, very thin slices are cut and placed on the pottery piece on which you want the design to appear and it is pressed down to make an integral part of the design. By including the process of Nerikomi you can take the earthy and worthy art of pottery to another level altogether.
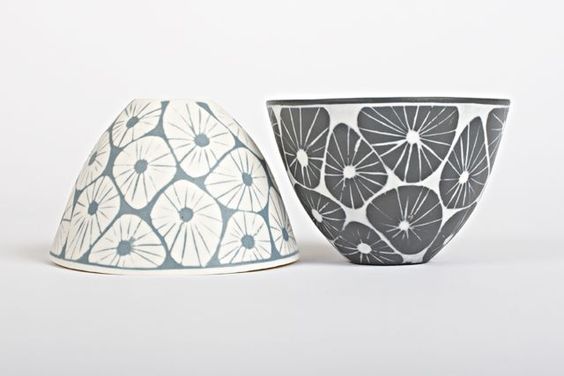

The process for creating nerikomi pottery is not simple but a subtle and carefully thought out process that is not at all like when you make clay pinch pots. We are not denigrating the process of making clay pinch pots but just observing that the process of Nerikomi is more complex. You may want to think about what kind of designs you will create using the Nerikomi process by looking up pottery painting ideas and designs but this can only act as a general guide. Because the Nerikomi design not only has a lot of thought and orderliness to it but also an element of surprise added to it.
We would suggest that you start working with clay that is easier to stack closely and slice thinly so that you get as near to the design as you plan to. We suggest that you go with white clay of the temperature that you like and add colorants to it. You will need to work with colored clays that can be stacked together to get the pattern you want. For this to happen, you need to keep the clay wet but stable. This will ensure that the design does not develop seams and cracks. To get the clay wet the right way, add water to clay that is not colored and let it sit for a bit of time.
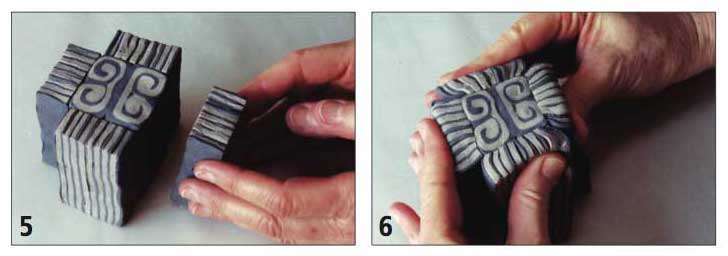
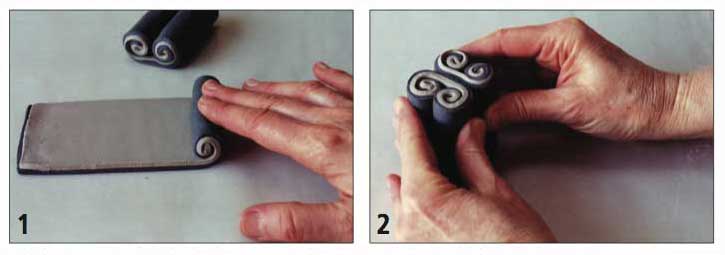
When mixing colorants, you have to consider how the end color of the clay will look like. If you want to figure out the percentage of color, we would suggest that you keep the color percentage under 10%. We suggest that you make a mound of wet clay and add the color in a depression in the middle and then go about adding a bit of water to blend it well. To begin making the Nerikomi design, we suggest that you roll out the clay in thin layers. Place one on top of the other (the width of the layer will depend on how many designs you want to create from one lot) and roll. When you look at the cylinder created from the top view, there is a pattern that has formed. We suggest that you create two such rolls that you stick close together. Then place different colored layers one on top of other with four or five layers. Press this together and then cut into four blocks and press against the two rolls that you stacked together.
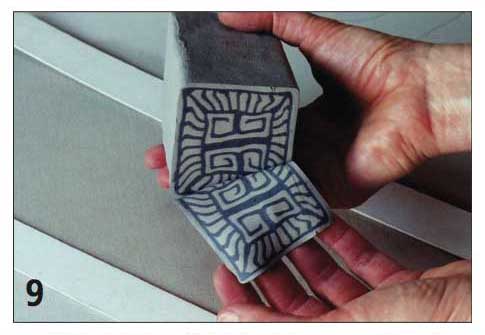
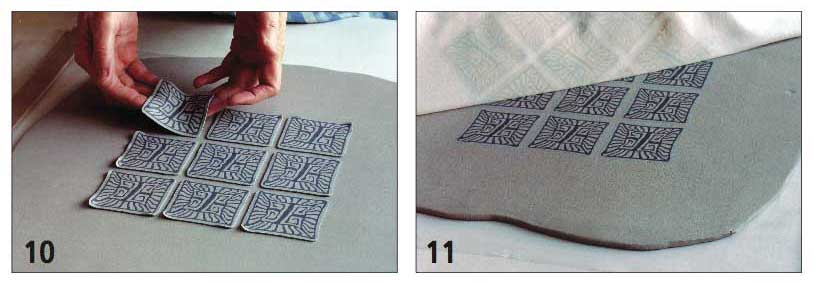
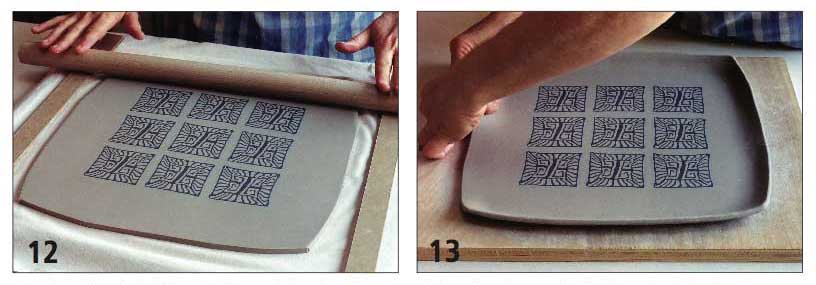
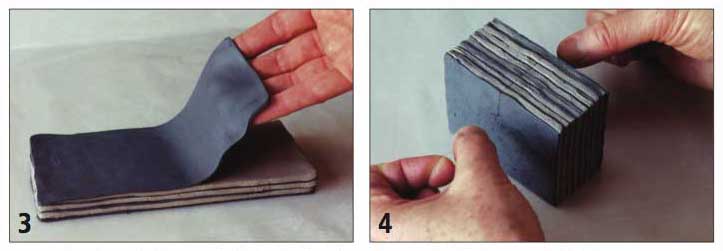
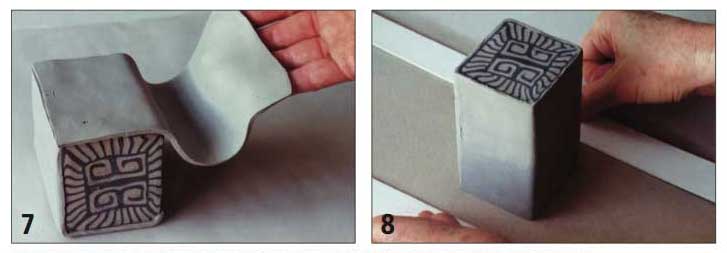
Roll out one thin layer of clay to create a border around this rectangle you have created. You have to do all this work while the clay is wet. So, keep your clay block wrapped in damp cloth as you keep working. Then place the block on its side and slice thin slices of the pattern. Then pick up these slices and carefully arrange them in the pattern you want to create. Please note that the base clay layer also has to be damp. Then roll the design into the bottom layer with a rolling pin. Makes sure you place a cloth on top to ensure that the slices you have placed do not move. Then remove the cloth and impress the slices on to the bottom layer. Then let it dry slowly before proceeding with the rest of the process of baking and glazing it with care.