- 196.7Kshares
- Facebook65
- Twitter1
- Pinterest196.6K
- StumbleUpon0
- Tumblr
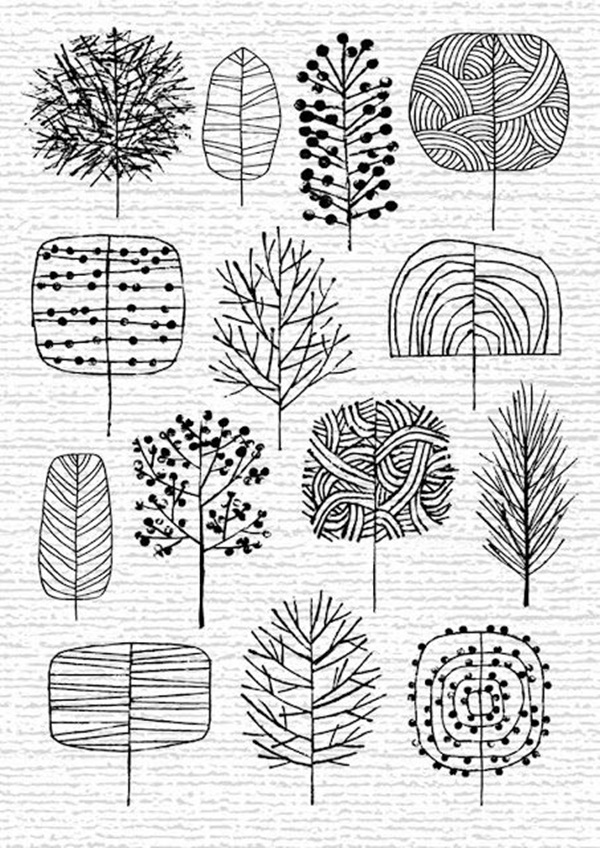
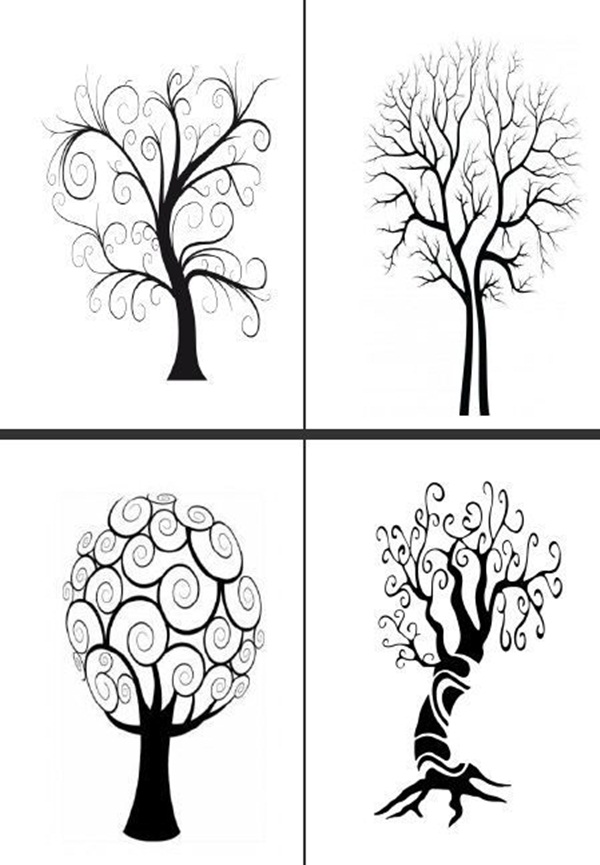
Nature is a great inspiration for artists as we gaze upon her immense and fascinating bounty to get our inspiration. There is no end to the kind of inspiration and ideas that you can gain from convening with nature and this is something that every artist will concur. That is why many visual arts like painting are taught by asking students to gaze upon nature and try to capture her simple but varied beauty on to paper, canvas or any other surface. The first step that most visual artists are asked to do is to learn how to draw the objects they want to paint and this enables them to appreciate the subtle lines and the details that make up this object. In this article, we will be taking you through how to draw a tree step by step image guides, which is one of nature’s bounties that inspires so many. Before you proceed to bewitching and beautiful black ink drawings to bedazzle you, we suggest that you master pencil drawing techniques with examples.
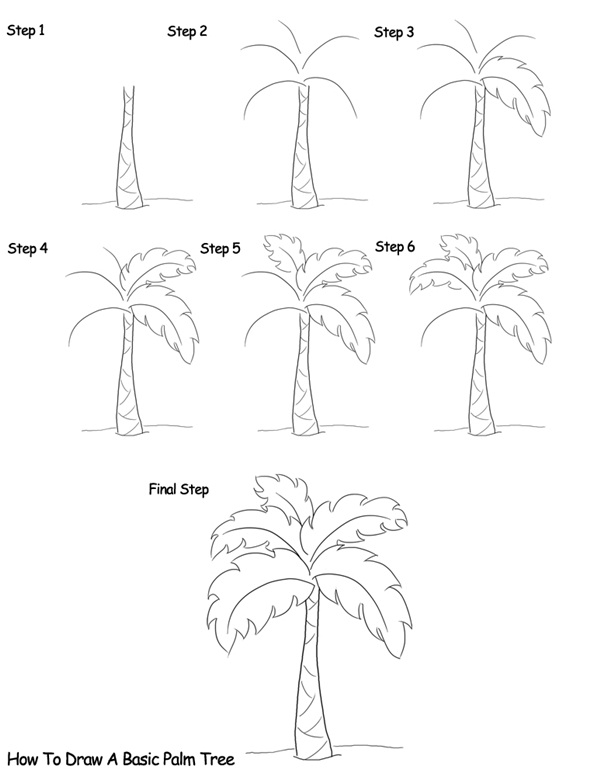
How To Draw A Tree step by step image guides
While drawing may strike some budding artists as mundane and boring, it is an essential skill to learn so that you can understand the subtleties involved in drawing or painting something as complex as a tree. Most people learn to draw with pencils, but if you want, you can learn charcoal drawing techniques for beginners to gain another facet to this art.
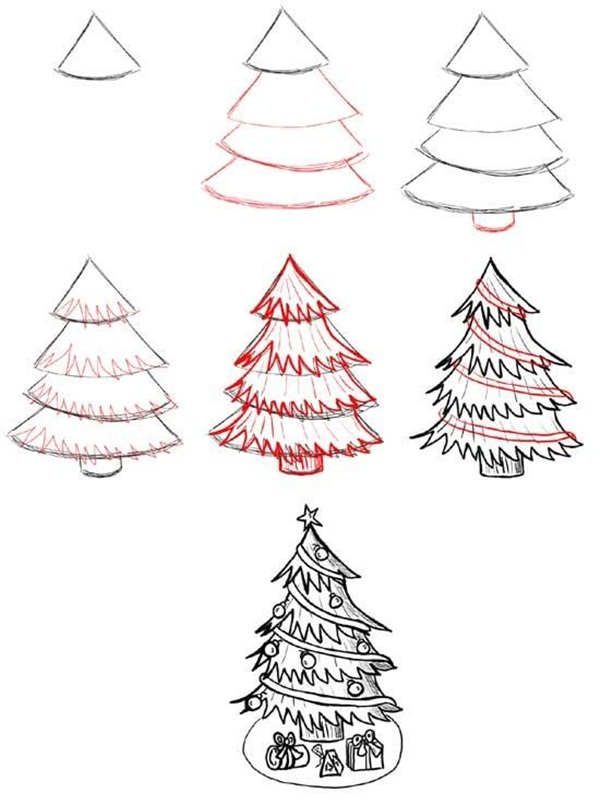
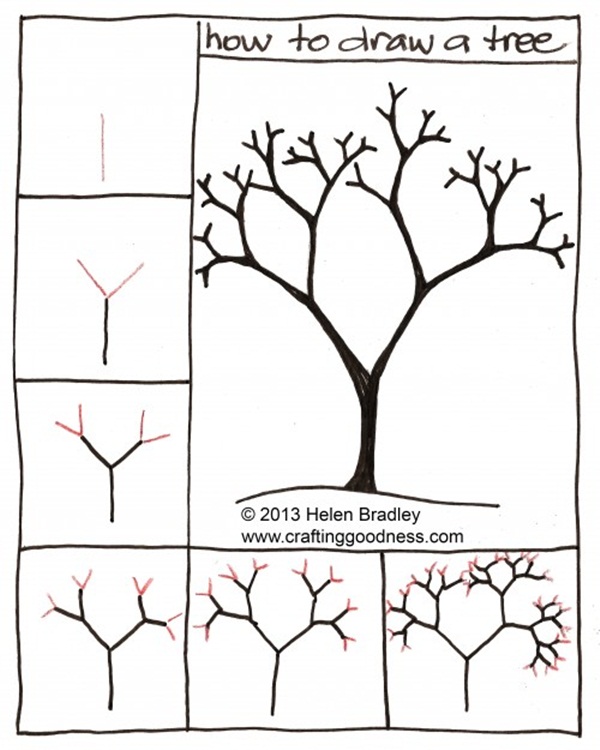
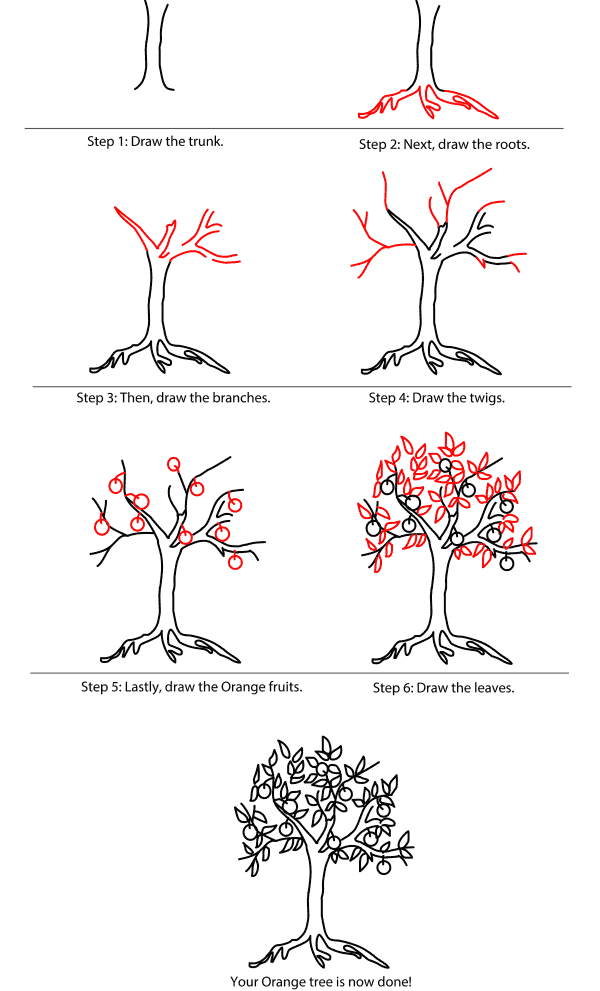
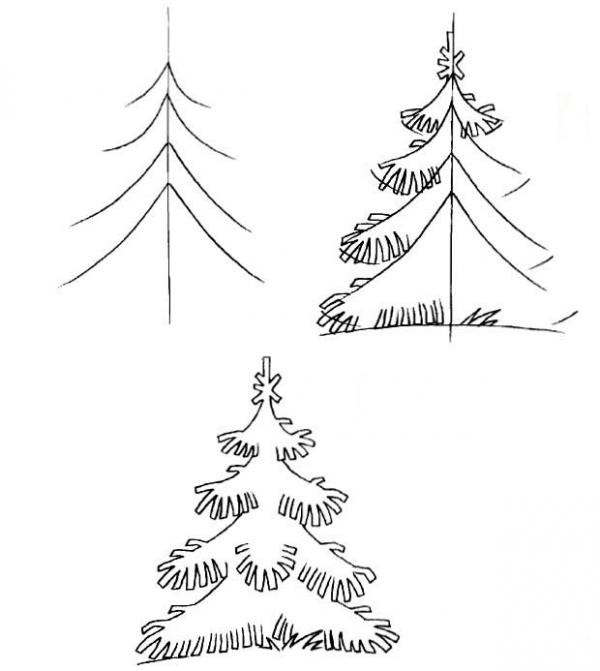
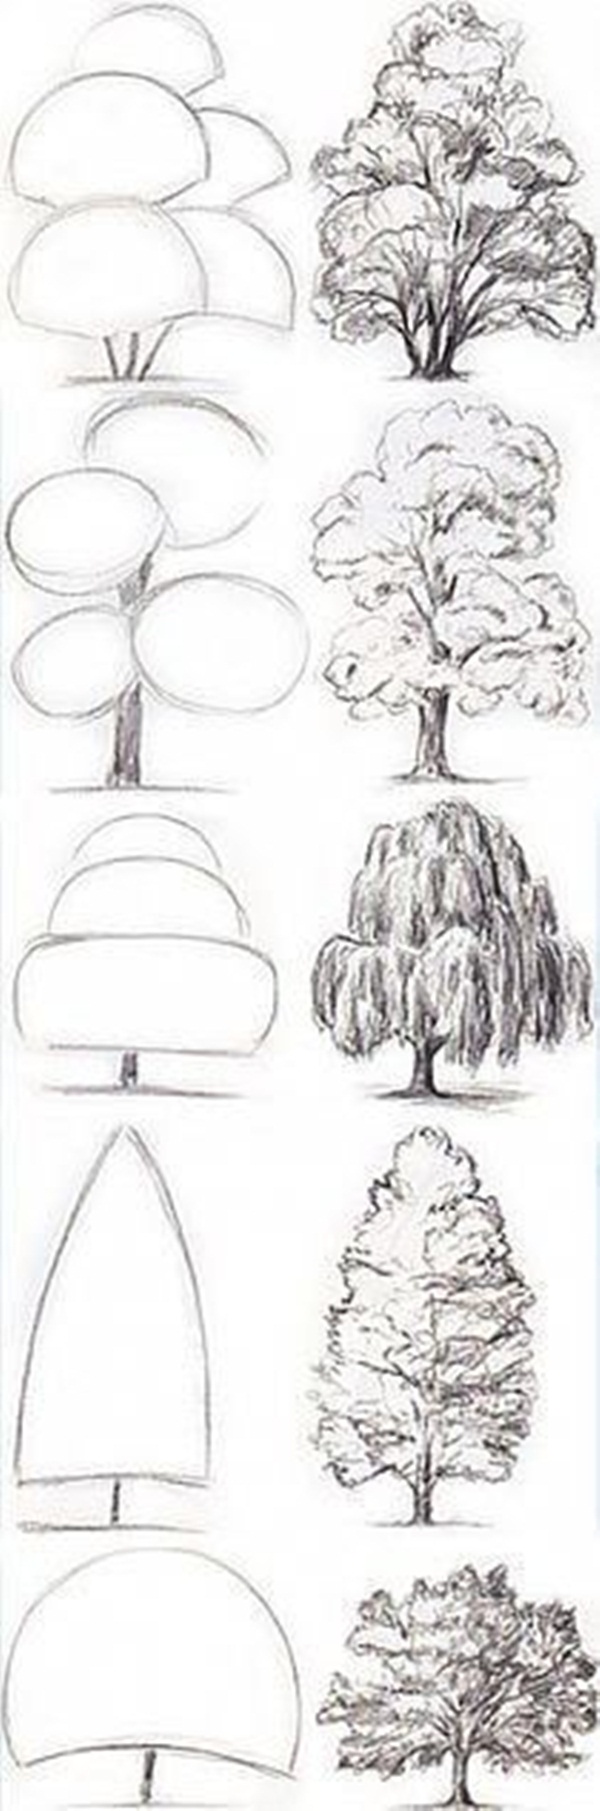
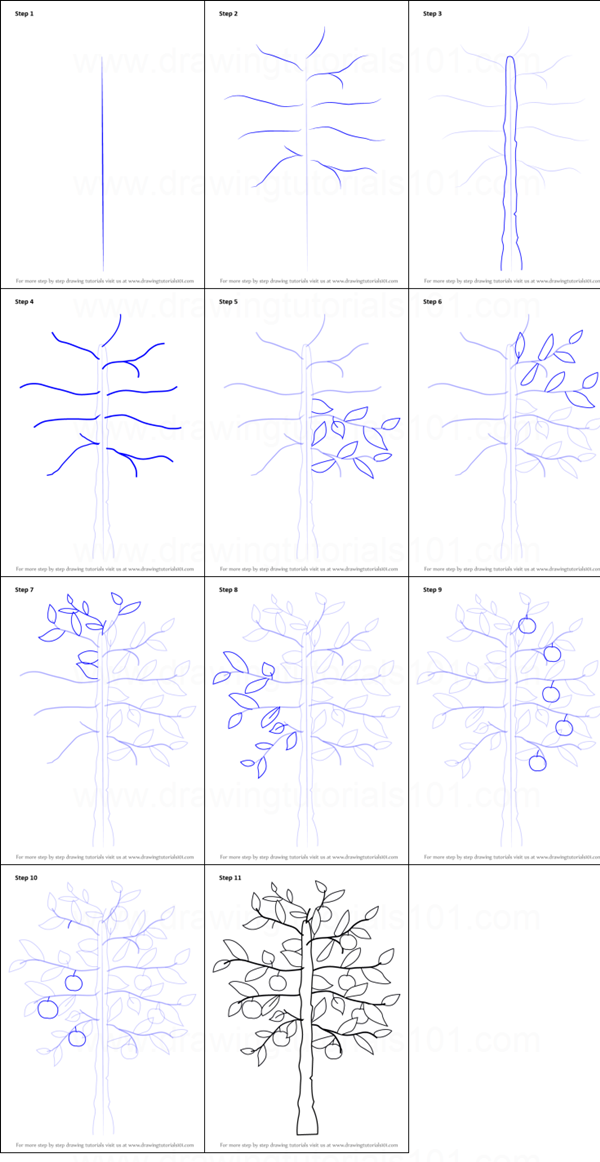
Here are the steps that you need to follow to draw a tree:
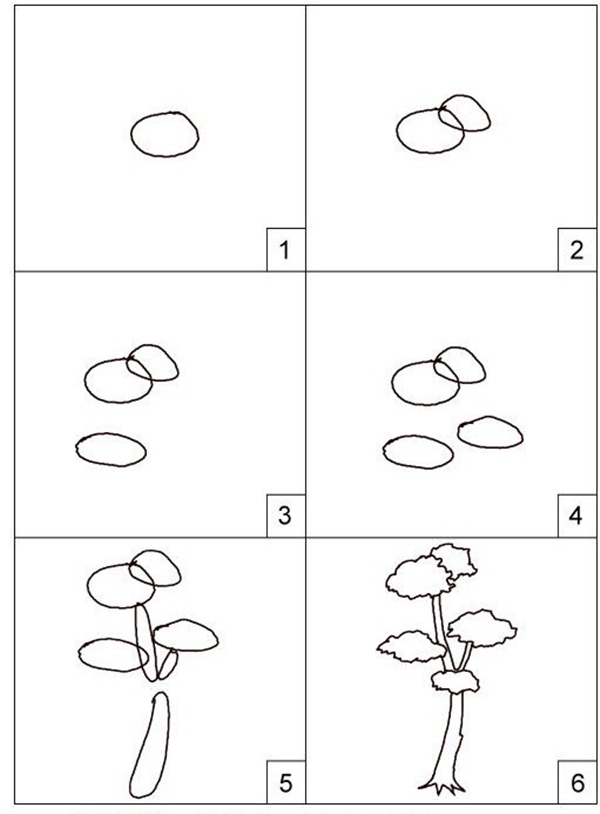
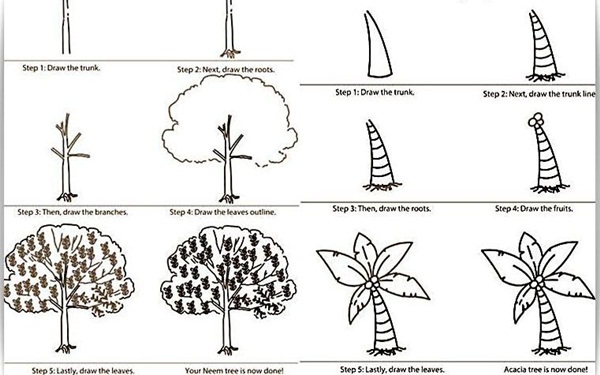
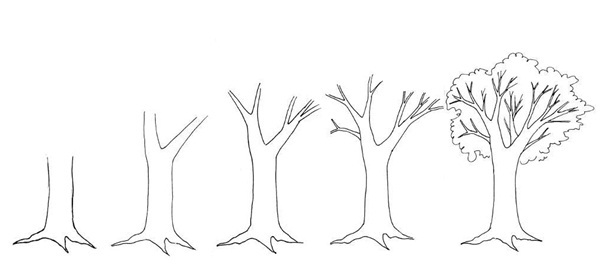
Observe and draw the general outline of a tree to start with. We suggest this because the mind generally notices the general outline first and then only the details and that is how you need to draw.

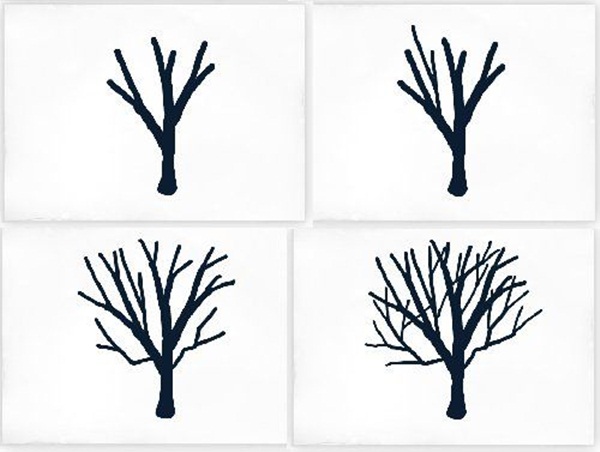
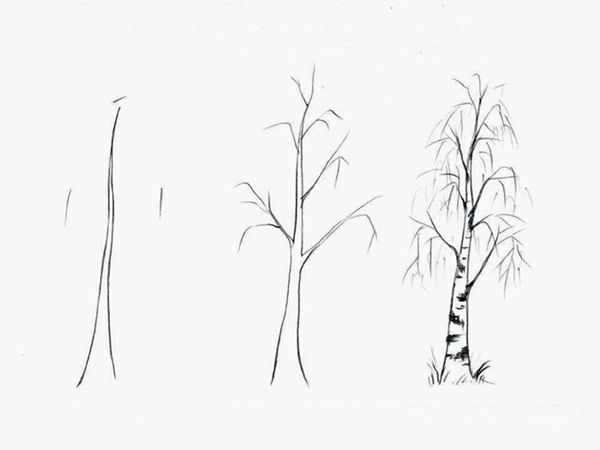
The next step is draw the trunk with the lower portion being wider with the trunk thicker, the bigger the tree is.
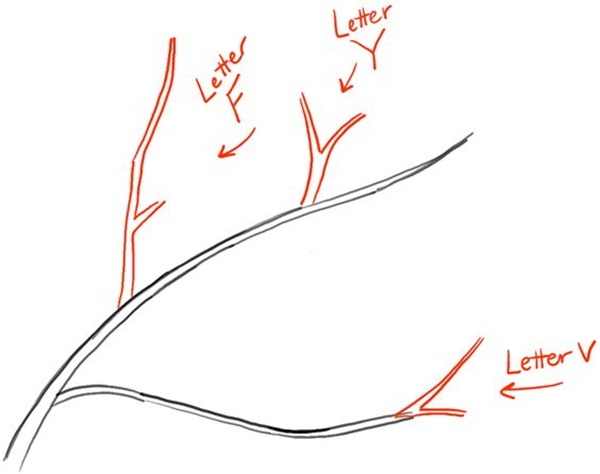
Draw the branches out starting from the top of the trunk. Ensure that the longer the branches, the lower they bend.
Keep on adding the branches as you go because the tree will have these on top. Ensure that your strokes are soft and subtle.
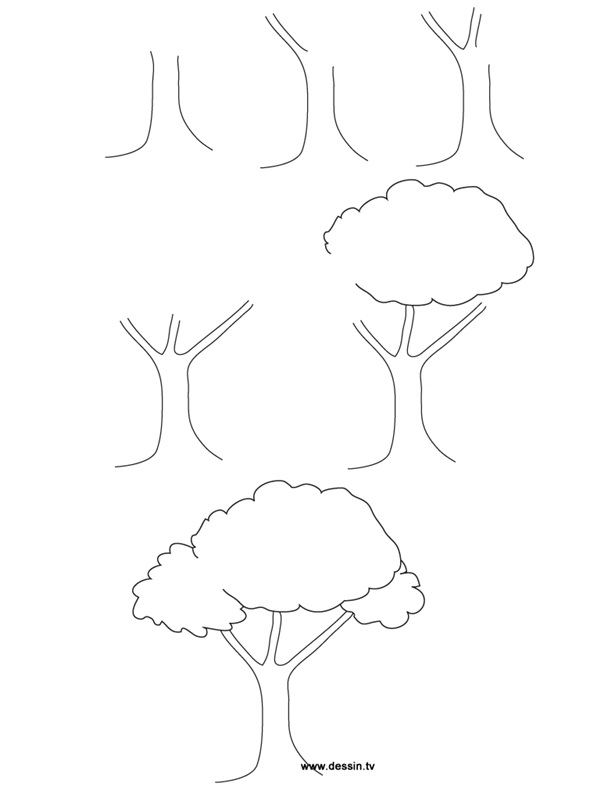
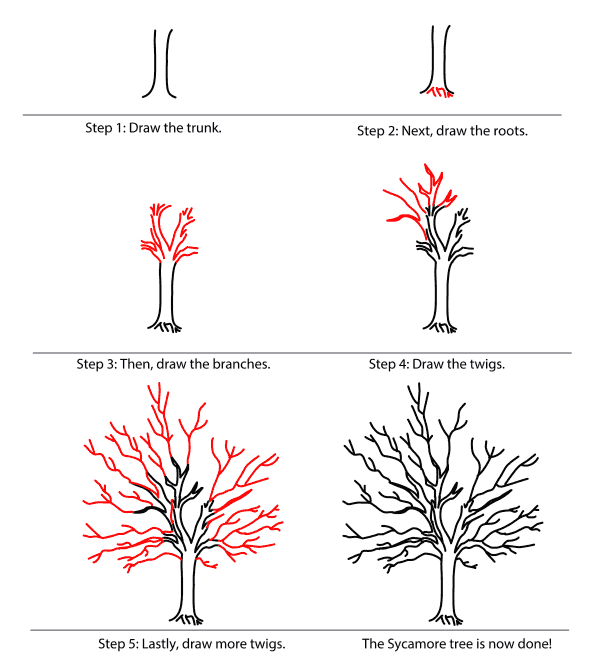
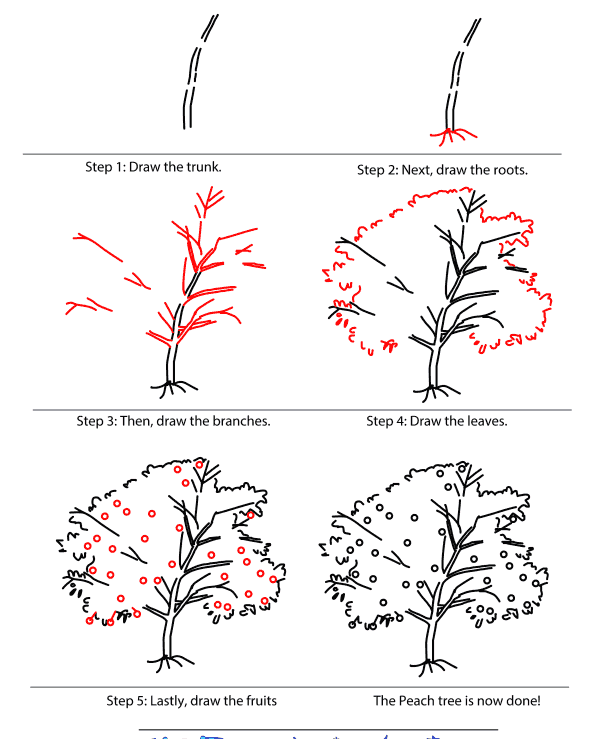
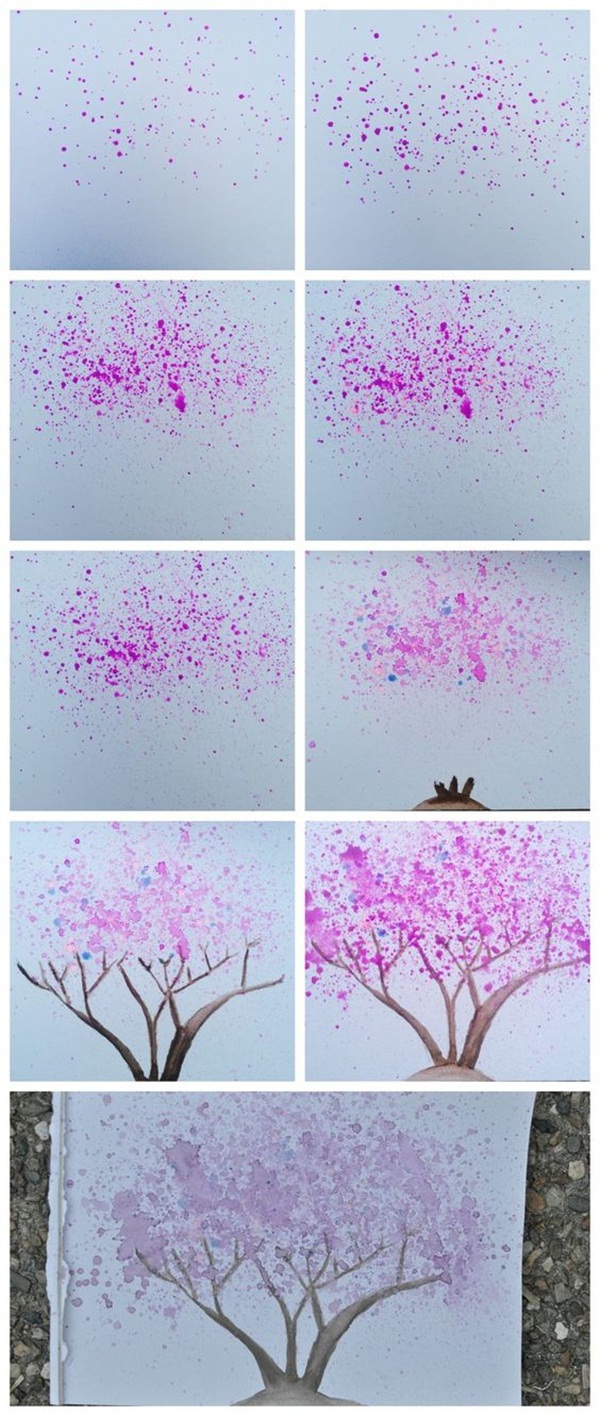
Define the top portion of the tree like a cloud with a jerking motion and then add the leaves while ensuring that there are some spaces in between but not in an even manner.
When the branches are not concealed by foliage, make them thicker. You can use cross hatching to make some areas bright and some dark.
Use a sharp pencil to add texture to the trunk of the tree. The white or plain elements are vital for the texturing of the trunk.
According to the kind of lighting you are planning for the tree and its environment, use softer pencils on the trunk. Keep pressing the pencil when you want it to be darker.
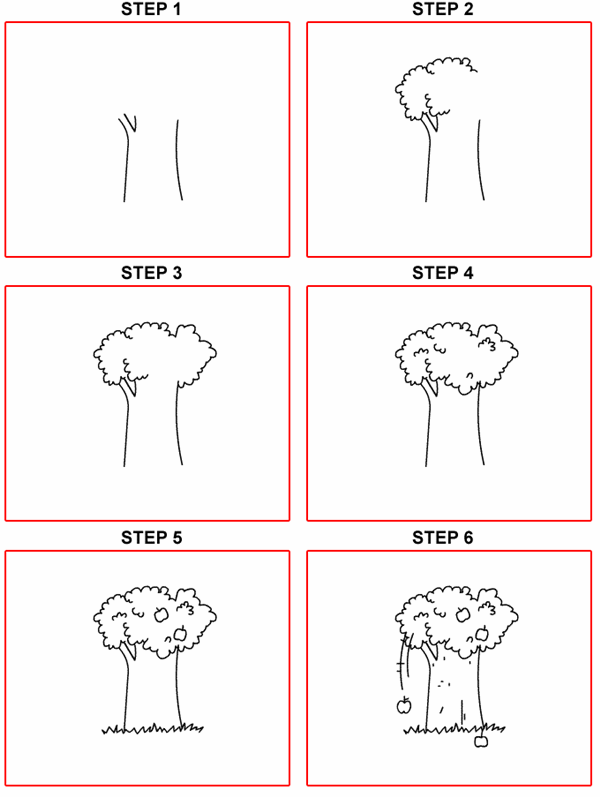
Take the right pencil to start drawing the leaves and ensure that you draw them using a jerky and uneven movement to ensure that they have a natural look.
Each branch that you will draw will have a cloud shape and leaves shaping them. Ensure that you shade the leaves right while you draw them.
When you have decided which side should be shadowed, press the pencil to make it darker. Create a medium dark border between the light and the shadow to create the right effect.
Use the pencil you used for leaves (2B) and add some random leaves here and there to simulate the barer branches that have lesser leaves.
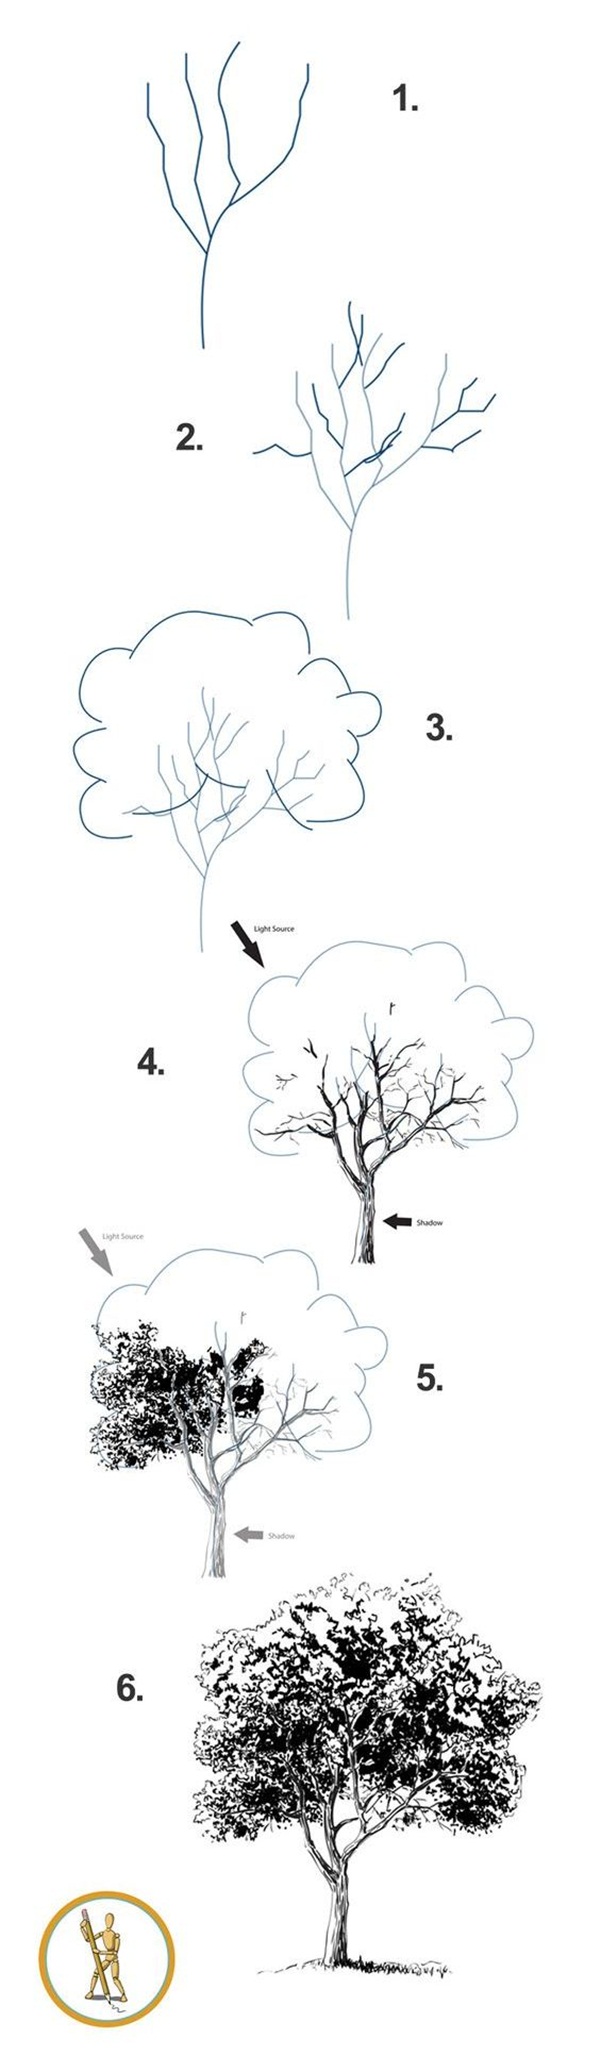
Now take the softest pencil that you have and add to the deepest shadows some dark accents. This will act as a contrast to the crown of the tree. You have to ensure that the leaves do not end up with a transparent look.
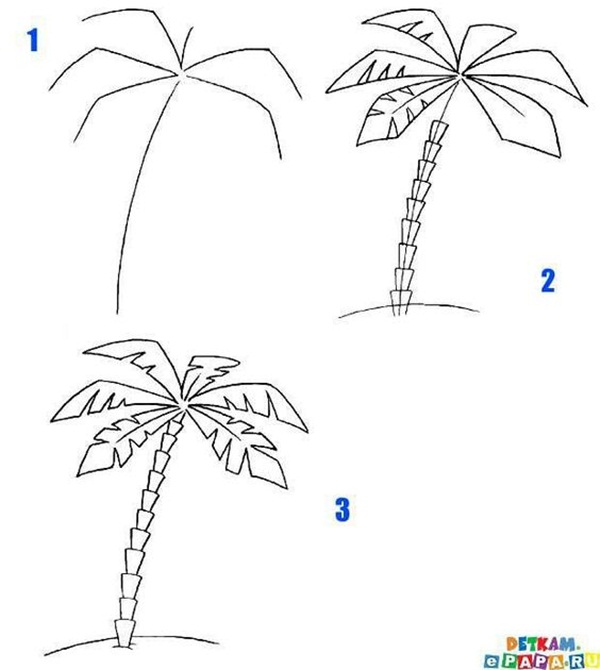
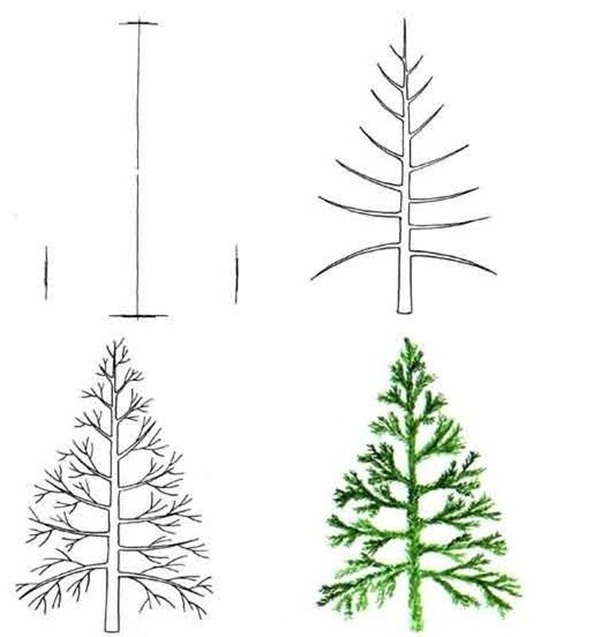
Whatever we have said is for the trees that have a particular structure like the oak tree.
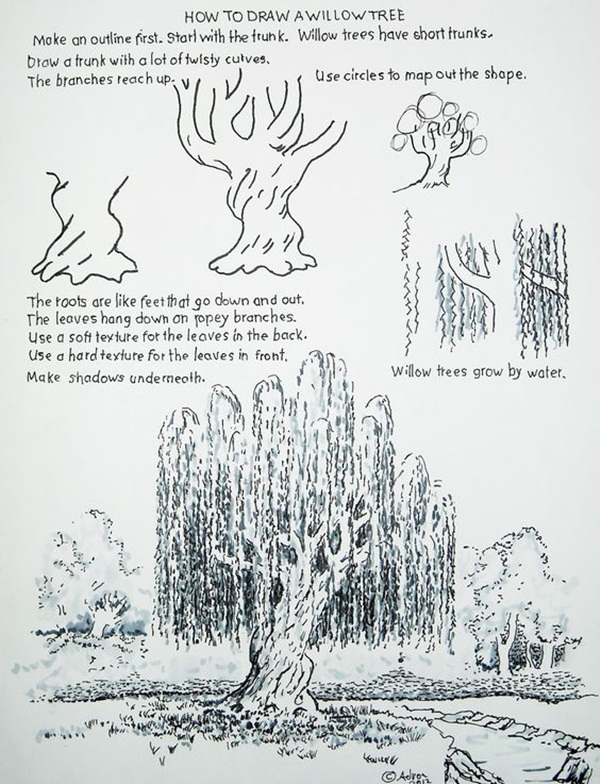

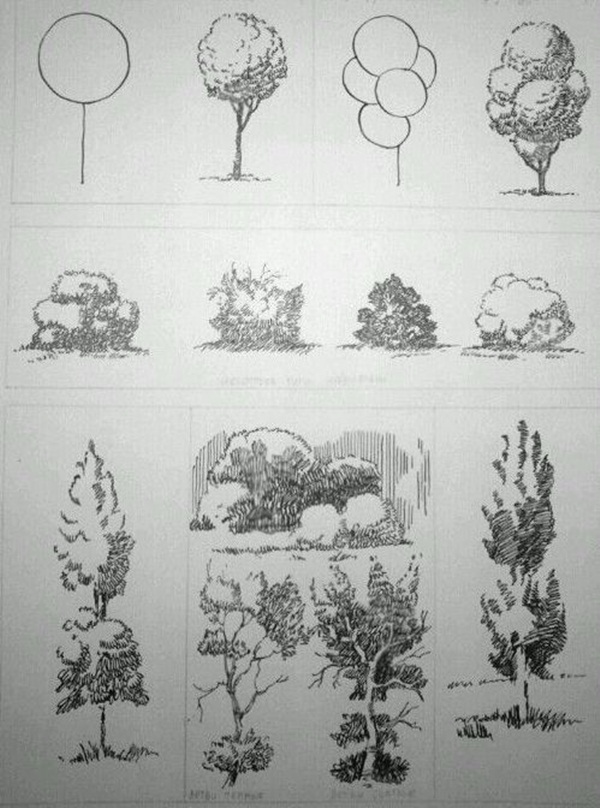
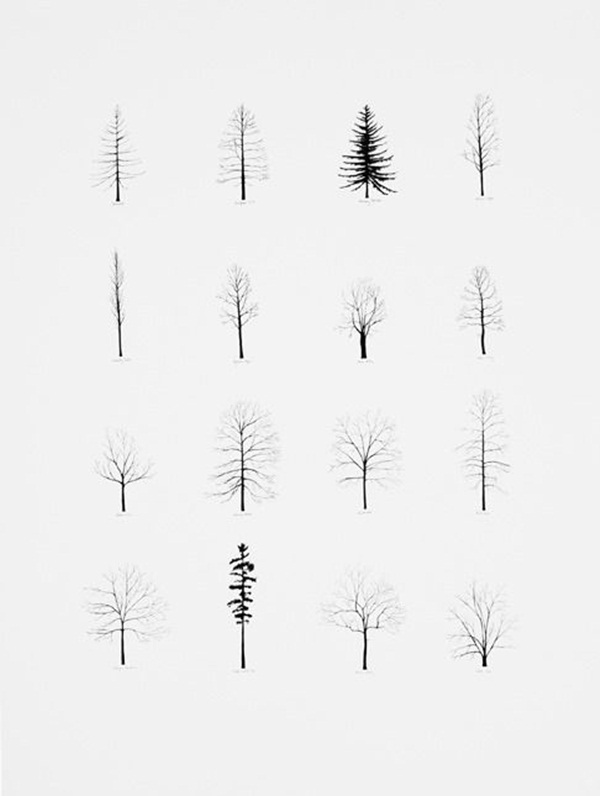

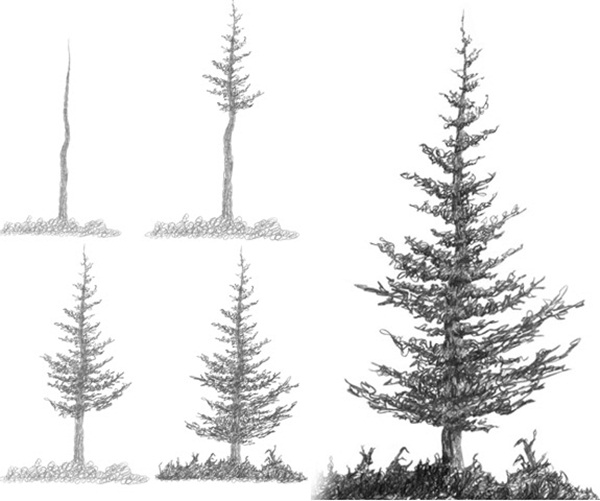
To draw other trees like the pine tree, which is shaped differently, you will have to spend some time on first observing the bigger details, the smaller details and then the miniscule details before drawing them. The drawing techniques will differ depending on how dense, dark or light the tree is.
Reply