- 295.6Kshares
- Facebook63
- Twitter3
- Pinterest295.5K
- StumbleUpon0
- Tumblr
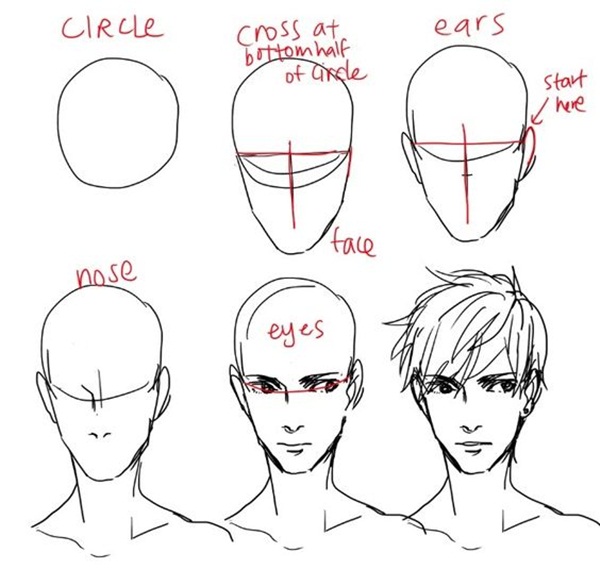
If you are learning to draw and that too each aspect of human beings and their various body parts or for that matter anything else, you will find that it has to do with details and techniques. And each part that you draw will need you to focus first on the whole picture and outline before you move on to the finer details. In this article, we will look at the steps involved in drawing hair. They say hair is the crowning glory of a person and getting this right would ensure that you have done justice to the subject you are drawing. If you want to keep things interesting during the learning process, you can actually also look at awesome hair drawings for fashion and art too to see how many facets there are. Let’s learn how to draw hair step by step image guides . You not only need to concentrate on the details but also work at adding depth to the drawing.

How To Draw Hair Step By Step Image Guides
Take for instance, realistic water drops drawings and tutorials where the emphasis is not only detail but also depth and this applies to almost anything you draw. Only when you learn all the details will you be able to do the kind of compelling and creative charcoal drawings to capture your eye. In this article, we will take you through the steps for drawing hair and that too in a realistic and detailed manner:
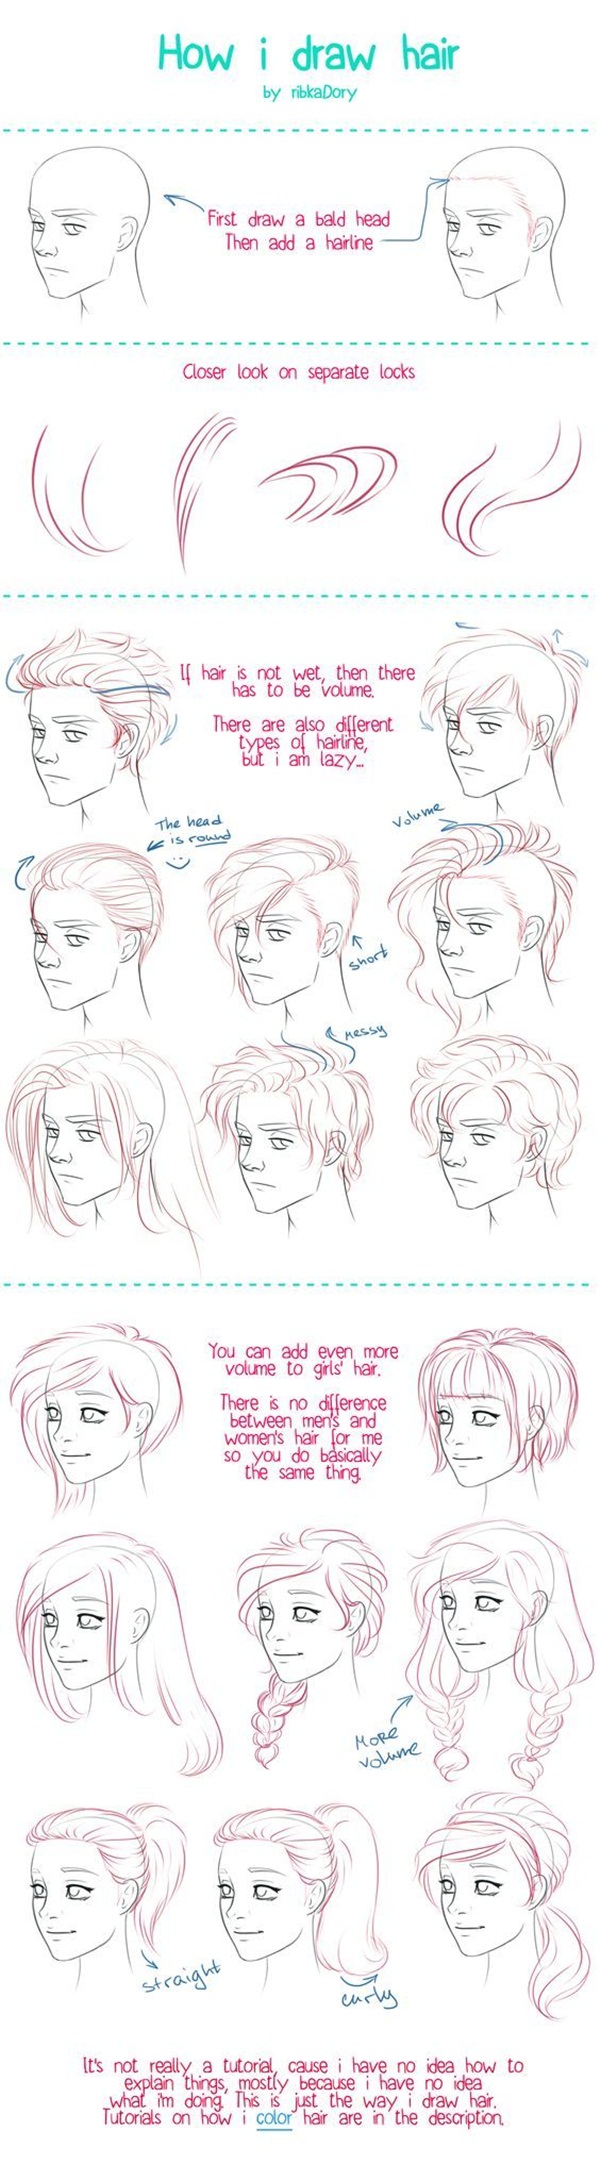
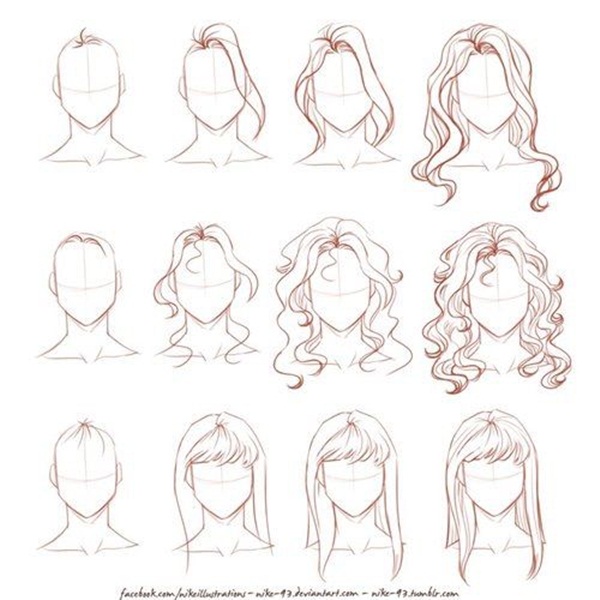
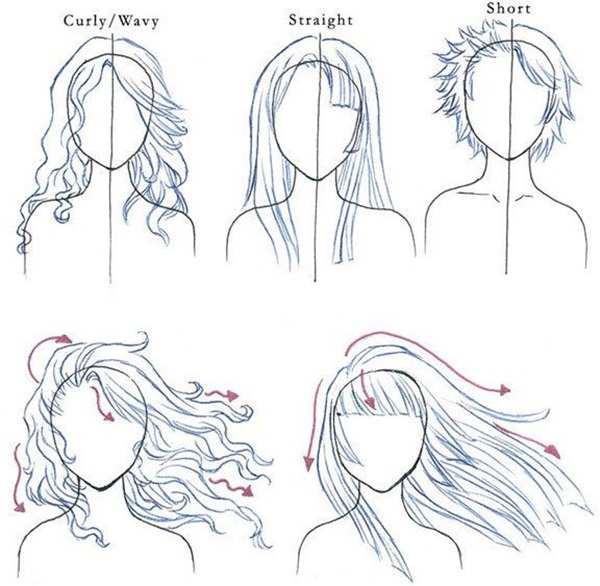
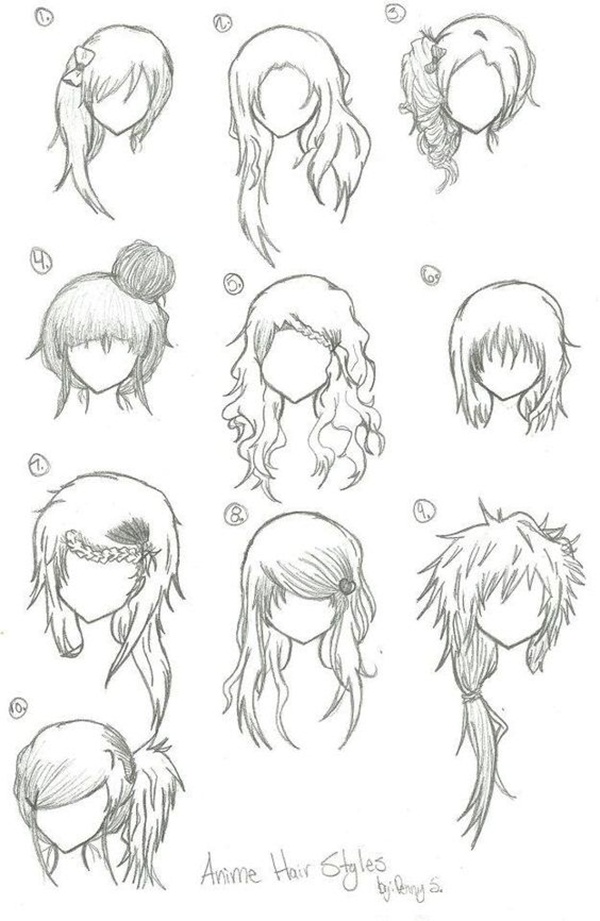
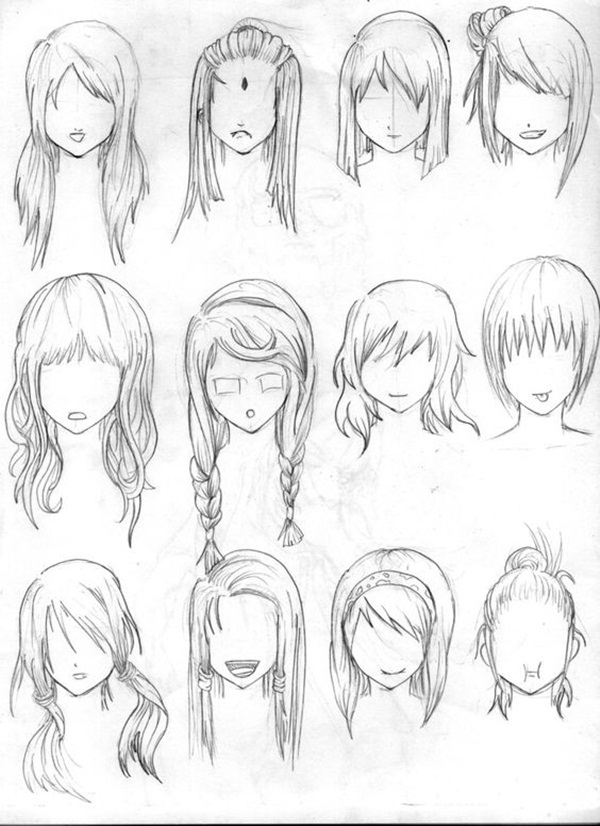
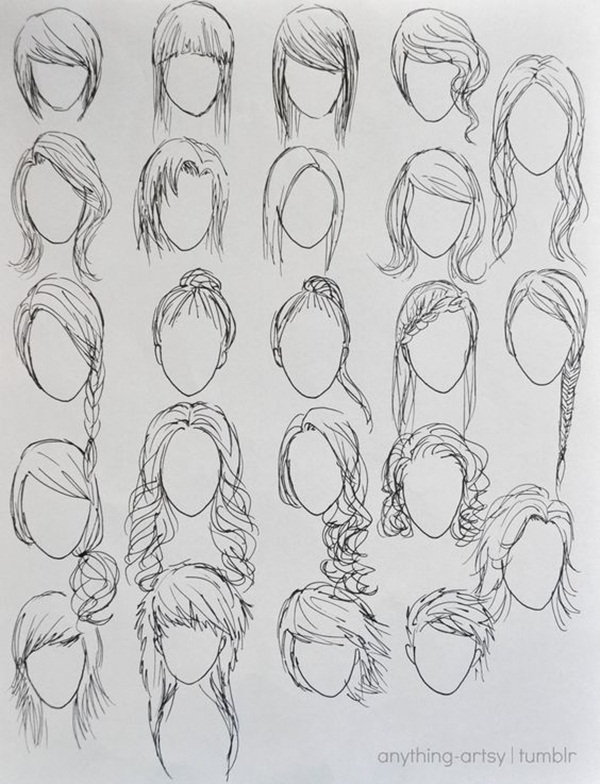
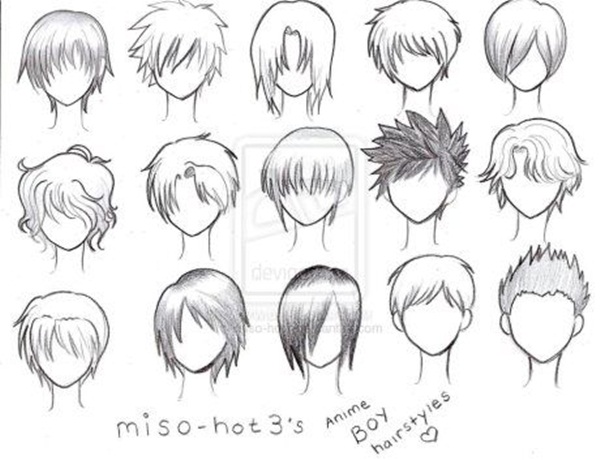
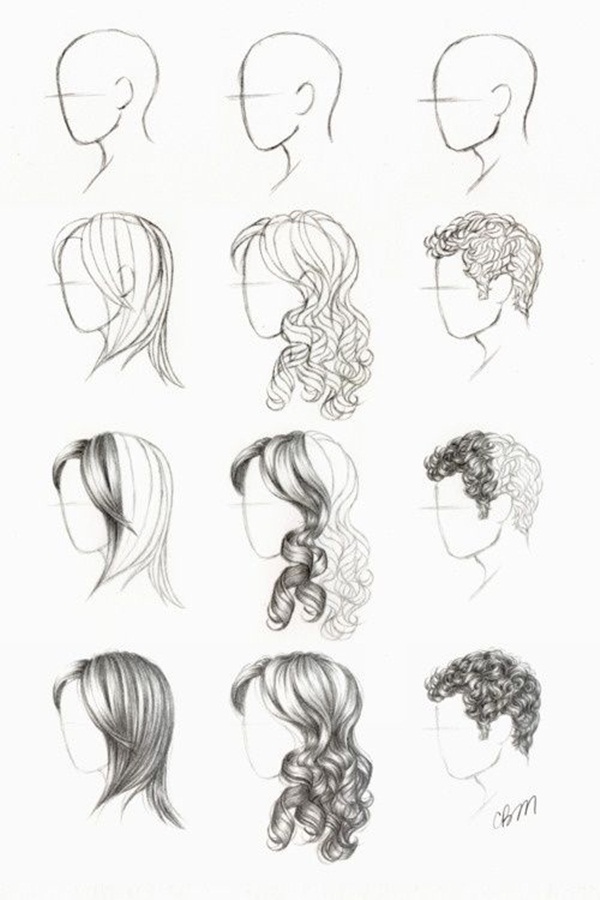
The first thing you have to realize about hair is that it comes in many forms like straight, curly and wavy to give you just the basic classifications. Then there is the intensity and flow that hair tends to have which can be different for not only men, women and animals but also vary depending on the age and the styles that they can take on.
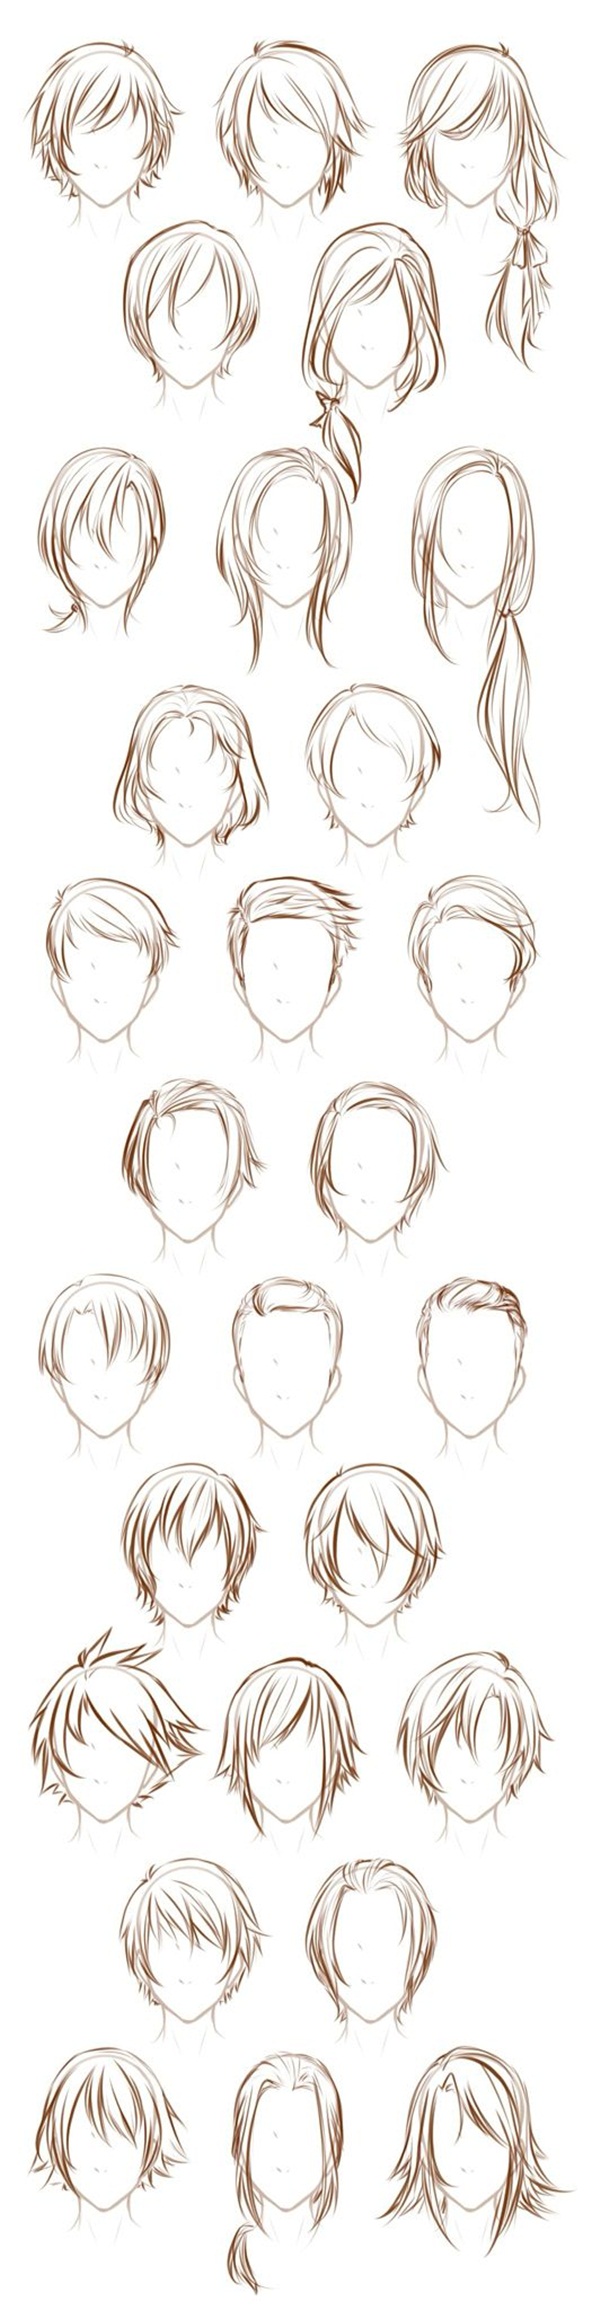
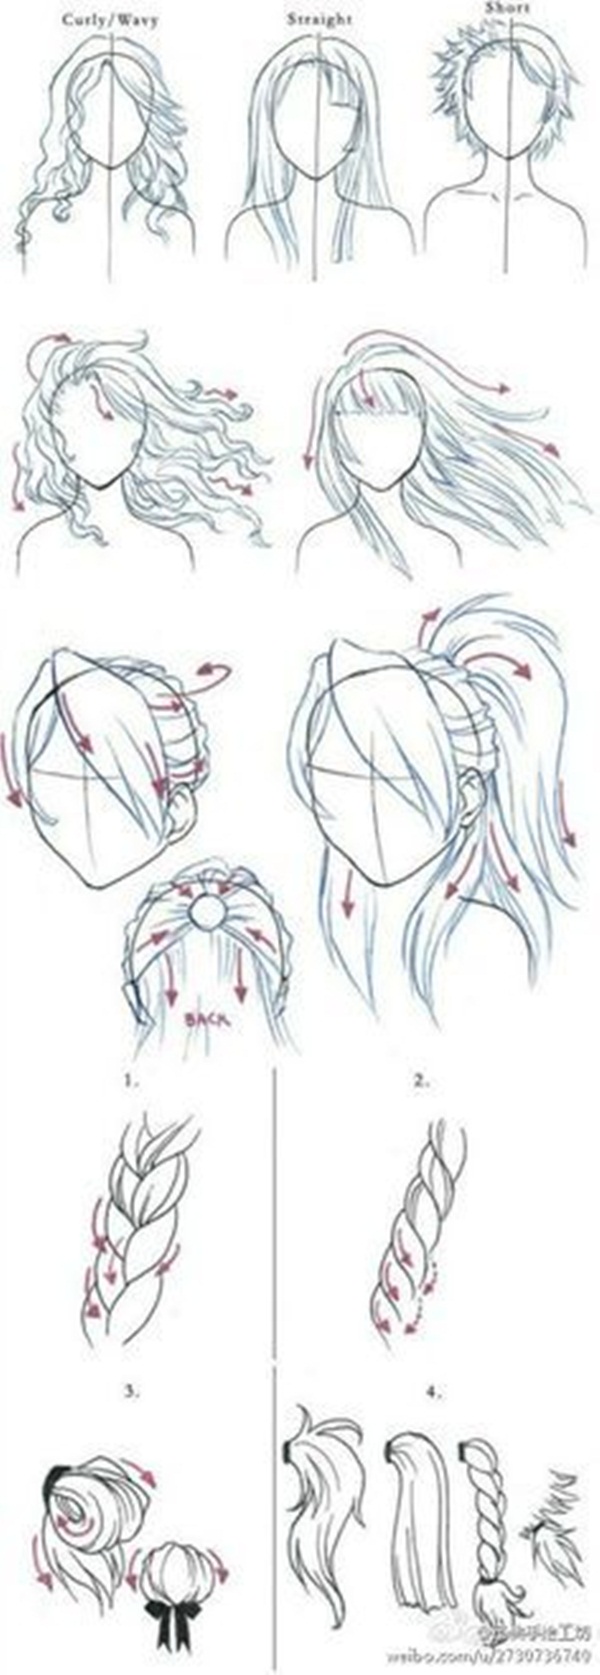
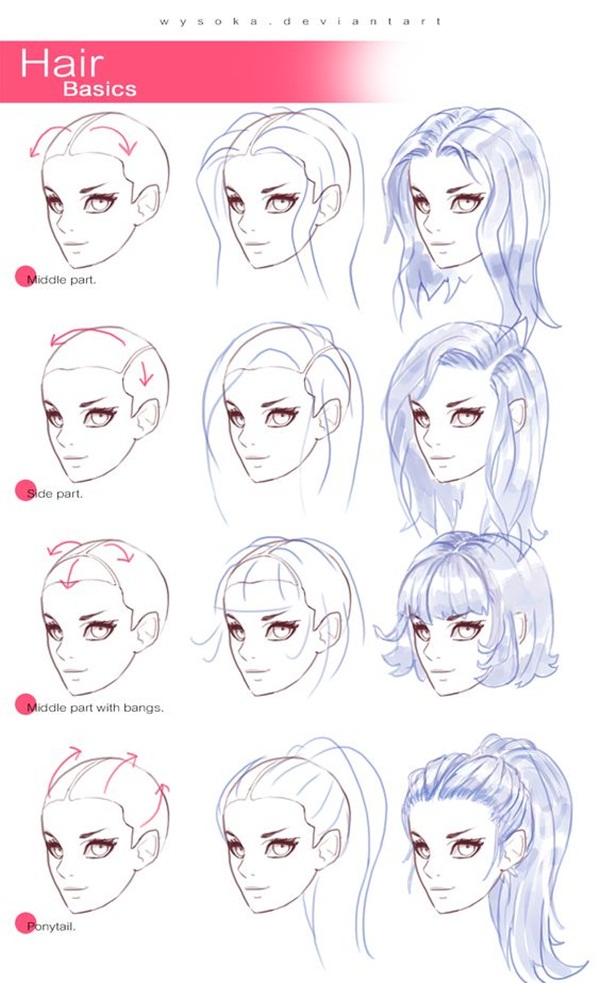
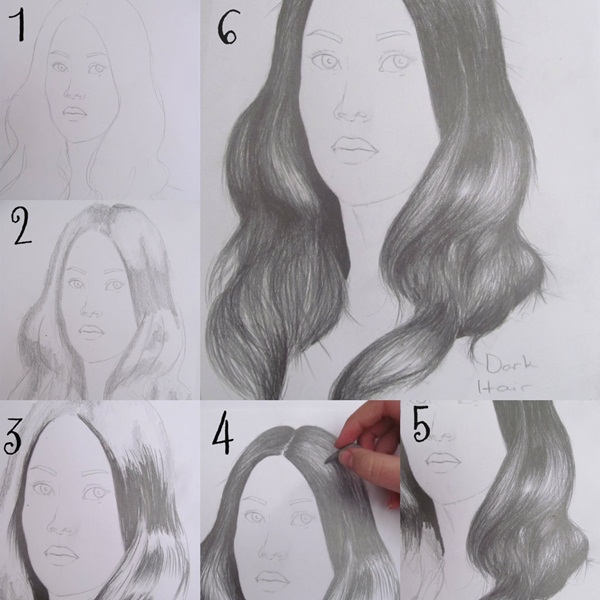
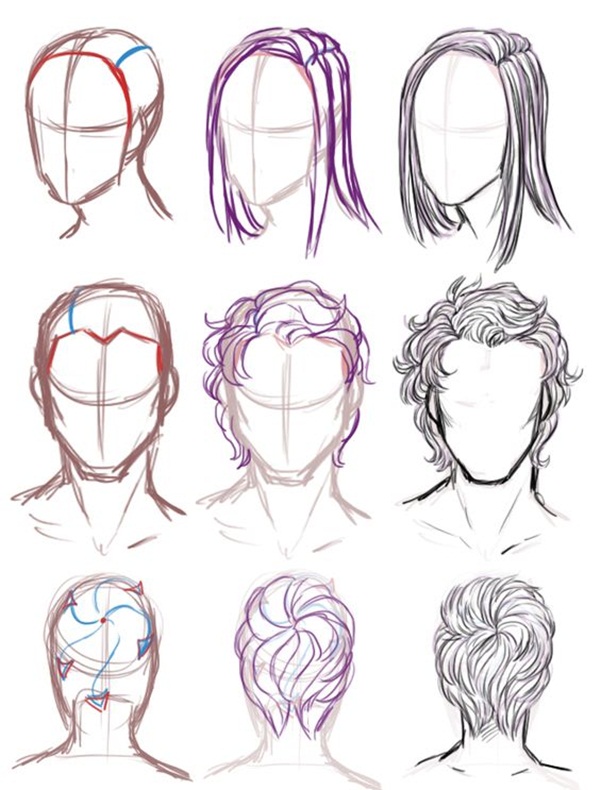
But there are some basics to master that will enable you to draw hair before you master the different types of hair. The first step to draw hair would be to go with the flow, which is from the top to down or outwards, depending on the length of the hair. Getting the flow wrong when you are drawing it would make it look awkward.


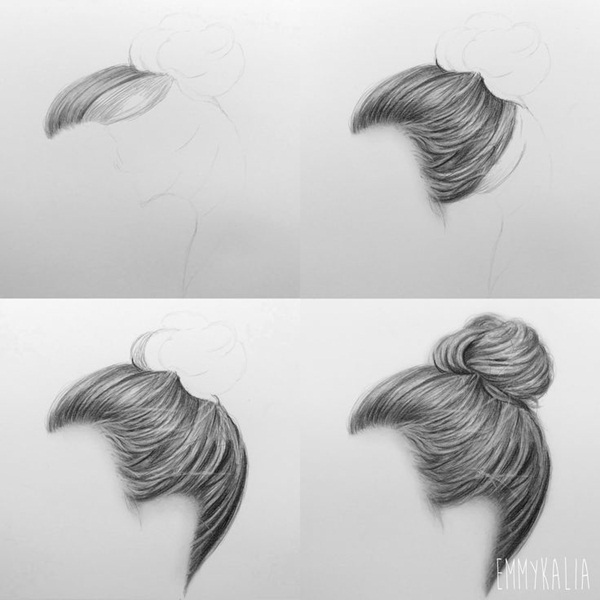
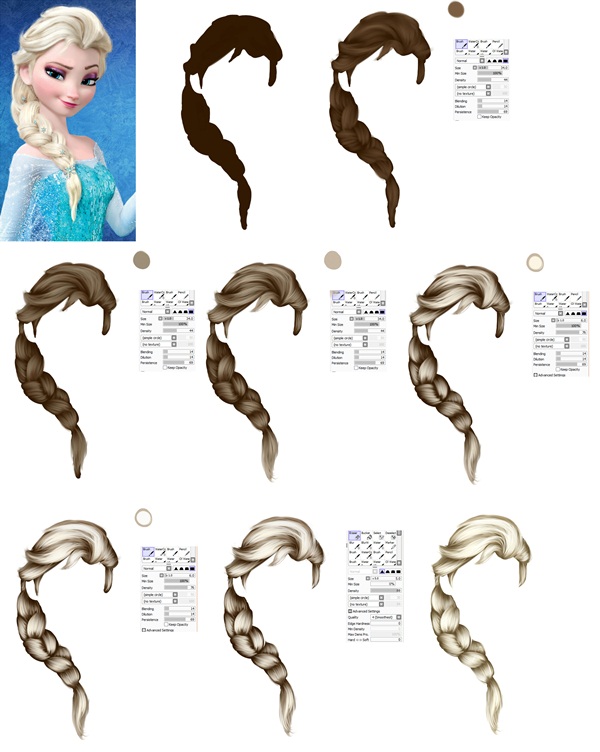
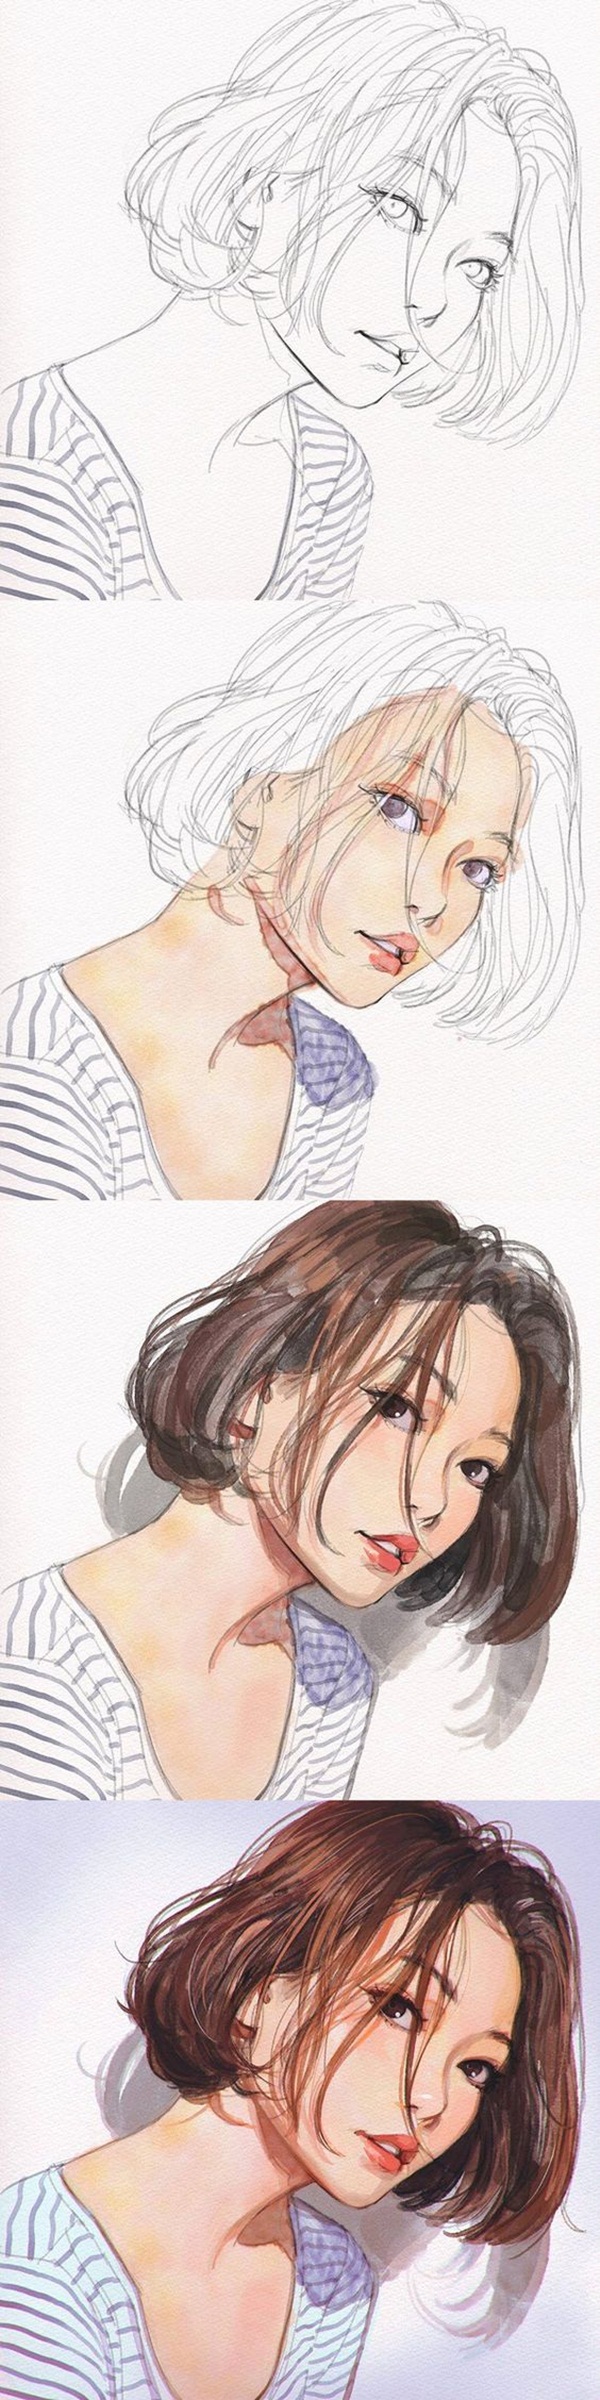
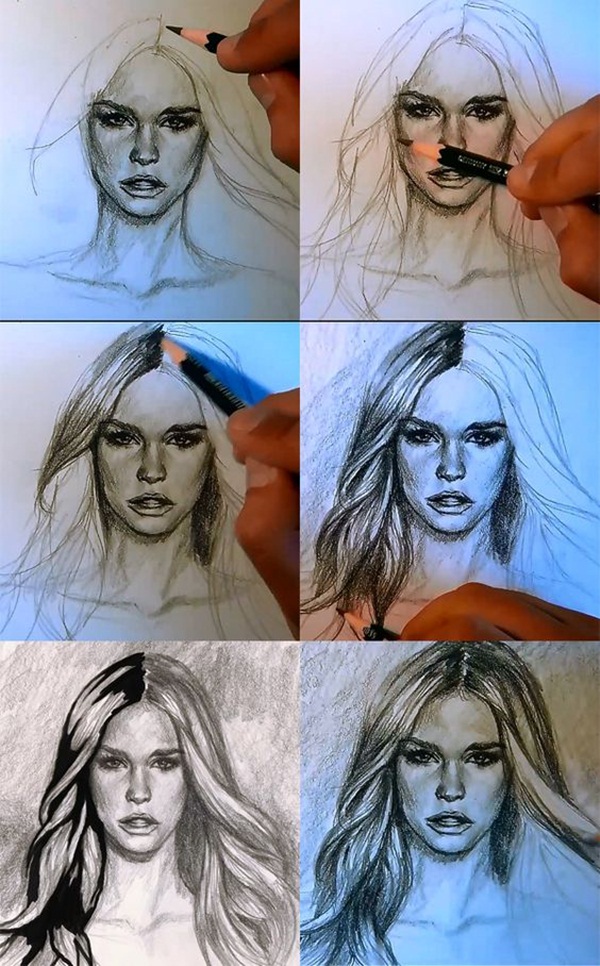
Then start by drawing from dark to light as the pencil will naturally be thicker and darker with more emphasis when you start drawing. The flow goes from the darker area to the lighter areas as the emphasis of the pencil would move that way. Another factor to remember is to go from hard strokes while drawing to softer strokes to get the flow going right. Which means that you start with hard emphasis and then end it with a softer stroke. This way you can make the hair appear to fall right in a wave or curl or perfectly straight in the way hair is wont to do.

Another step that you should try is to draw hair by keeping the arm still on the surface and go with a fortyfive degree motion to enable drawing hair in a natural manner. Do this not in a stiff and staid way but with a freedom of movement to the hand.
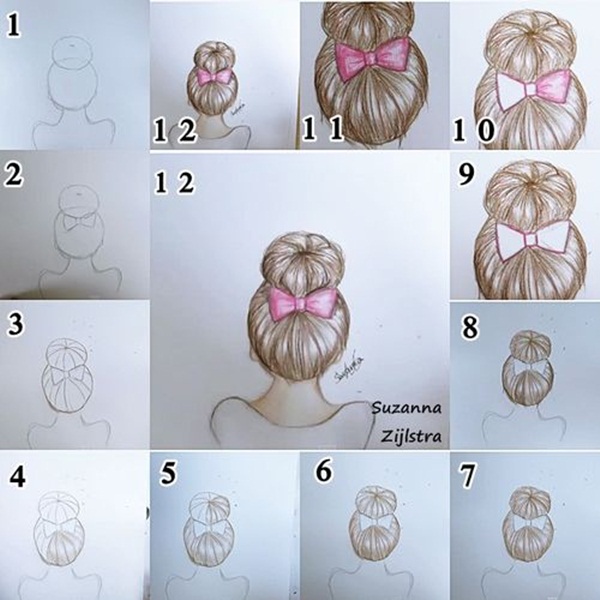
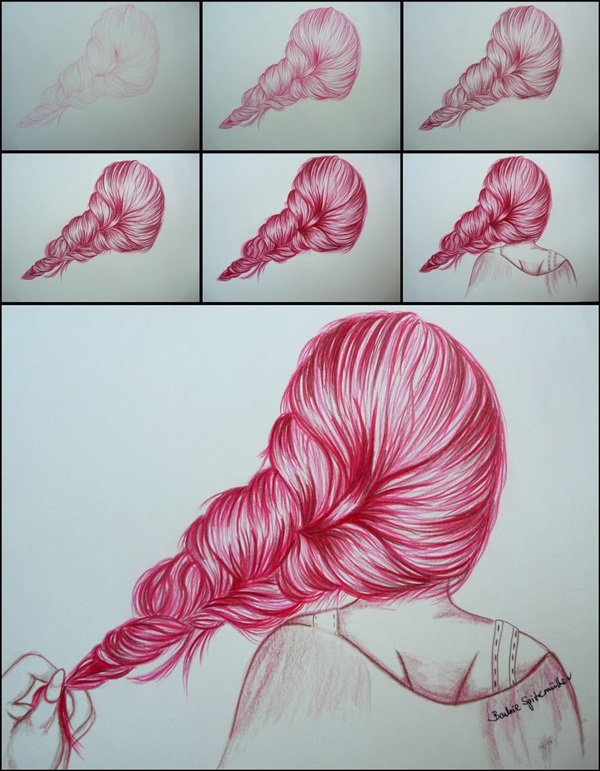
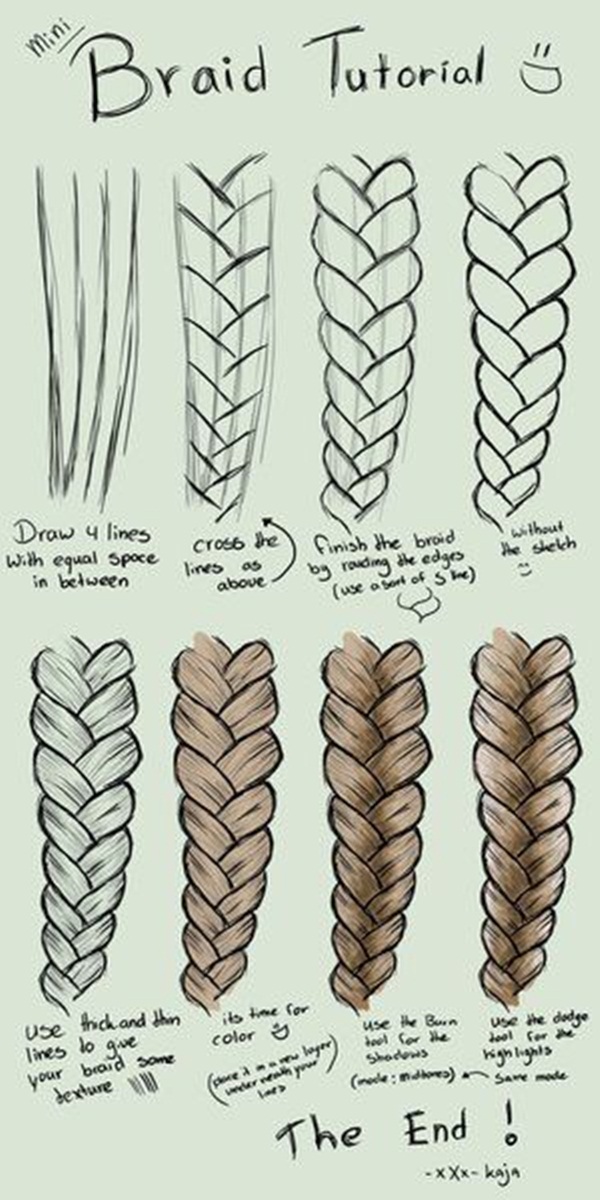
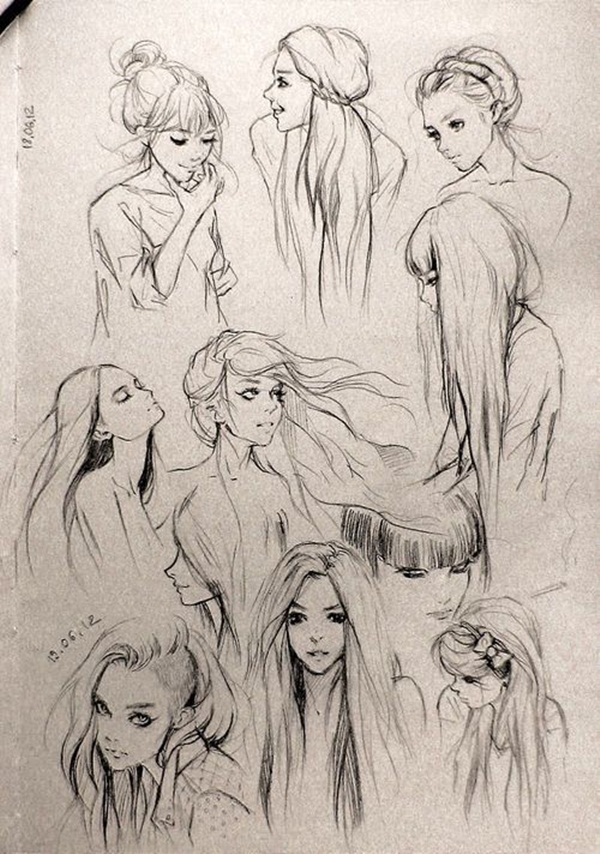
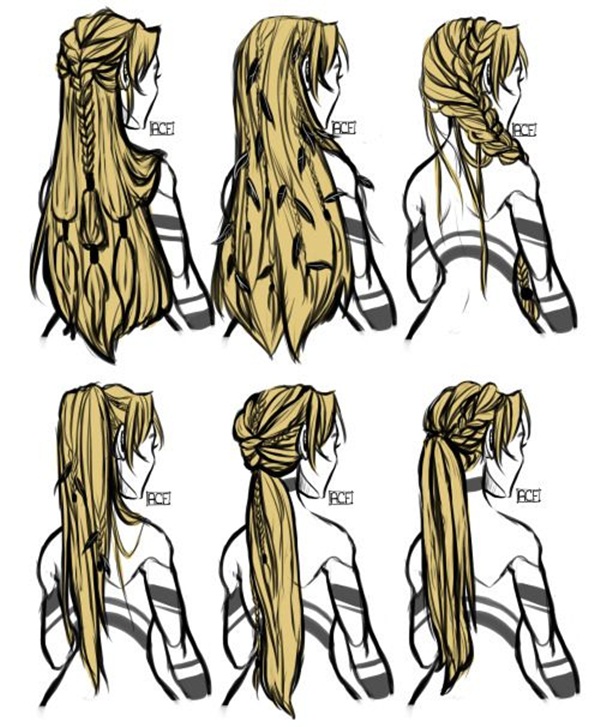
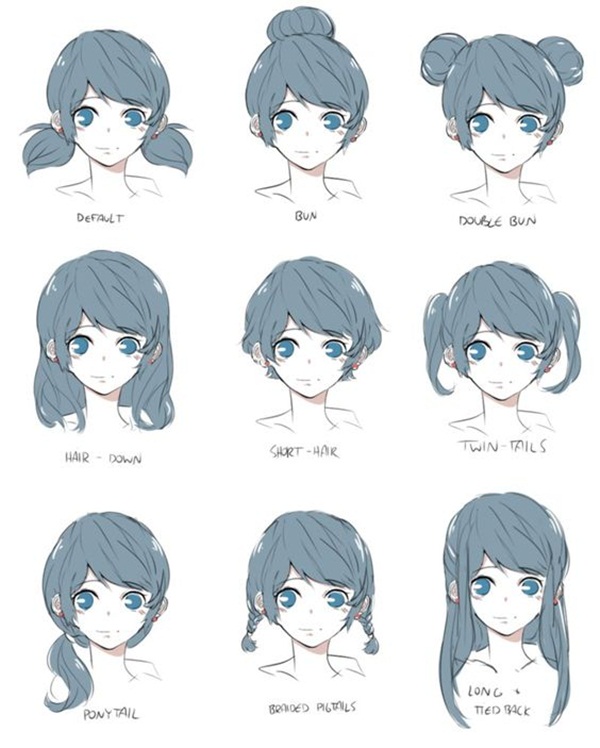
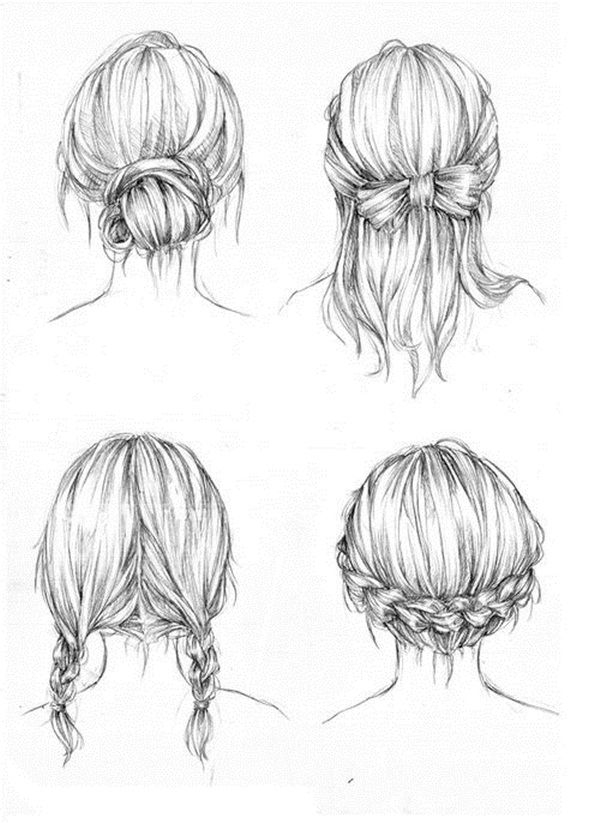
Of course, it goes without saying that the drawing technique that we have given above is applicable to hair that is loose and open or with minimum styling. When you draw hair that is combed back into different styles like a bun or a knot or a ponytail, you have to follow these techniques to ensure that the textural look of the hair is unchanged but while ensuring that the hairdo is captured faithfully.
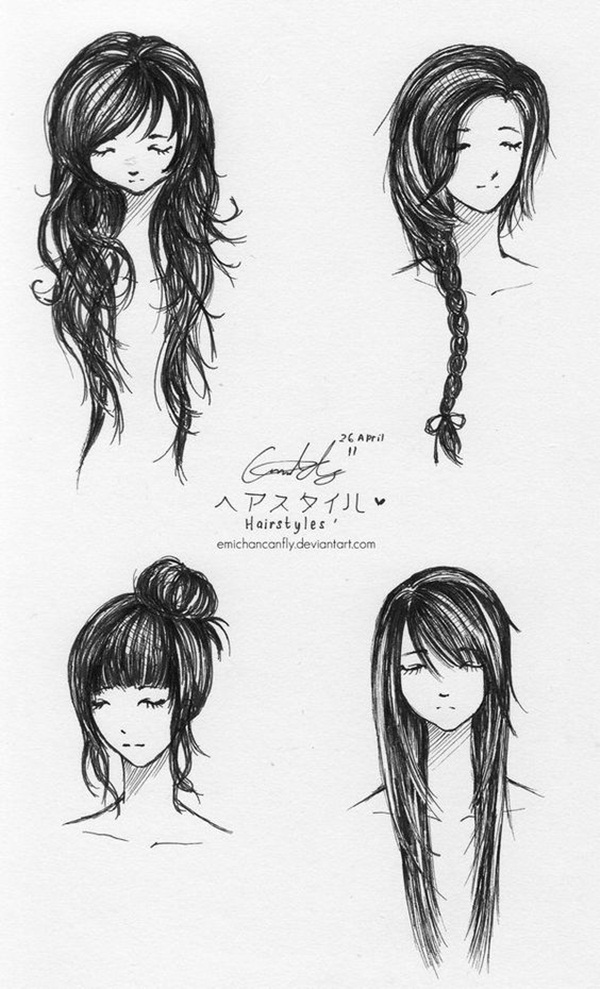

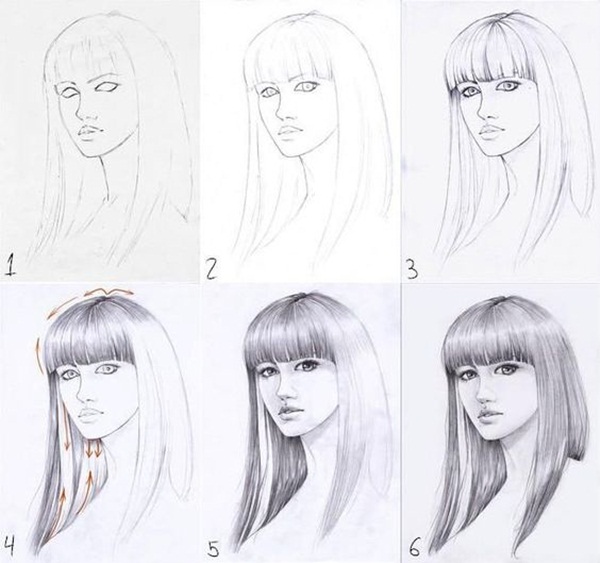

To put it simply, we would say that go with the flow of the hair till it is possible to do so and then move onto shaping the hair do and thereon to adding the details of soft, hard, dark and light. If you don’t do this, the hair can take on a stiff wig like appearance that you want to avoid.
Reply